

Truly…my head is spinning! Already I can see that really…I ought to write in this space every single day if I’m to keep on top of sharing all I’d like to…because…wowsers…on any given day of the week I might begin this post with a completely different train of thought! I reckon you might come to realise, my life (or at least my brain) is really quite unhinged! I know I post a lot of pretty pics and it probably all looks wonderfully calm from out there…but underneath…I’m the proverbial duck (or swan, or whatever it is!) paddling for dear life! Each and every day this week I’ve had such a list to convey…if only I had the luxury to sit…and write. But if I don’t do the doing, I’ll have absolutely nothing to write about! So…
As the kitchen gardeners had a good run last week…I’m going to work backwards…and give non-kitchen gardeners first dibs this time around! But don’t worry…there is plenty of kitchen (and some notes on ornamental) gardening coming further down the page.
A word of housekeeping though before I get too far…towards the end of last week’s post a message popped up telling me my post was too long and might not display properly via email. Humph…I suspect this will be due to including too many images…but I’m not going to stop including them…because I want you to visualise as much as possible what I’m describing. So please…just click through to read on the app if you’re seeing all those annoying little question marks on the email version in your inbox instead of an actual image…then you can see the post as I intended! Here…I’ll insert one of the ‘buttons’ they’re so keen on…to make it easy for you!
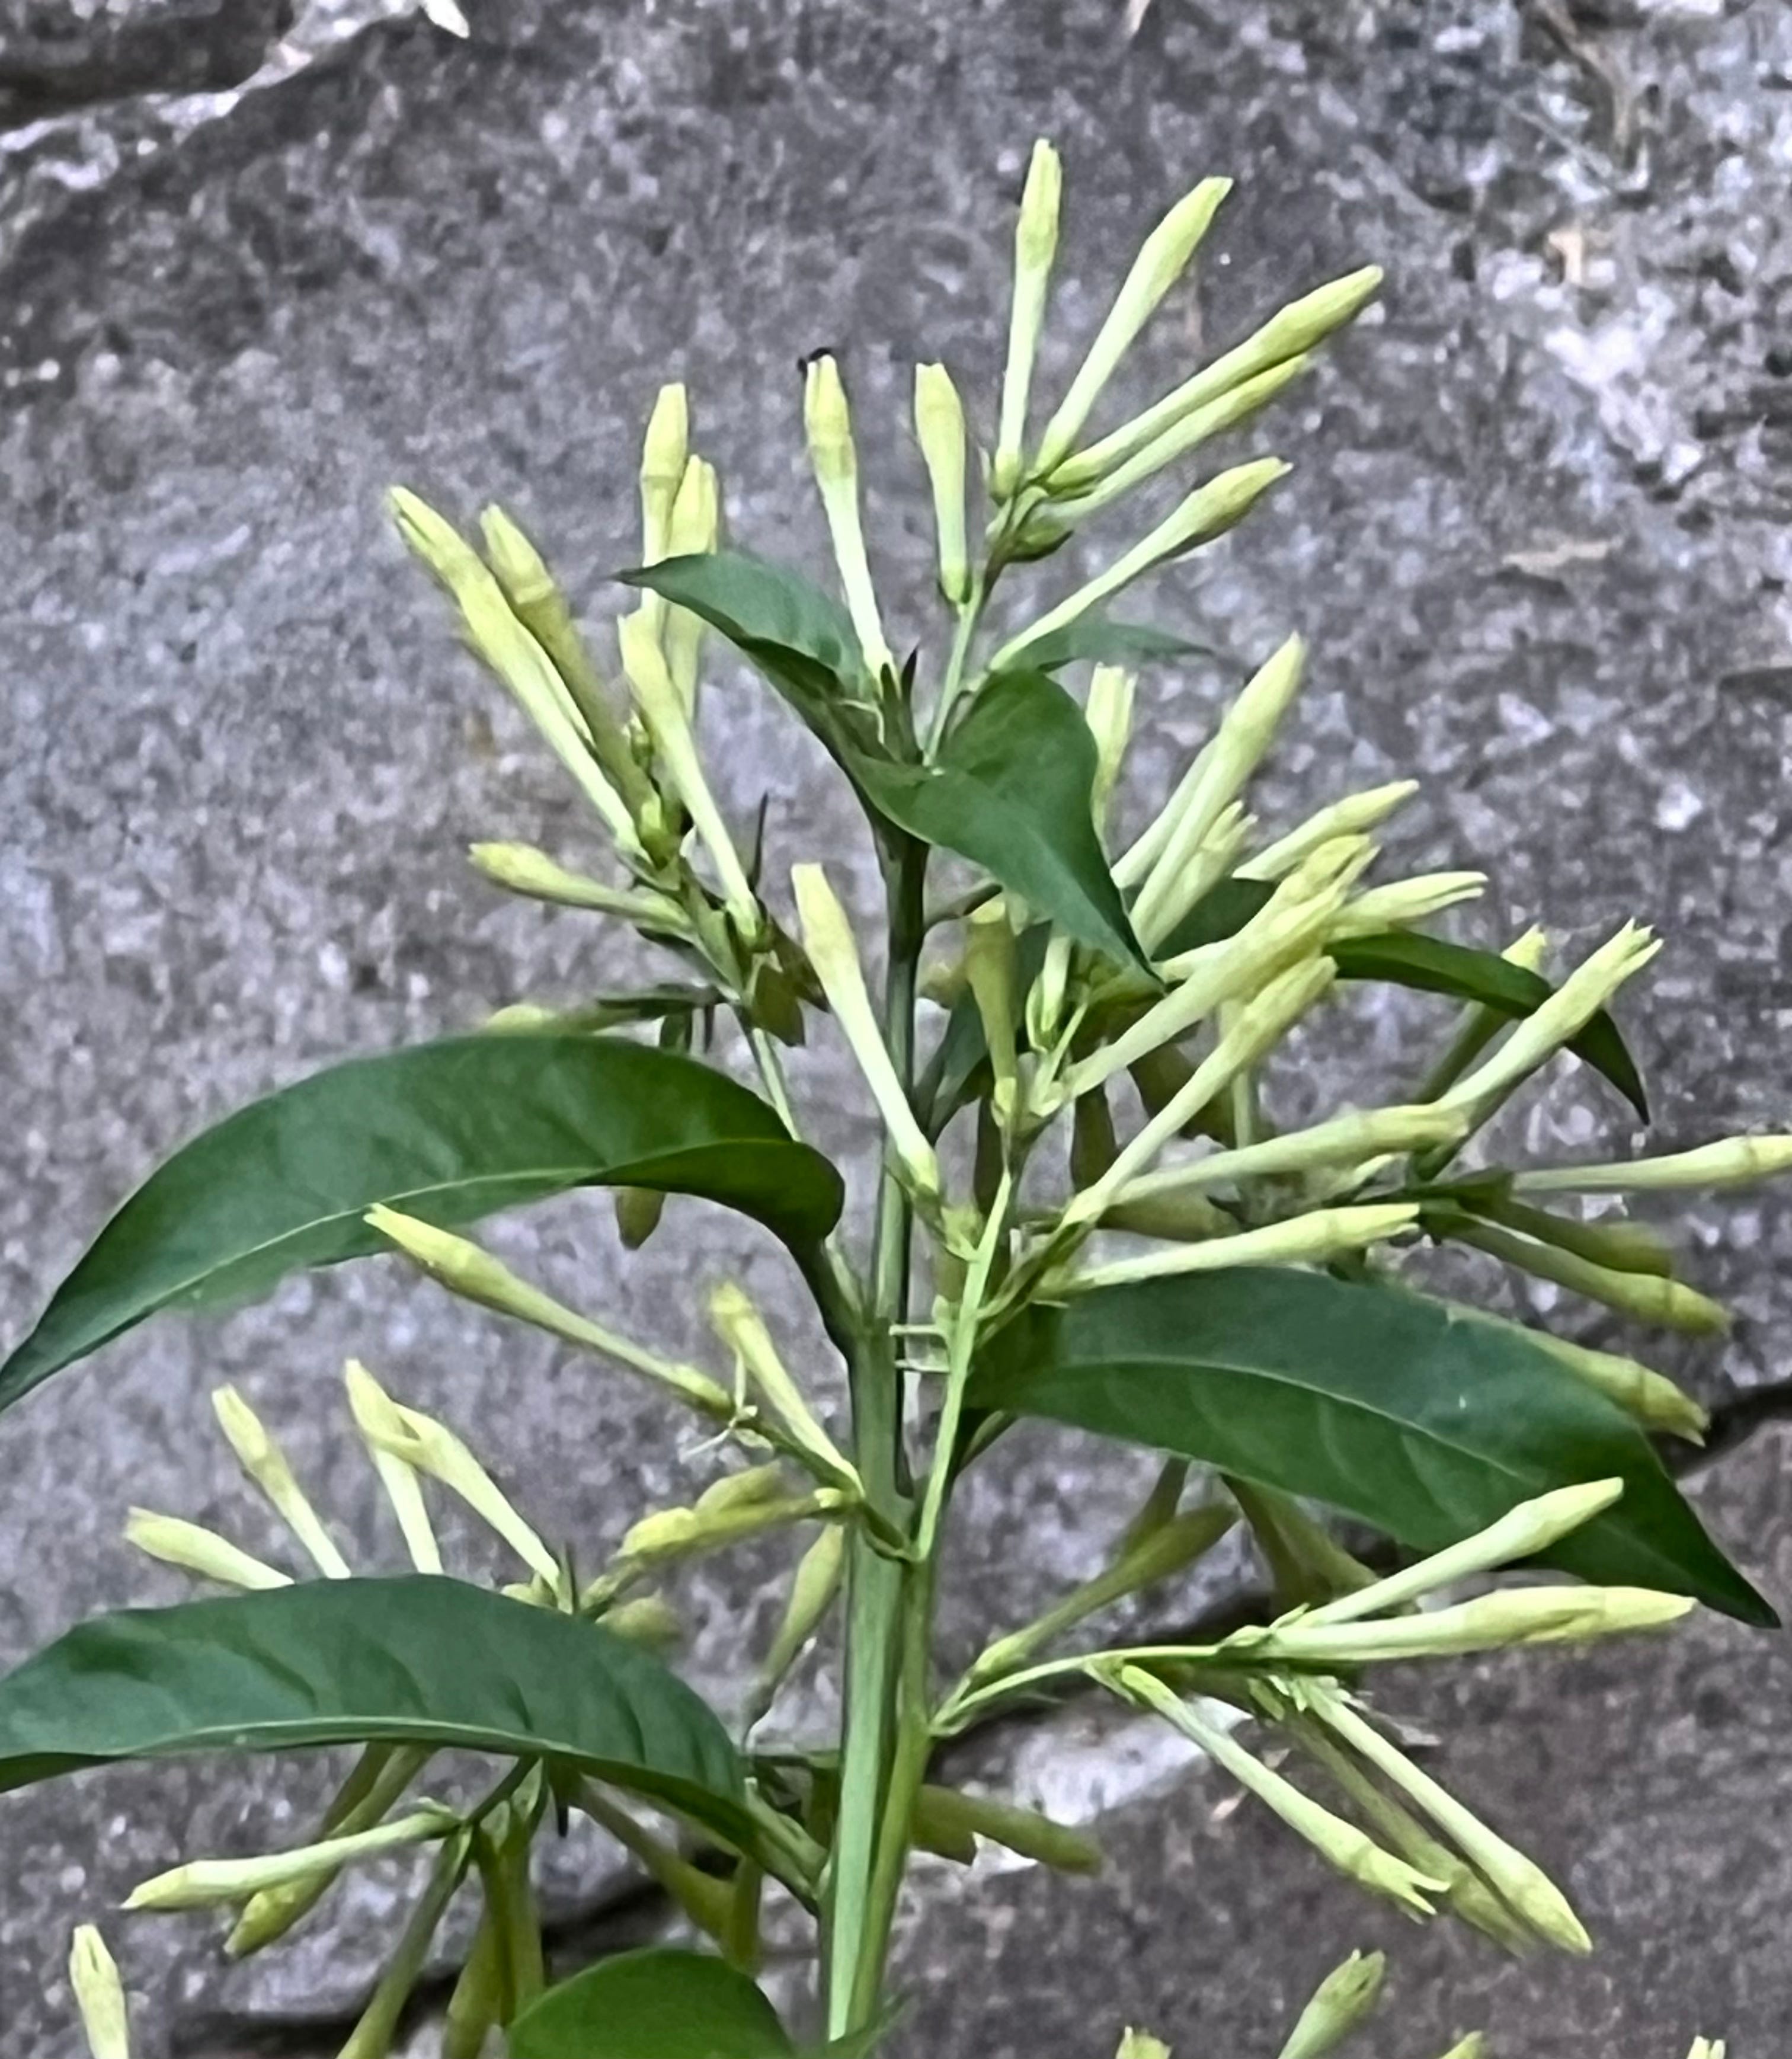
A seasonal scent that I omitted to mention last week was one of the most intoxicating of all. How could I have left it out? Well…quite easily in fact, because I was tip-tapping away here during daylight hours, when that overwhelming perfume could not have been further from my mind. But come the dark of night, through an open window, the deeply sensuous aroma of night-scented Jessamine arrives in waves…great dense waves, forging (I almost feel like saying invading!) its way through open windows, enveloping every nostril in its wake. All from panicles of insignificant, cream, tubular flowers on a very boring…almost weedy looking shrub. It has no form or shape…it isn’t even a blob! During the day you might wonder why on earth have such a plant in the garden at all…but…believe me…what it lacks in visual significance is made up one-hundred-fold by the power of its glorious night perfume! Perhaps it presents as a more attractive specimen in tropical climes? All I know is that…I would hate to be without it and it’s quite neatly obscured here, tucked in close to the kitchen verandah, ensuring it inveigles its way into our every evening at this time of year…and every evening, it comes as a delightful surprise.
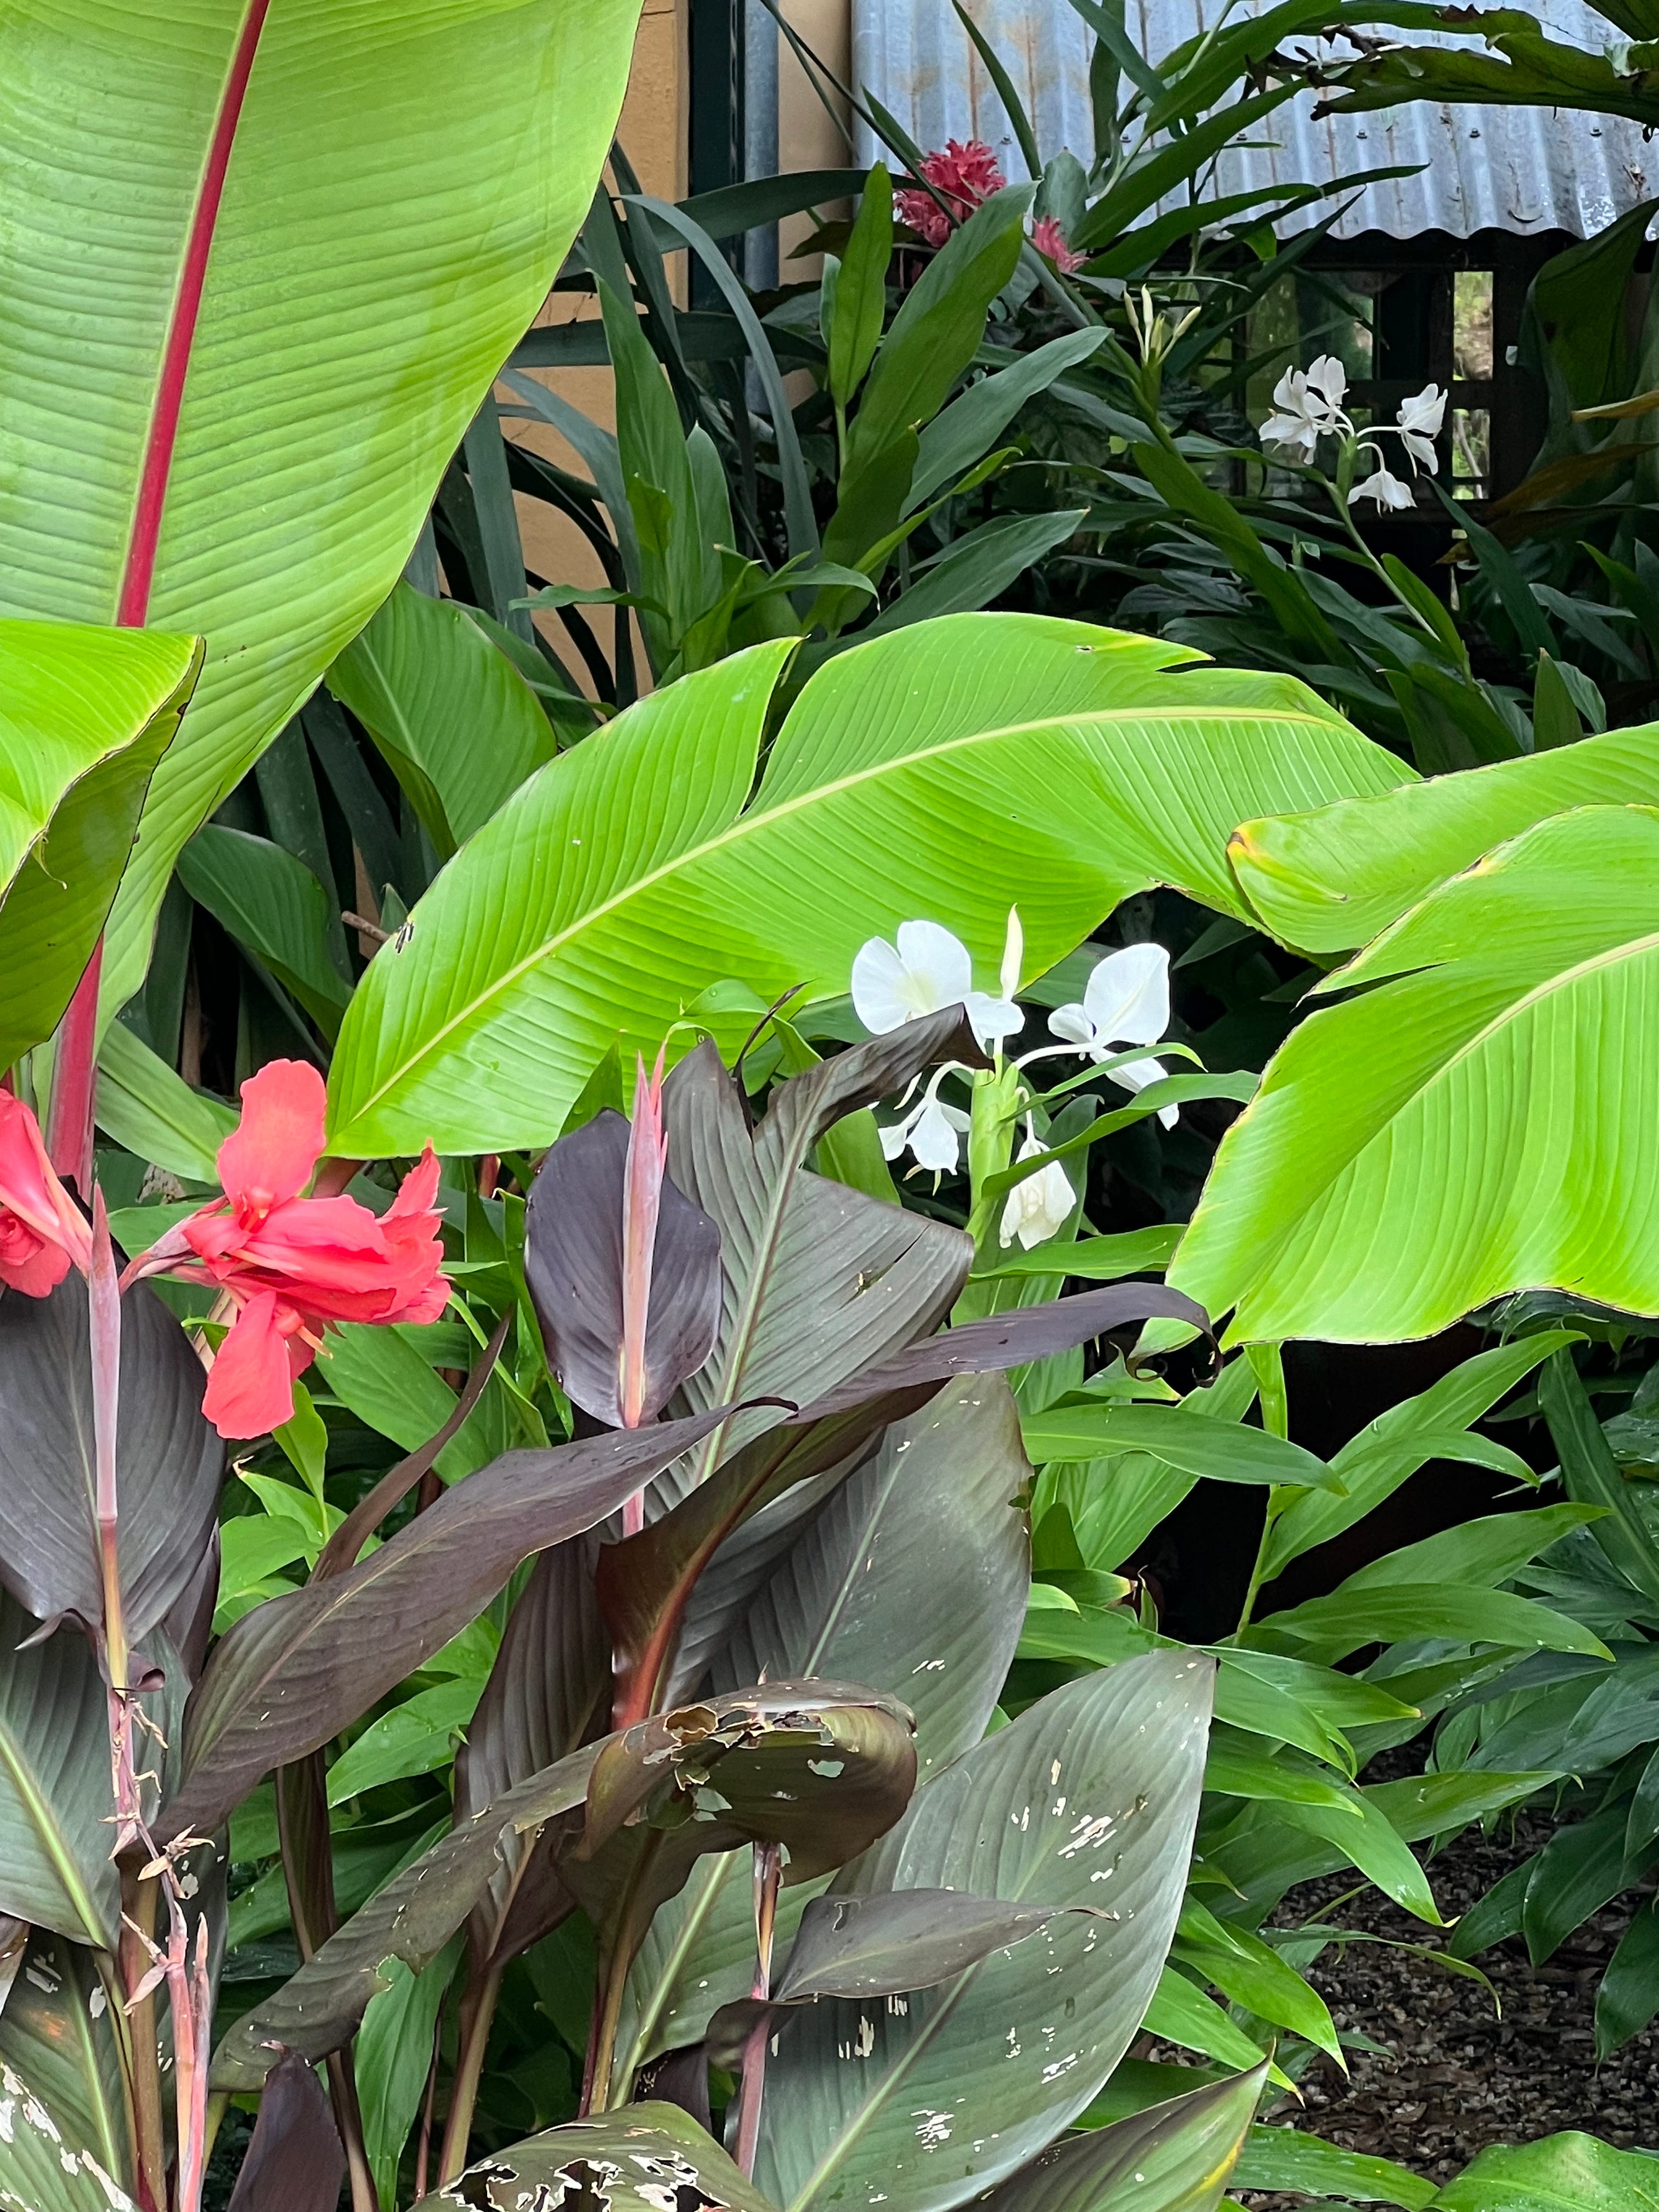
All the other scents I mentioned last week are still going strong…the white flowering ginger (above) in its protected environment under the canopy of willow (to prevent these tropicals from the midday sun) ‘between the wings’ and where, through open windows, their delicate scent seeps in, to both our bedroom and the gallery.
The Murraya is another I omitted but is casting its perfume all around. Forming a dense green hedge that divides the gardens around the house from The Borders below…I’ll save that image for another time. Of all the scents in the garden here, it’s perhaps my least favourite. I find its perfume overwhelming…and somehow flat…dead…it’s too dense and almost gives me a headache. But how I love the hedge itself…at the moment it’s all fluffy again after a mid-summer trim…so needs another session to get it back in order. Hedges…I’ll talk more about them down the track!
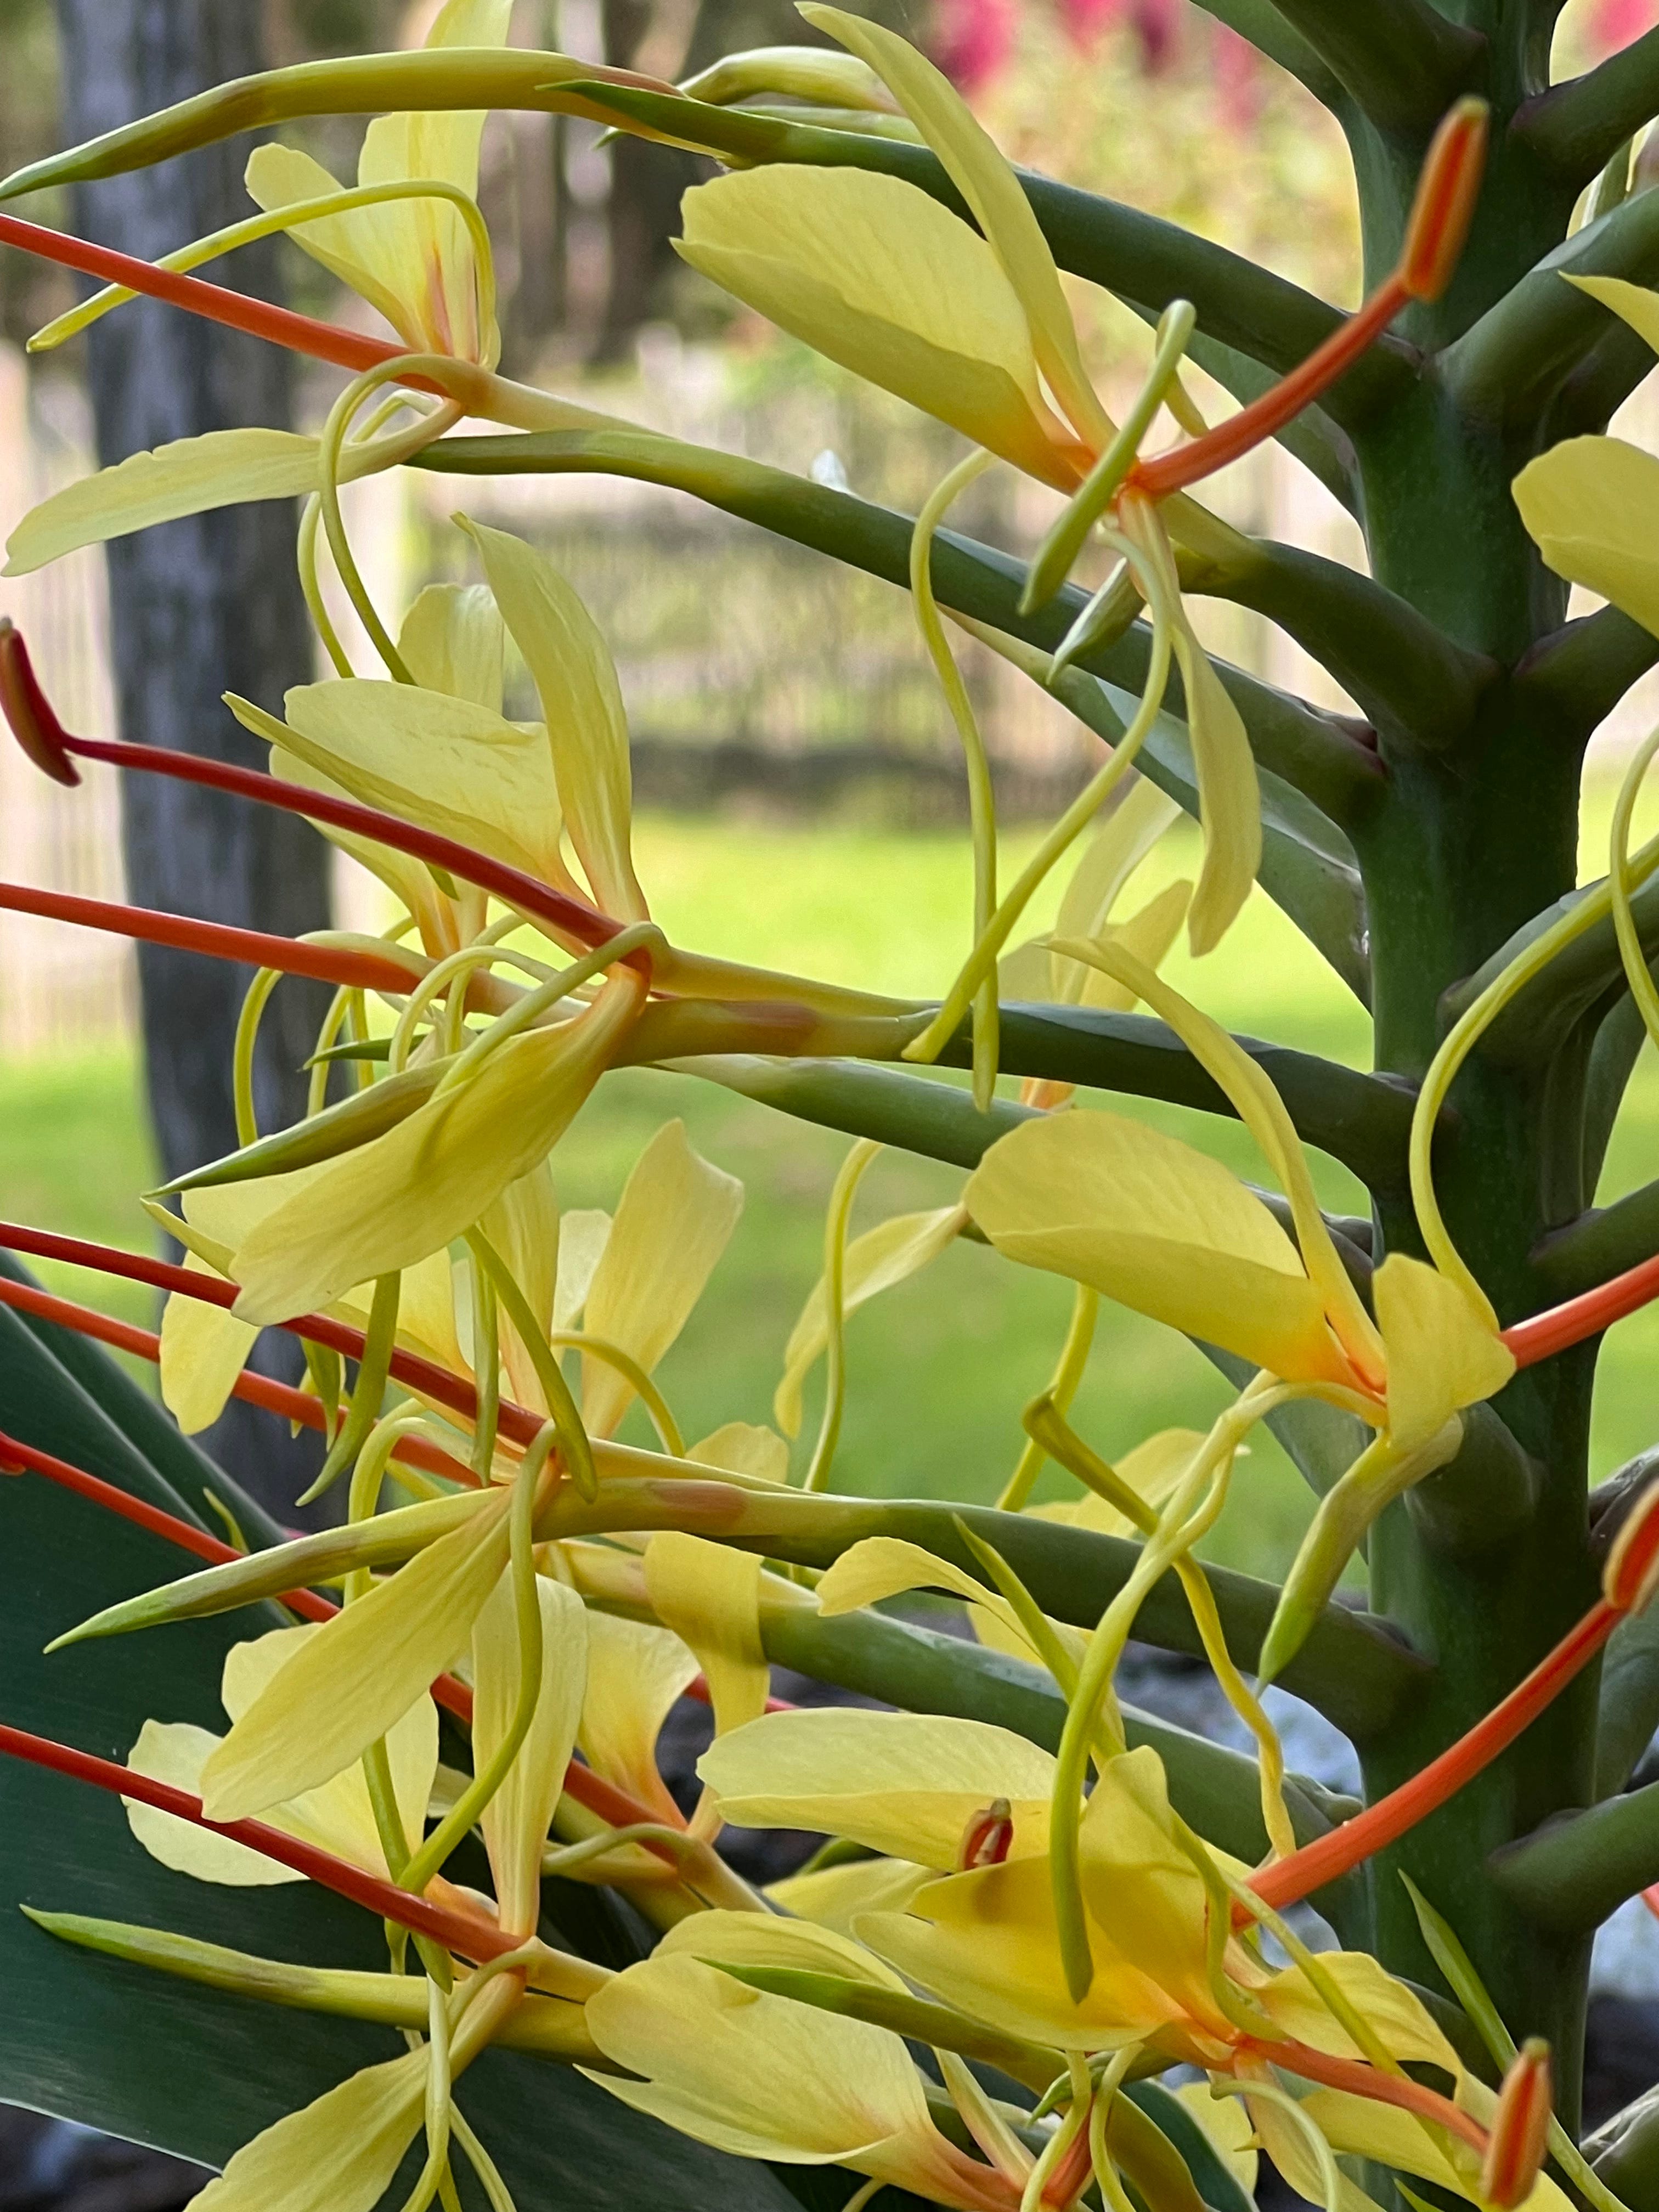
Just one more on perfume…and tropicals….because every single moment they are with us is to be treasured…they won’t linger much longer. They underpin the atmosphere of this season…the humid and muggy, dense days…the oft sleepless nights…but not for much longer. The atmosphere, bucolic as it is…is changing. Most of the spikes of the common yellow flowering ginger are spent. All the ones in Mrs R’s garden have been over for weeks, but some years ago, I popped one rhizome into a pot, where I keep it down the back. I so hate to cut and bring flowers into the house when the position they hold in the garden forms the view…the vignette I’ve made for them to fill my eye from inside. So in the garden they stay…and I sigh each time I behold them as I pass during the course of the day. They bring me such immense joy…even though many such vignettes are short-lived and I must wait a whole year for them to repeat. But then…I do believe the best things in life are ephemeral….fleeting. The aforementioned ginger in the pot down the back has very kindly sent up two sturdy flower spikes. And these…I will bring inside. One is a few days ahead of the second…so with any luck I’ll have the perfume of these beauties in the house all through the next week.
I know that in many places these gingers are considered to be weeds…especially down on the coast from here, along the escarpment (let alone in other countries…I was lucky to visit Waiheke Island just off Auckland a few weeks ago where they are also out of control). But not here…I struggle to have them multiply, so don’t feel in the least guilty about growing them. The same can be said for various other plants I have in the garden here. A noxious weed in one environment may not be so in another. Common honeysuckle for example…it took about 25 years to get the one I planted here to smother the cubby house in the Barn Garden. When it next does, I’ll show you!
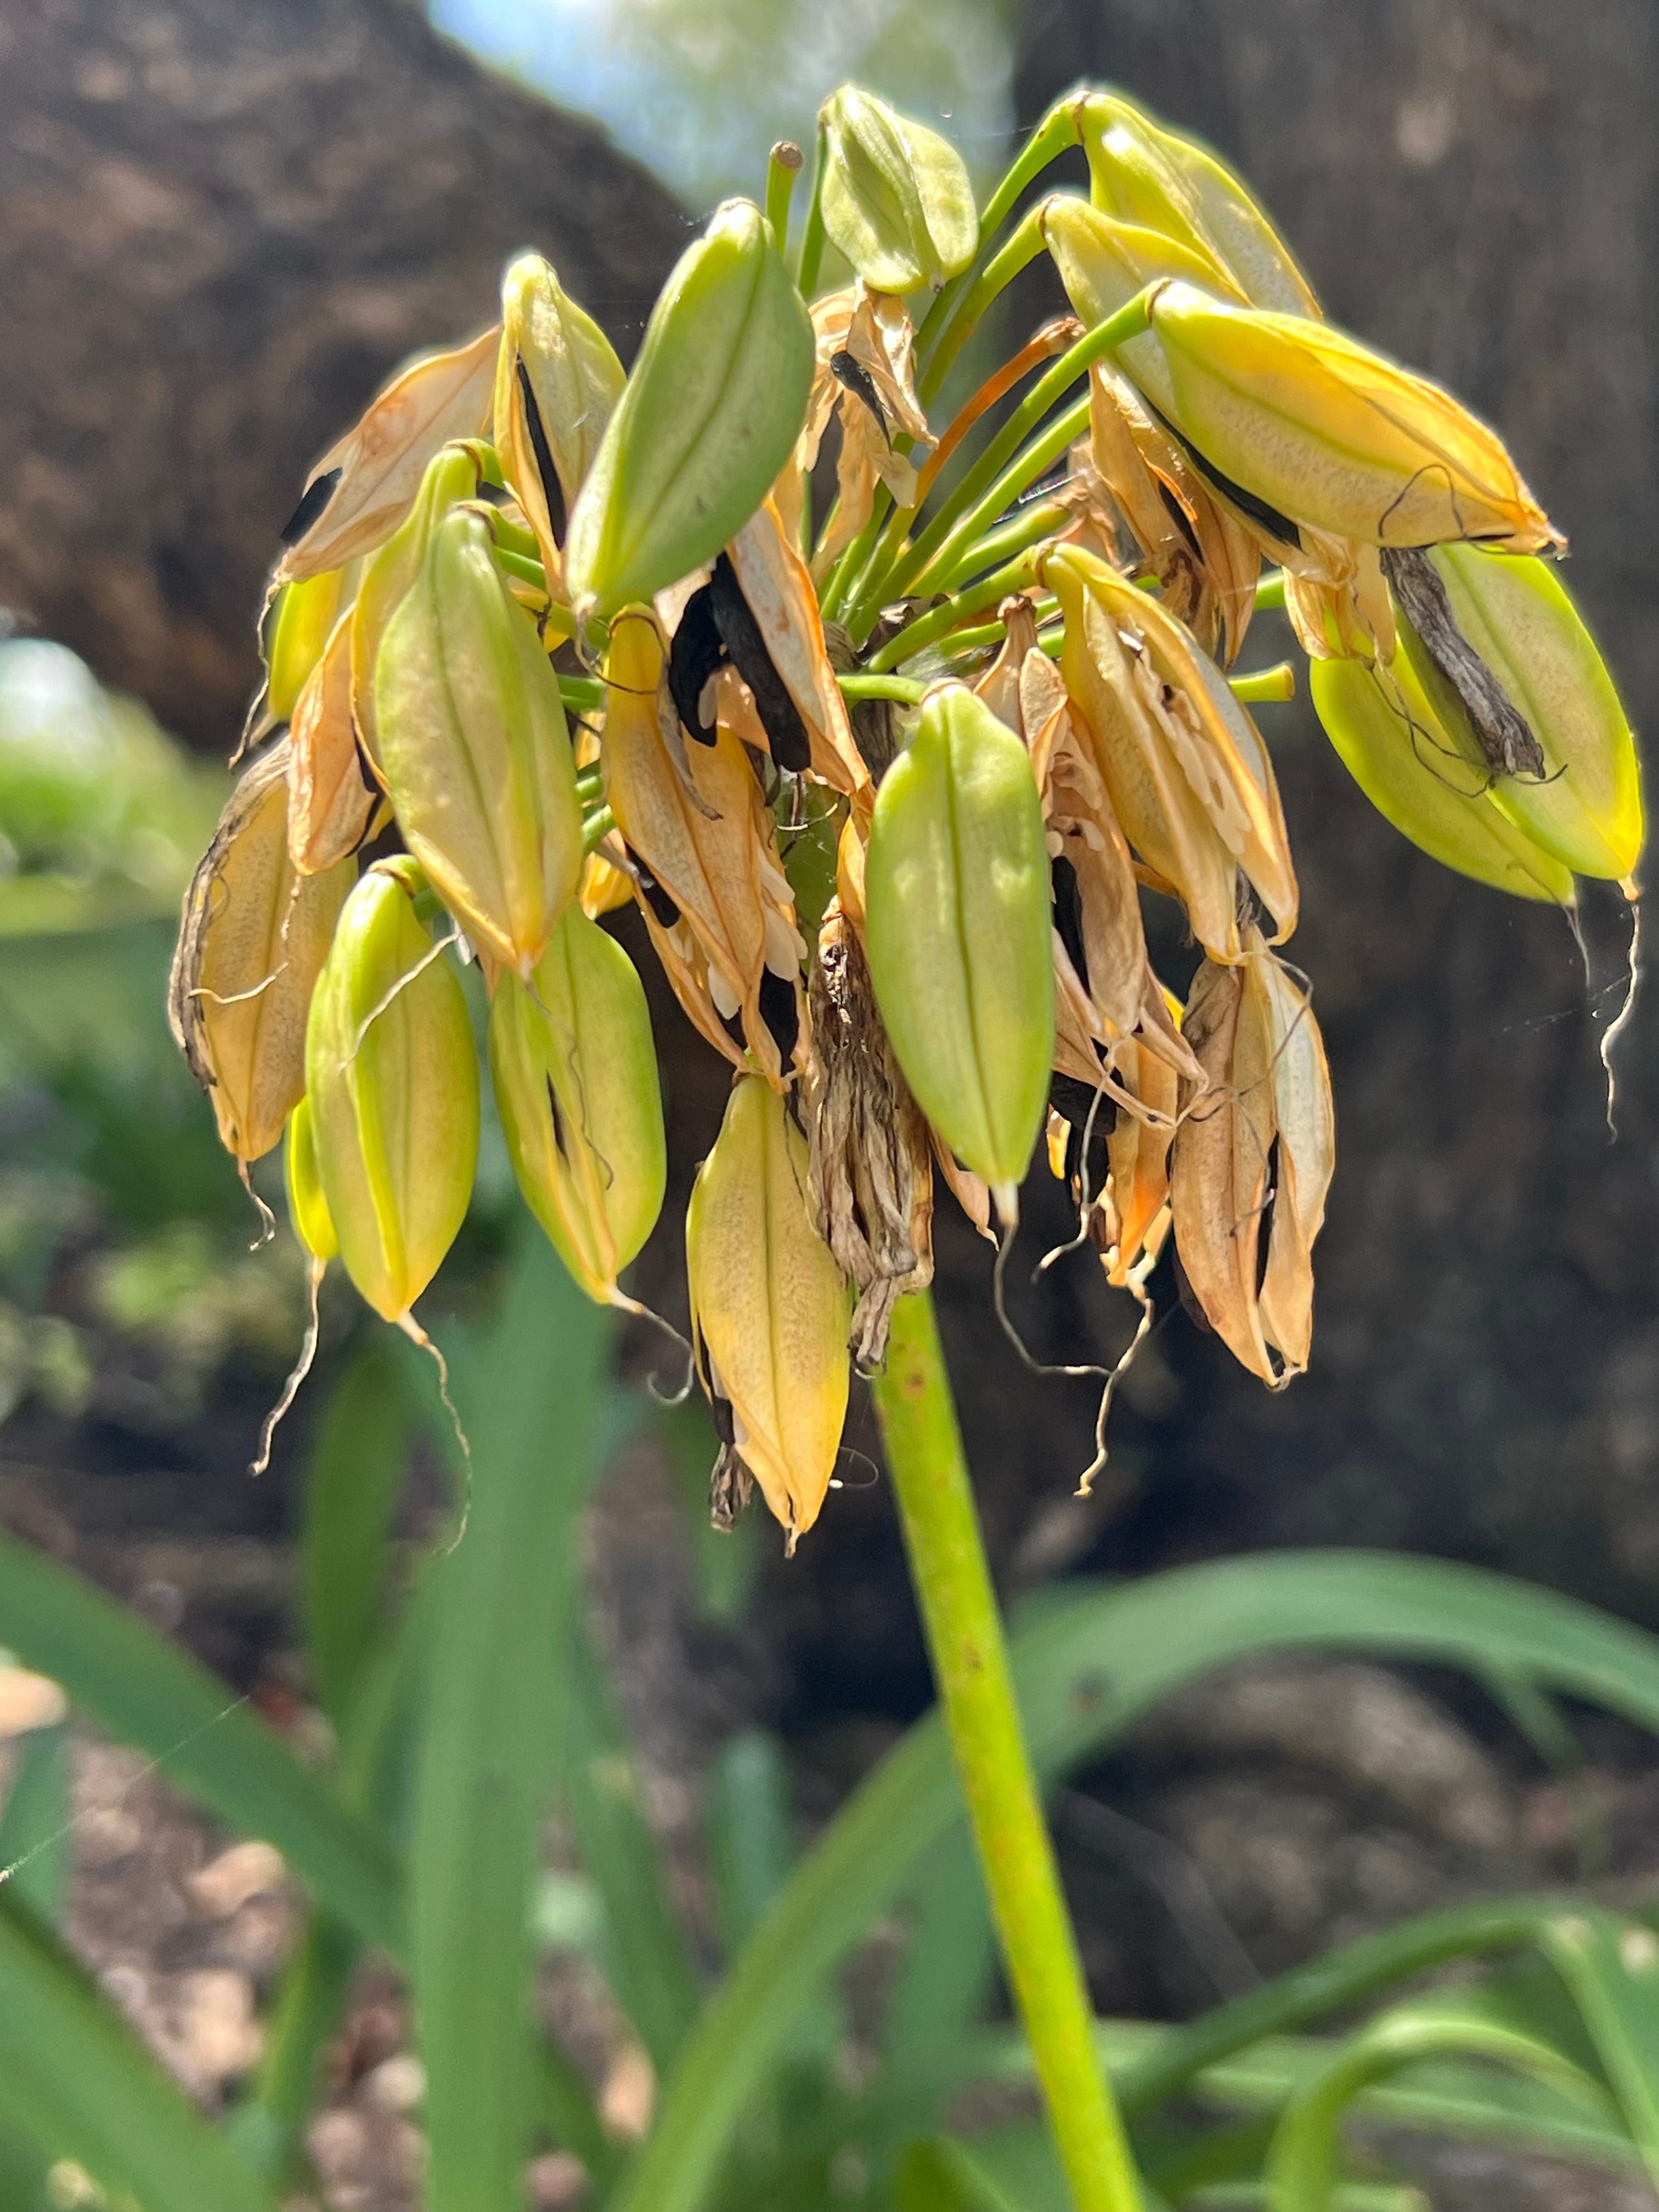
Agapanthus are another. We began the little Agapanthus bed at the edge of the back drive with a handful of plants dug from my Grandmother’s garden (north shore of Sydney) literally…34 years ago (I was pregnant…I remember!). And still that bed is not filled to the brim! Just this week, I asked Thalia (yes…I do have help here…and will come back to that point at length because…I can’t do everything…I am no more superhuman than anyone else and events…eat into my ‘gardening time’ like you would not believe. Anyway…I’ve worked my way with Thalia all around the garden these last years and these days she knows exactly what I mean when I ask her to carry out a task…she’s here 4 short days a week…I’m very lucky…and (we) work very hard to ensure we can continue to pay her…and in doing so continue to run the workshops, events and to share Glenmore in the way we do). I also love that she never goes off on a tangent and adheres strictly to my list…my list frees her mind so she can listen to her podcasts! (Me with my head gardener hat on!).
So…I asked Thalia to please pull all the spent Agapanthus stems, as you see above, filled with seed now their flowering season is over…and to lay all the heads on the ground…in hope that maybe this year…we will at last fill all the remaining gaps. At the same time she kindly weeded, and brought up some compost for where the seedheads now all lie on the ground. It’s a spot rabbits love to dig. And so it is that a 34 year old project is still in the making!
Let’s have a recipe!
A couple of days ago I was expecting a special visitor…in the name of a very exciting, upcoming collaboration…to be revealed soon! I knew neither of us really needed cake…but I do like to have a little something on hand…and when peeps have made the effort to get here, well…they don’t usually leave in a hurry!
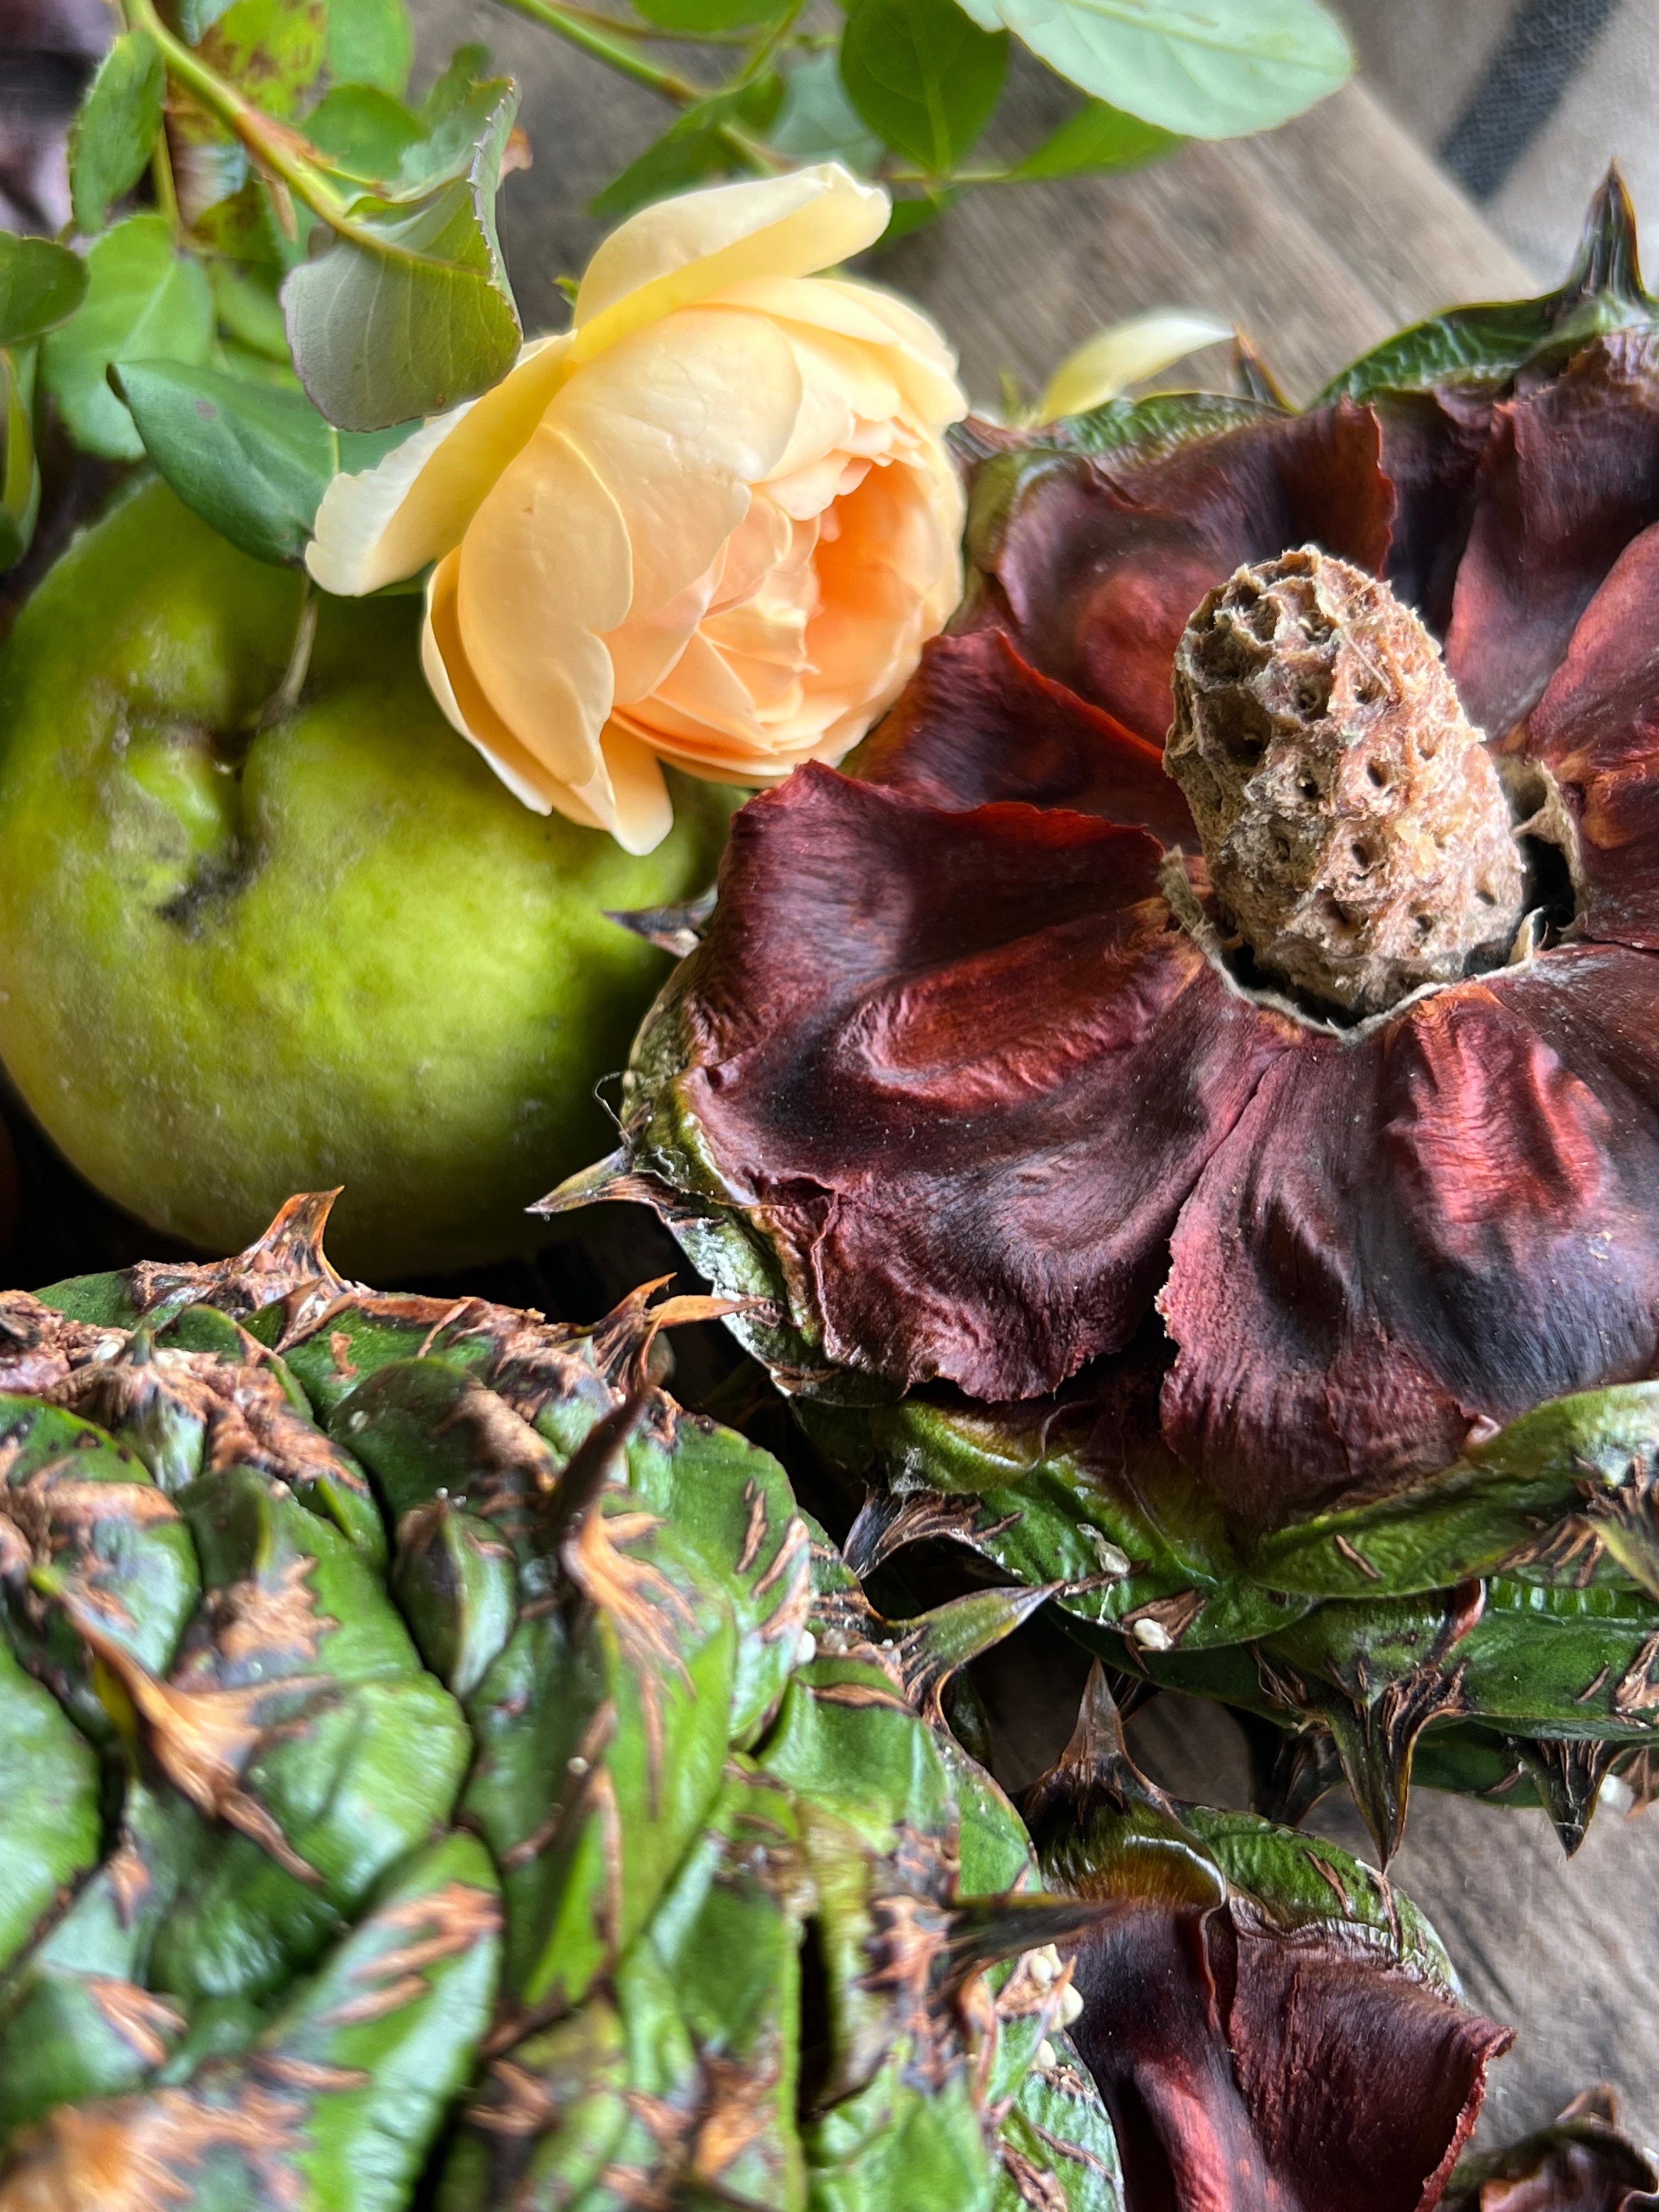
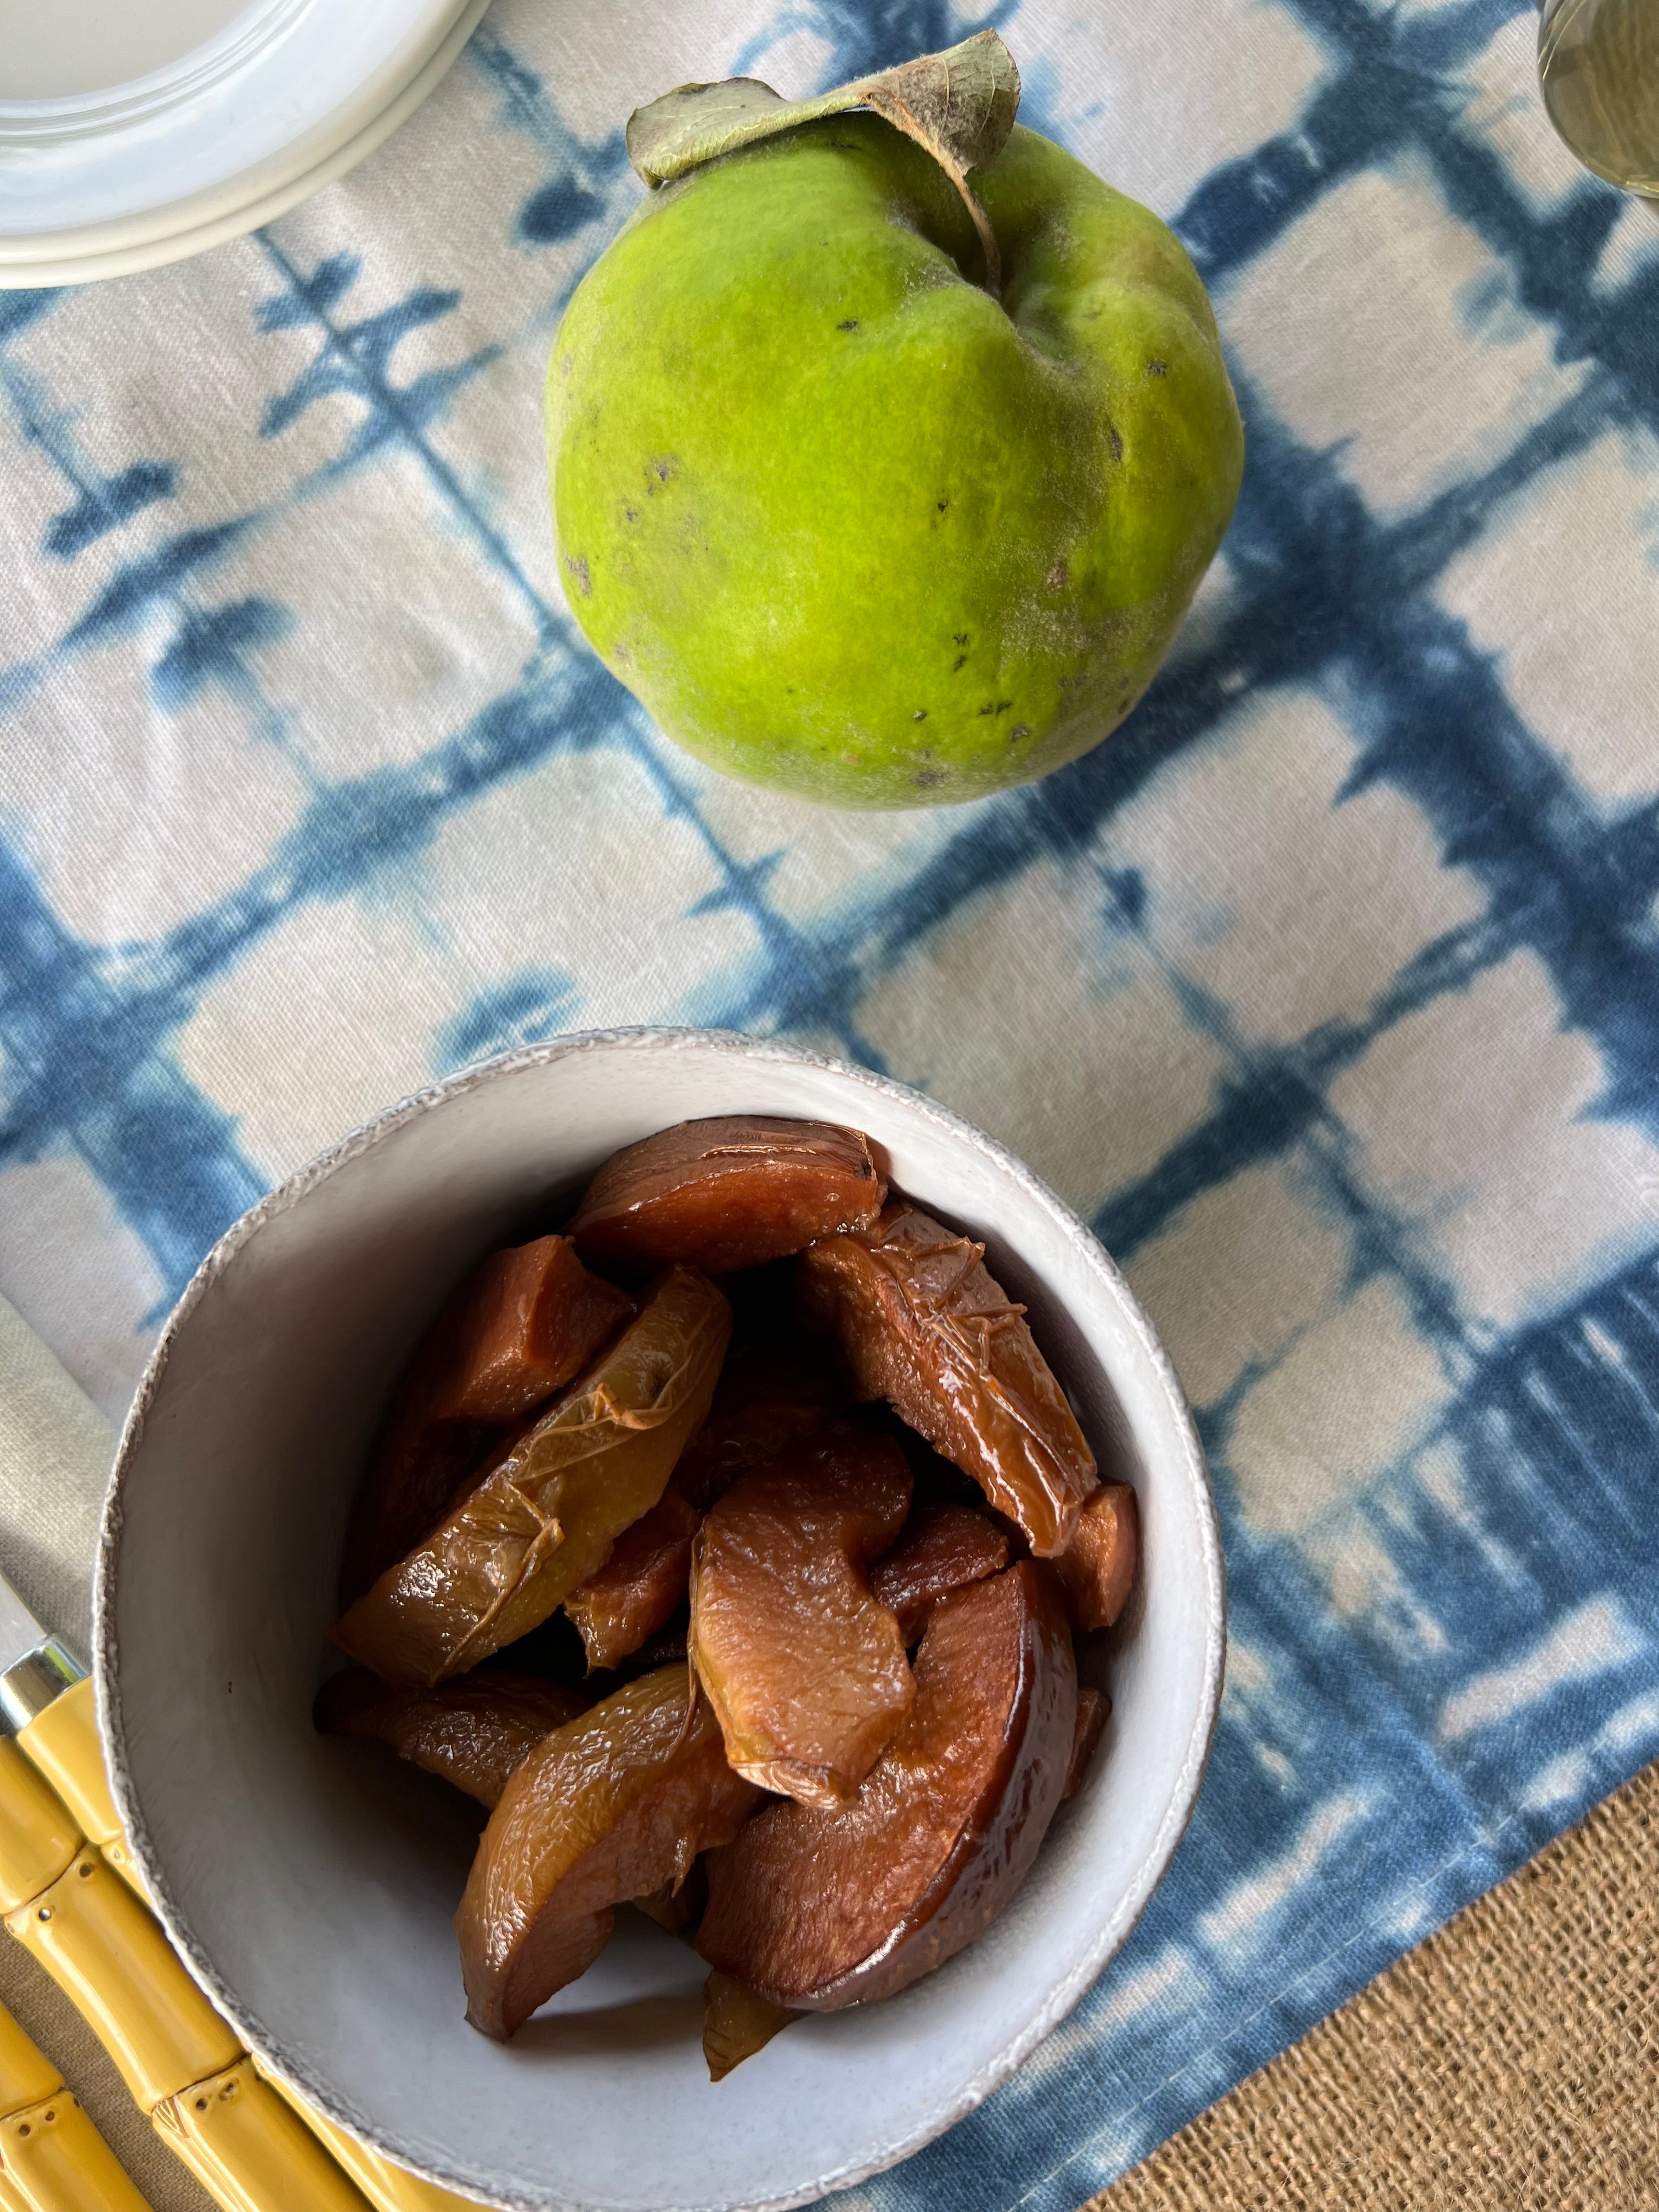
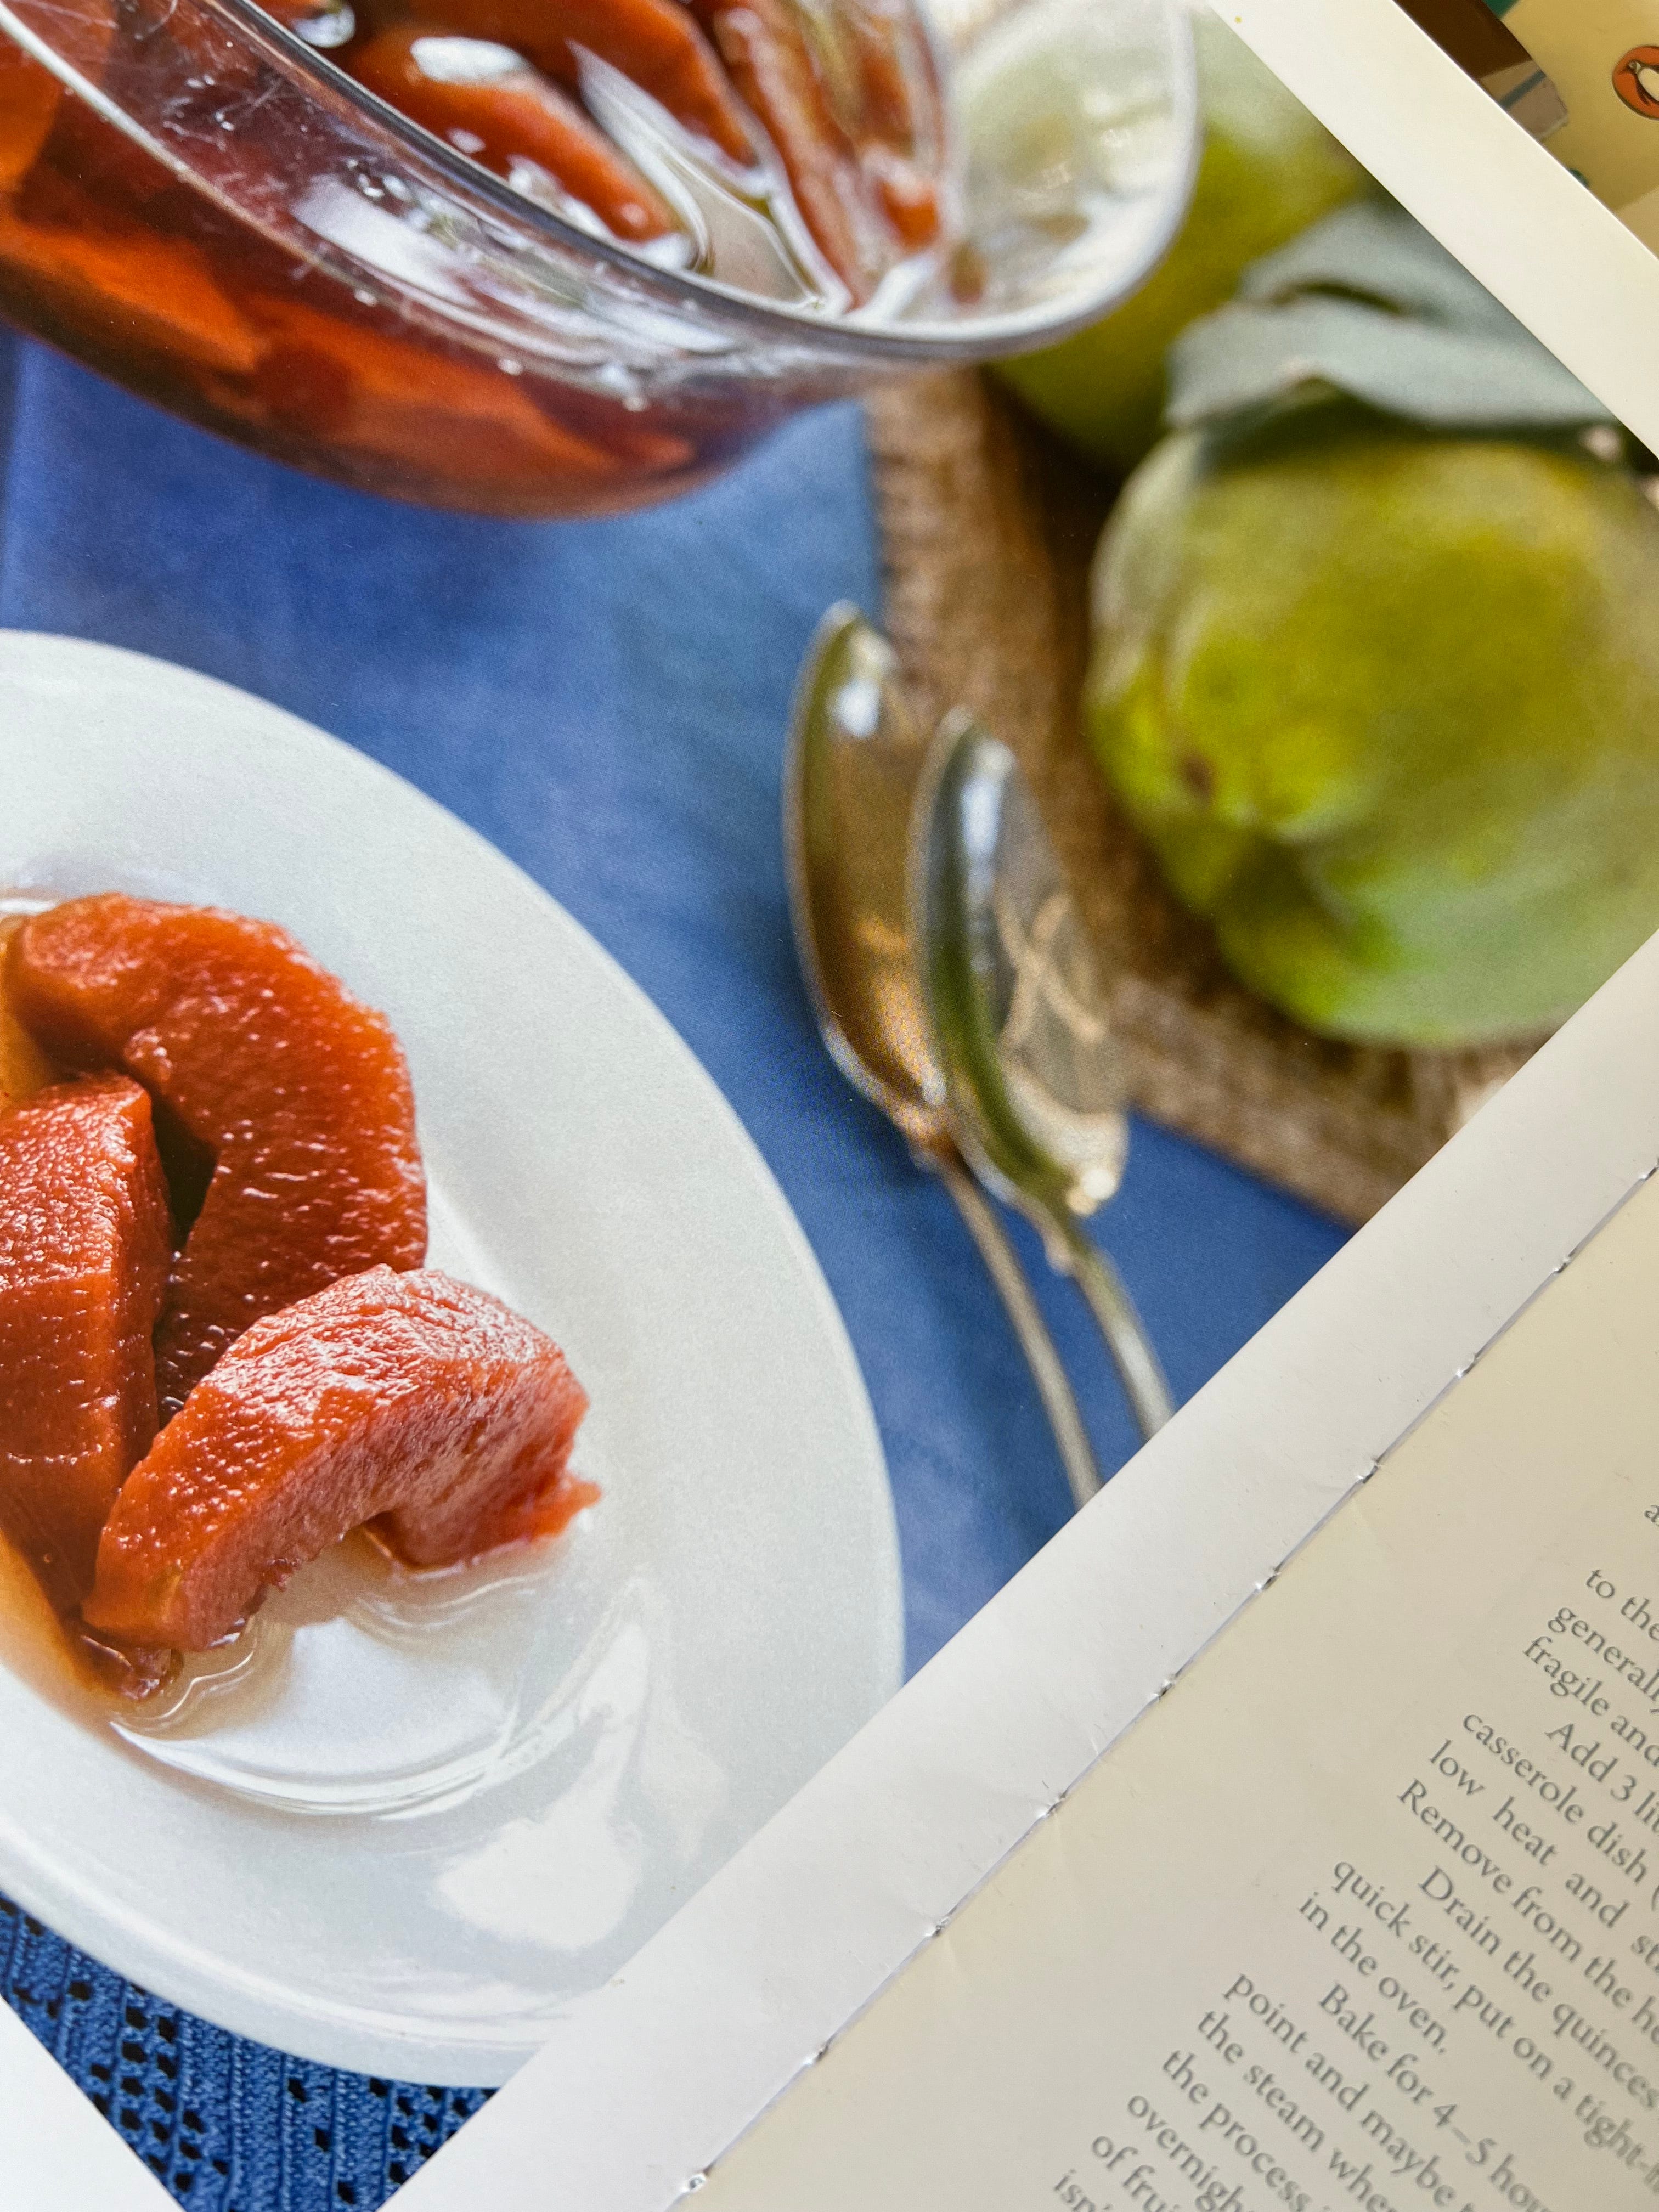
Sitting on my kitchen bench was a quince. One beautiful, fuzzy skinned, unblemished quince. It had fallen off the tree…into its net bag…I net all fruit (more coming up about that later). Had it fallen of its own devices? Or been knocked off by a bird? I went on a little quince-check…believing if they come easily off the tree with a slight twist, that like apples, they are probably ready. But…really? Are they ripe? Because they’re all still green! When we see them to buy in the shops…they’re always yellow! It’s a conundrum; and one that to this day, often has me leaving fruit on the tree for way too long…because in my mind, they don’t yet look right and ready.
But I’ve come to notice over the years that if I do leave the quinces (mine are all organic…I use no spray of any kind), they are likely to develop an ugly bruise and before you know it, they’re rotten. So…not this year! I’ve wisened up (about time?!!). To be honest, I think the rotting is due to humidity…and can be worse in wet years.
If you have a copy of The House and Garden at Glenmore, you will have the recipe for my Baked Quinces (p.270/1) where…true to form, I had them in the ‘late autumn/early winter’ chapter….which does coincide with when they’re usually available in the shops (psychologically, as a recipe, that’s when I think most of us imagine we’ll eat quince). As a gardener…I should know better…see? I was just trying to fit in with the shops…silly, silly! Whilst you can follow that recipe (make a sugar syrup by dissolving 2&1/2 cups caster sugar into about 3 litres water in a big heavy cast iron pot, then add the peeled, cored and quartered quinces and cook, covered, at about 150C for 4 or 5 hours…’til the most beautiful consistency and deep terracotta colour….
These days, the very idea sets my teeth on edge! Maybe I’m just getting old….but no…in reality I do, as much as possible, avoid sugar. Of course it’s there in cakes…and we do all love a cake and I see no harm in sugar as an irregular part of our diet, but…I do play around with alternatives. So…some years ago now, on a whim, I thought to do the following. I know many of you have had great success with this method:
Mickey’s Olive Oil Baked Quinces
Scrub the fuzz from the skins of as many quinces as you have (one if that’ll all you have!)
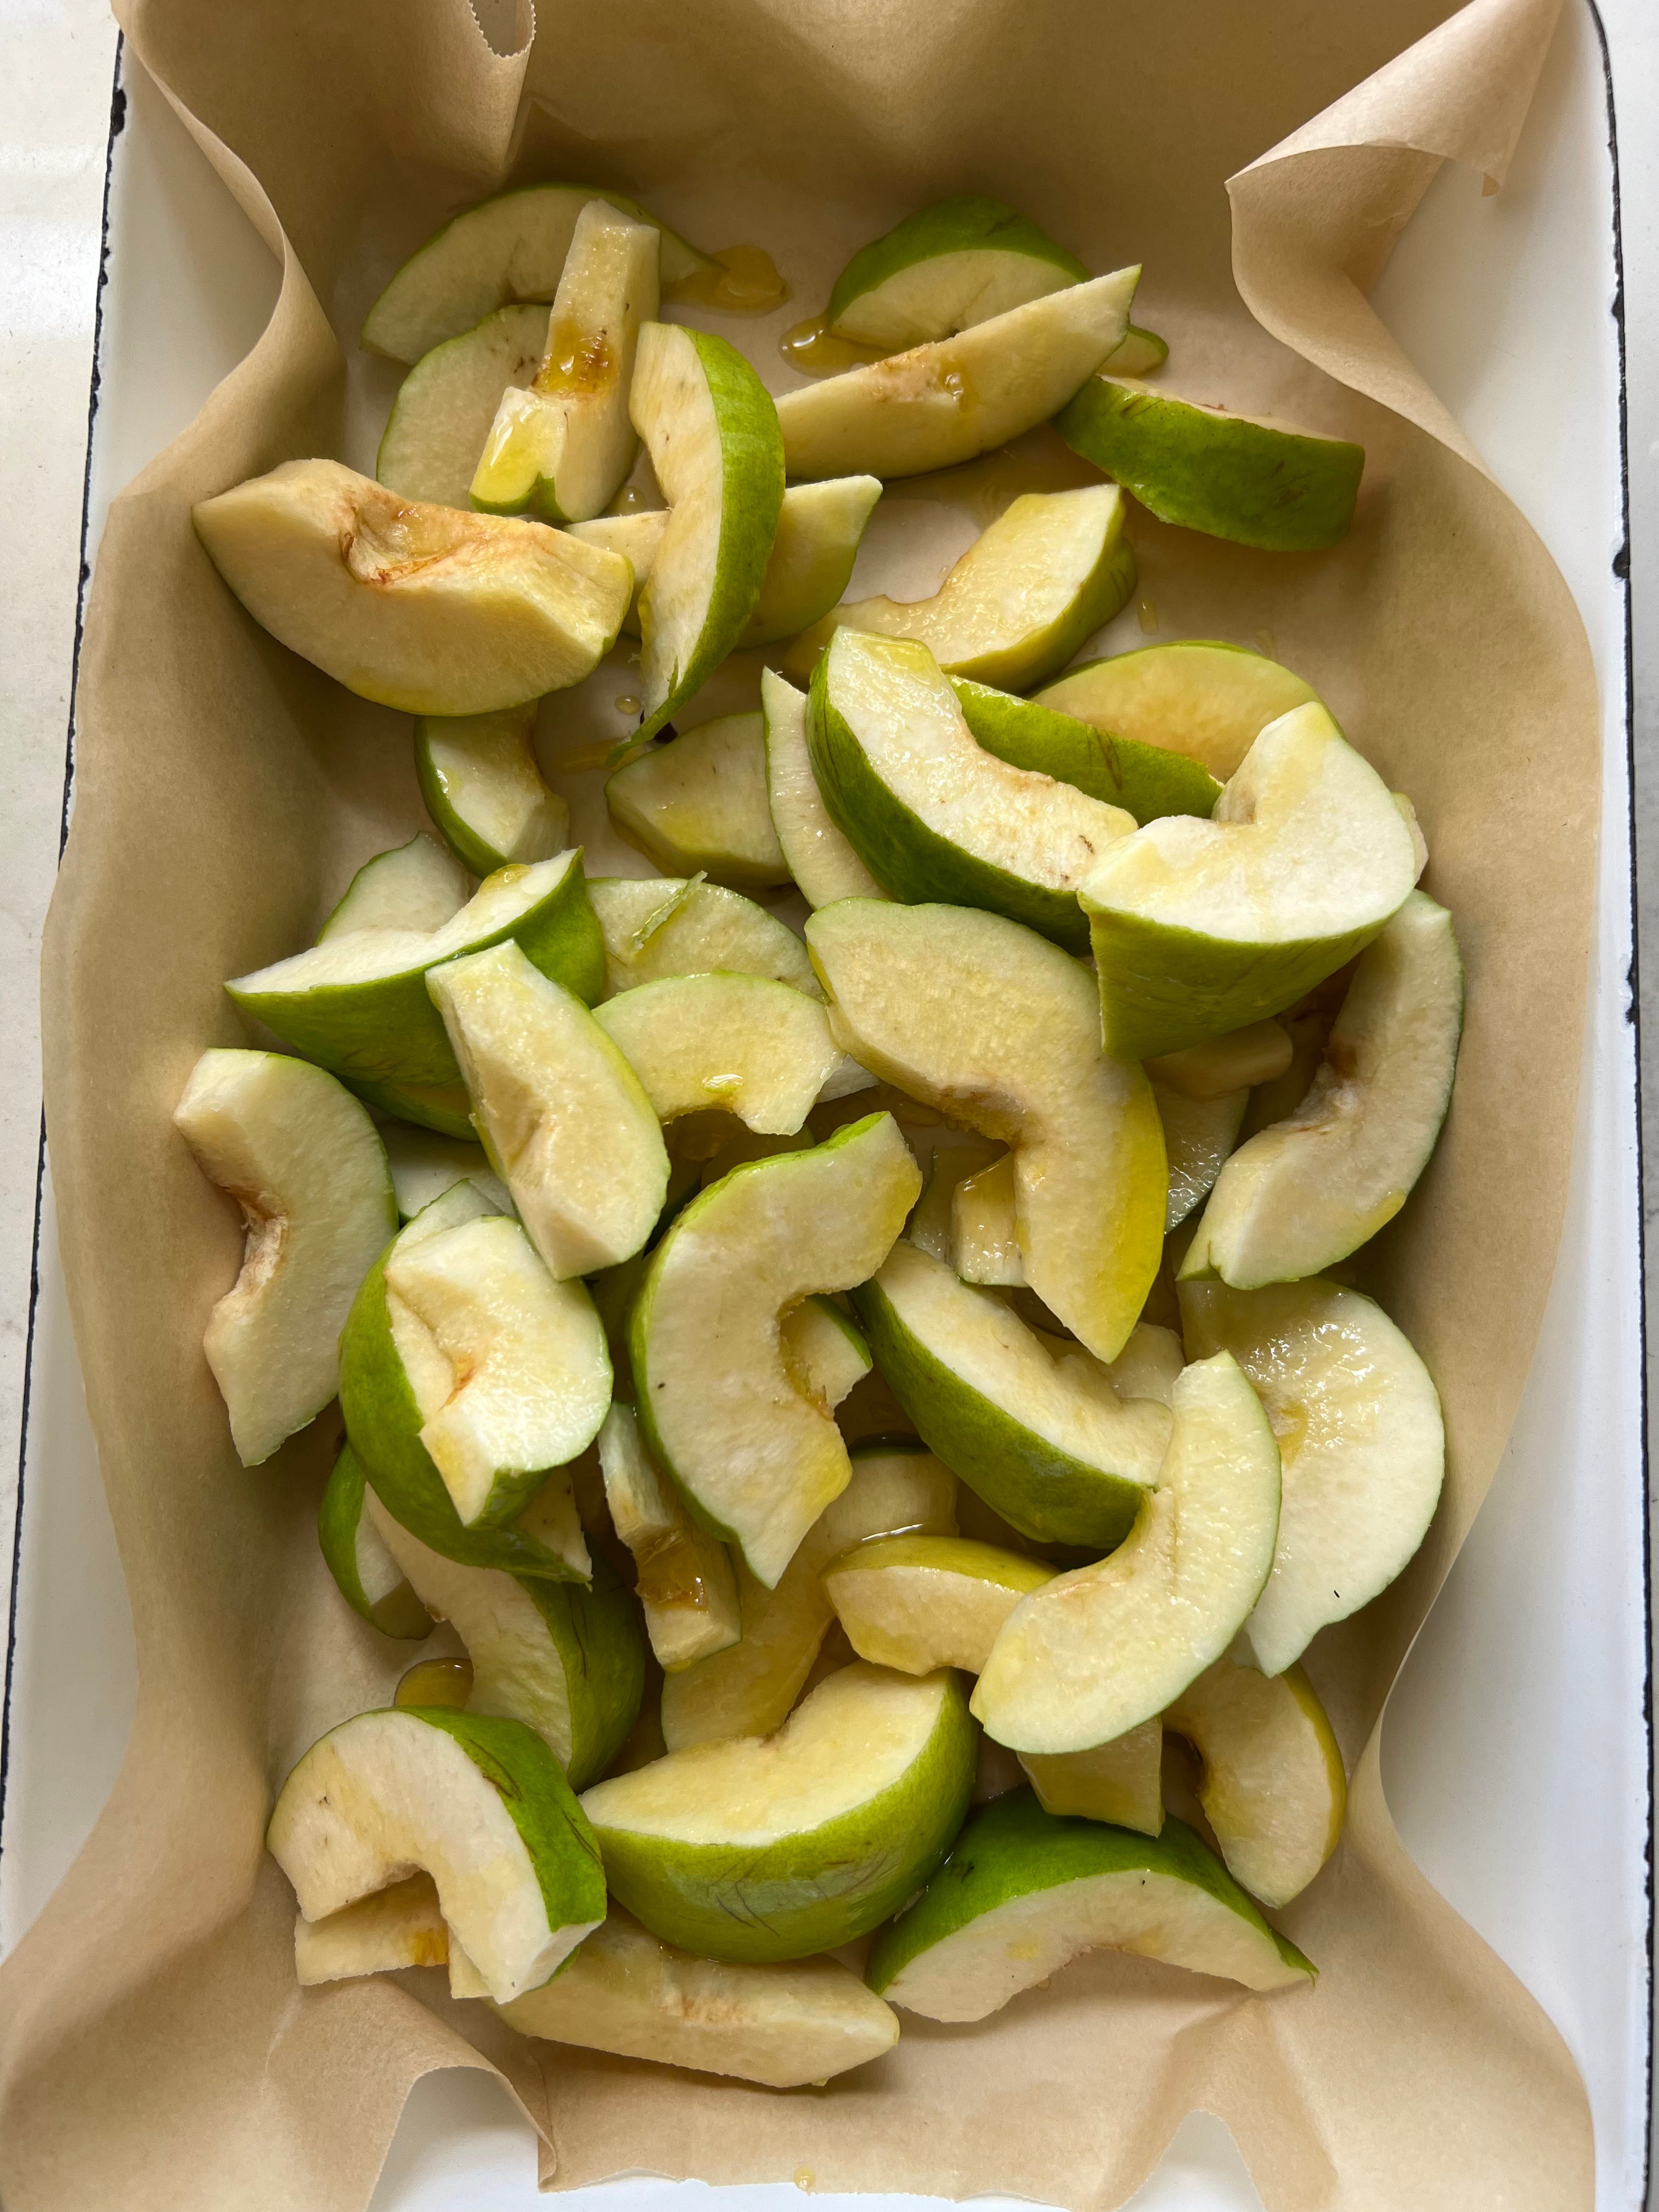
Take your heaviest knife and cut through the centre of the fruit, then halve again…depending on the size of each fruit (home grown ones are all uneven) you might only quarter, others you might cut again but don’t cut them too fine or they’ll just fall apart
Tip them all into a baking tray (I line mine with baking paper) then drizzle with olive oil and rub them all over. Add about a cup of water. Cover with baking paper
Pop into an oven at about 150C (to be honest the other day I was in a hurry and put them on too high a temperature, so several pieces got burnt). Better to be in a very slow oven, over a long period of time. Check from time to time, give them a good toss around and add more water because they can catch and burn if they dry out.
Over time, their colour will turn to a deep and beautiful terracotta…although the colour will be more ‘organic’ than if you use the sugar syrup method…when they kind of sing!
Try to not eat them all the minute they come out of the oven! Now there’s a challenge!
To be honest…I find that cooked this way, they have a more dense texture. They are completely moorish and…taste of pure quince. I know a lot of recipes suggest spices and all kinds of extras…but I like to taste the actual fruit…especially one that is so fragrant and utterly sublime. See how you go! Although you may not find them in the shops quite yet…!
As I thought they might look a bit mean on their own…I found some oatcakes in the cupboard and opened a little packet of Meredith Dairy chèvre (a good thing to always have in reserve in the fridge!). All together…a piece of quince on a fork, a generous smudge of chèvre on an oatcake, a cup of tisane…an animated conversation and a turn around the garden…made for both a delightful and productive afternoon!
Last weekend, I had a very productive and much needed Saturday in the kitchen garden (details of which I’ll report lower down) but I did have to down tools to go into event prep mode…see what I mean?
Before any event, there’s furniture to move, with thought to the number of guests, how the space will flow, the view guests will have, through to how food will arrive from the kitchen and, in this instance, for our beautiful Feast…and Journey through Lebanon with Karima and Sivine of Sunday Kitchen…to be sure everyone would be able to see Karima at her dome oven, baking flatbread (so each guest could enjoy a round straight onto their plate!) and be able to hear her, and her beautiful mother Sivine, tell tales…of the traditional Lebanese breakfast foods everyone would enjoy…from village to city souk.
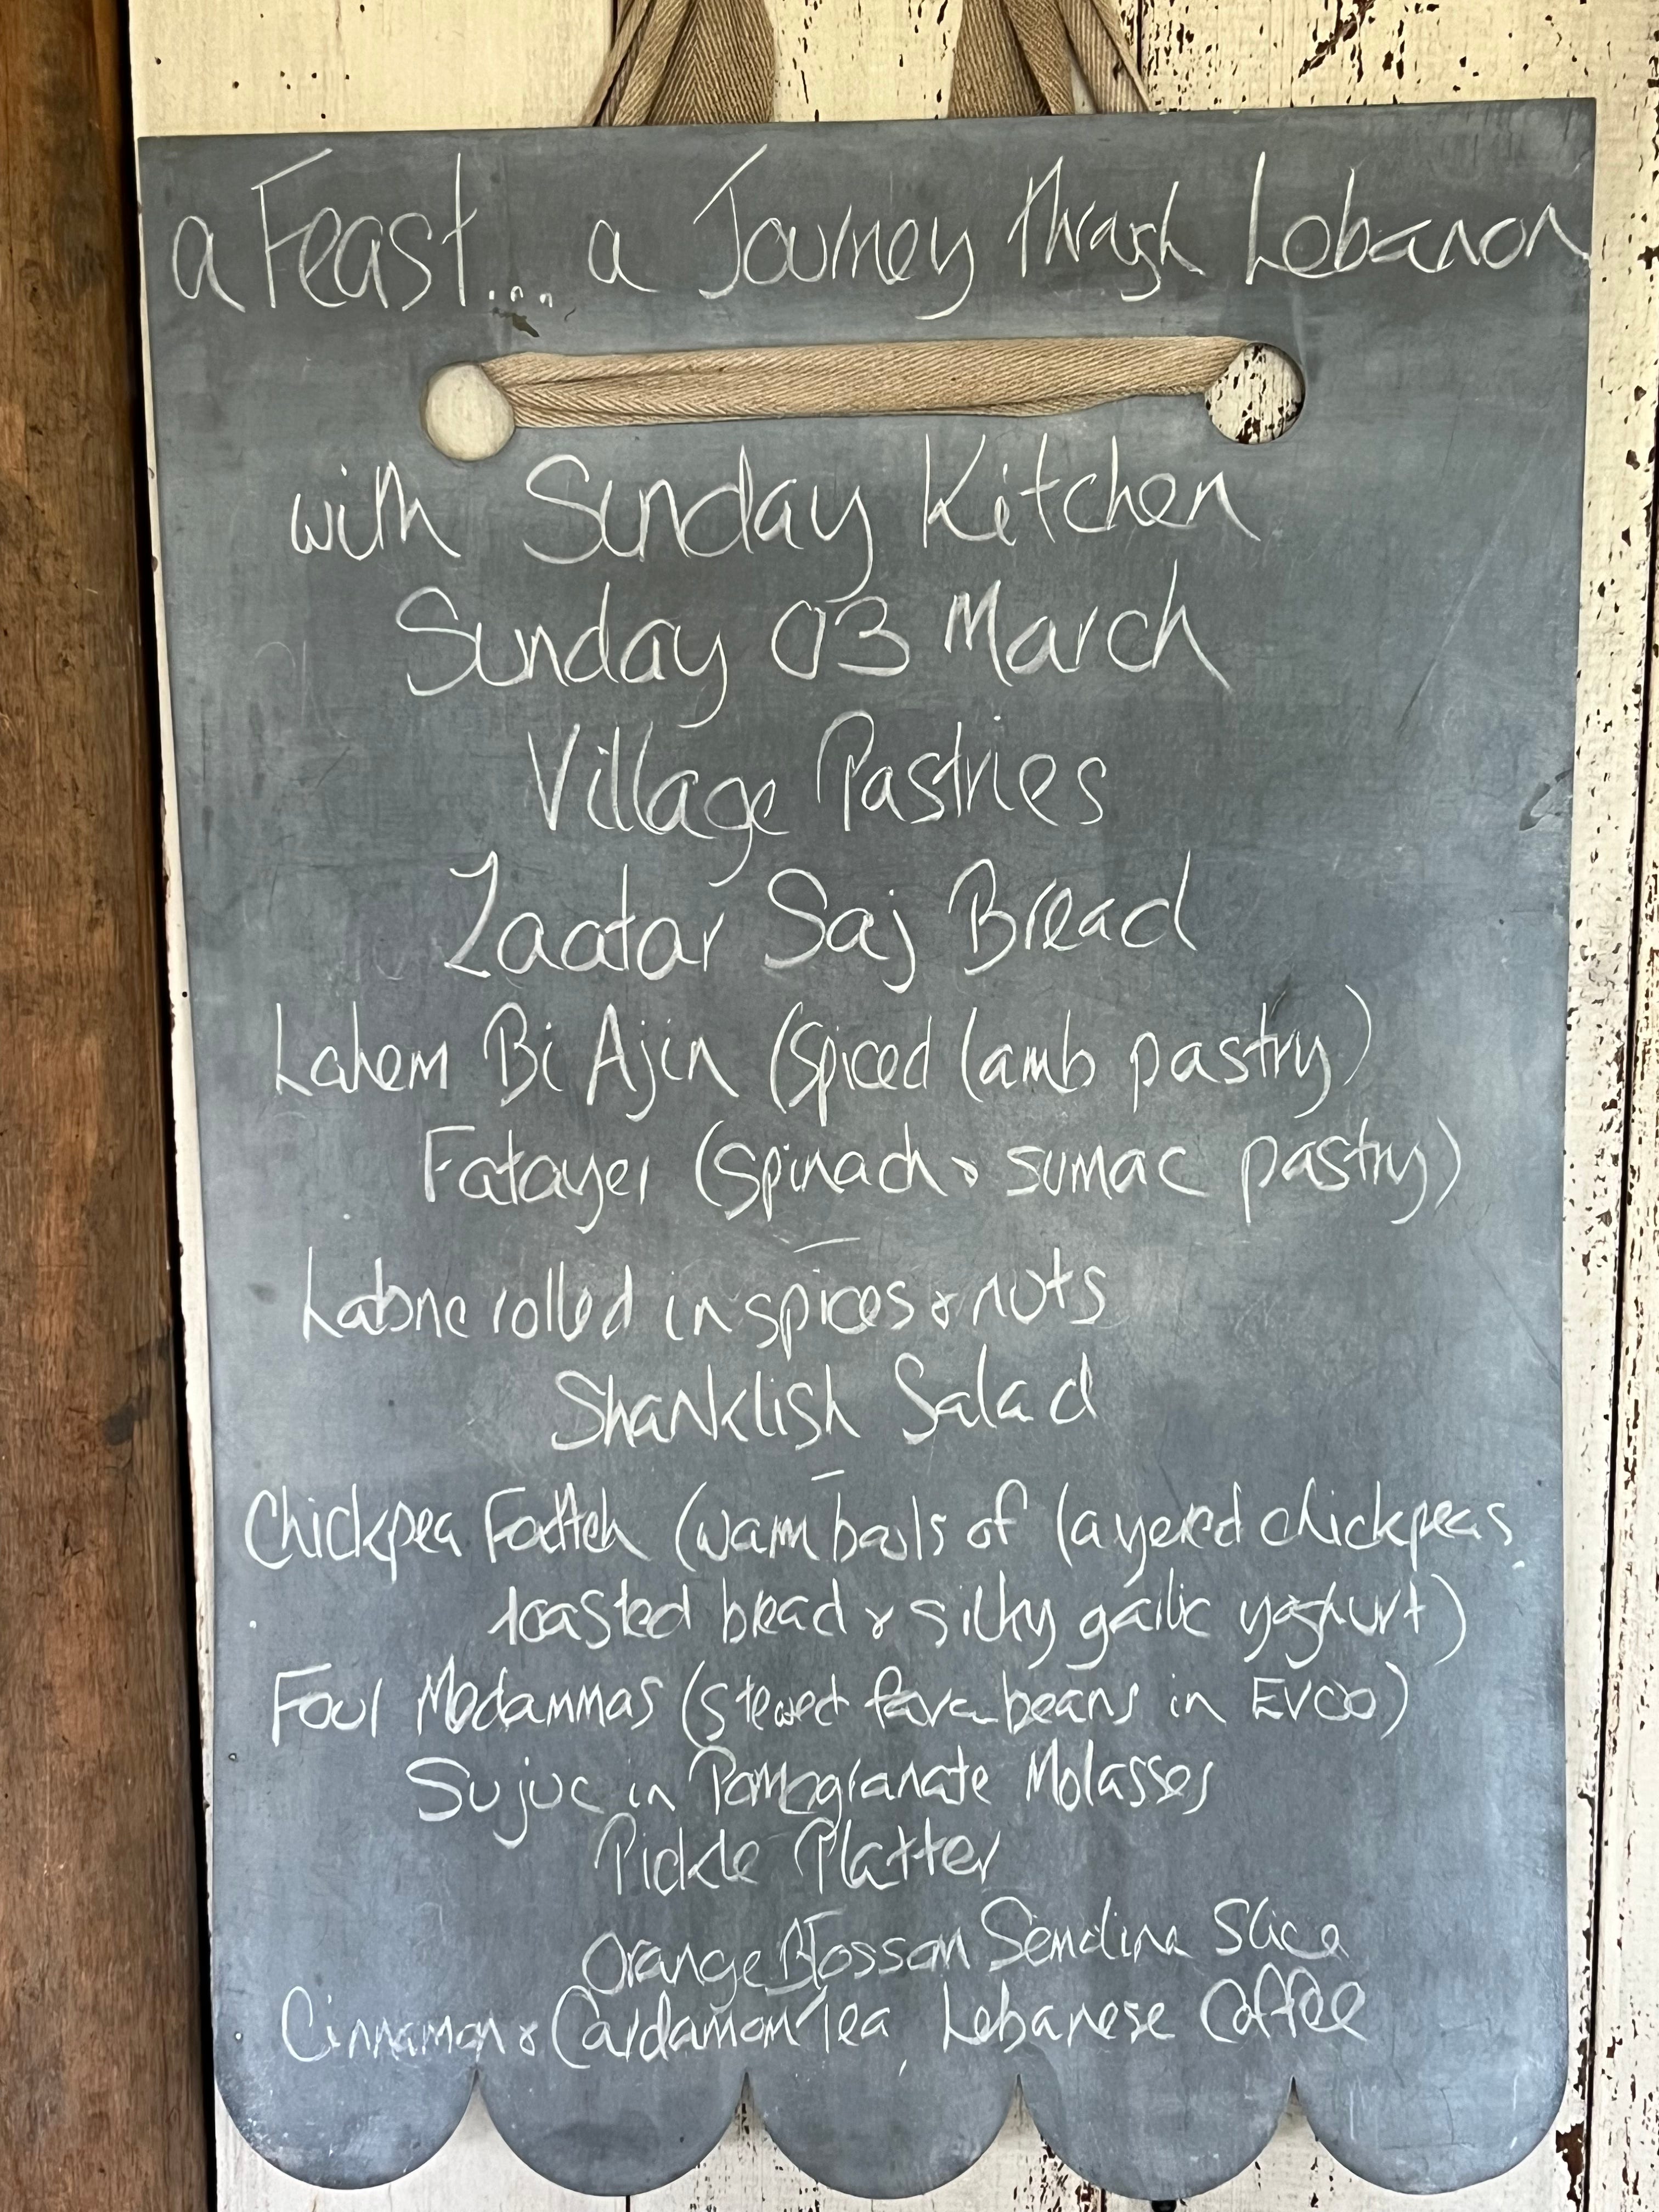
But first…after the furniture moving on Saturday afternoon, I ran everything we might use through the dishwasher, set the loos, chalked the board and made myself a big fat list for Sunday morning! I always joke that it wouldn’t matter what time I got up on an event morning…even if I didn’t go to bed at all…I’d still only (maybe!) scrape in at the last minute to be ready before guests arrive! On this occasion, I was delighted to see Karima literally running between tasks before our guests arrived too (not just me then!). As it is…on event mornings I’m always up in the dark. Sometimes I score a surprise as a result…like the previous week when (ahead of my Late Summer in the Kitchen Garden Day) a huge full moon was hanging low in the western sky before sinking in the pale dawn light behind Big Hill.
But I digress! Again…you’ll get used to it…I hope!
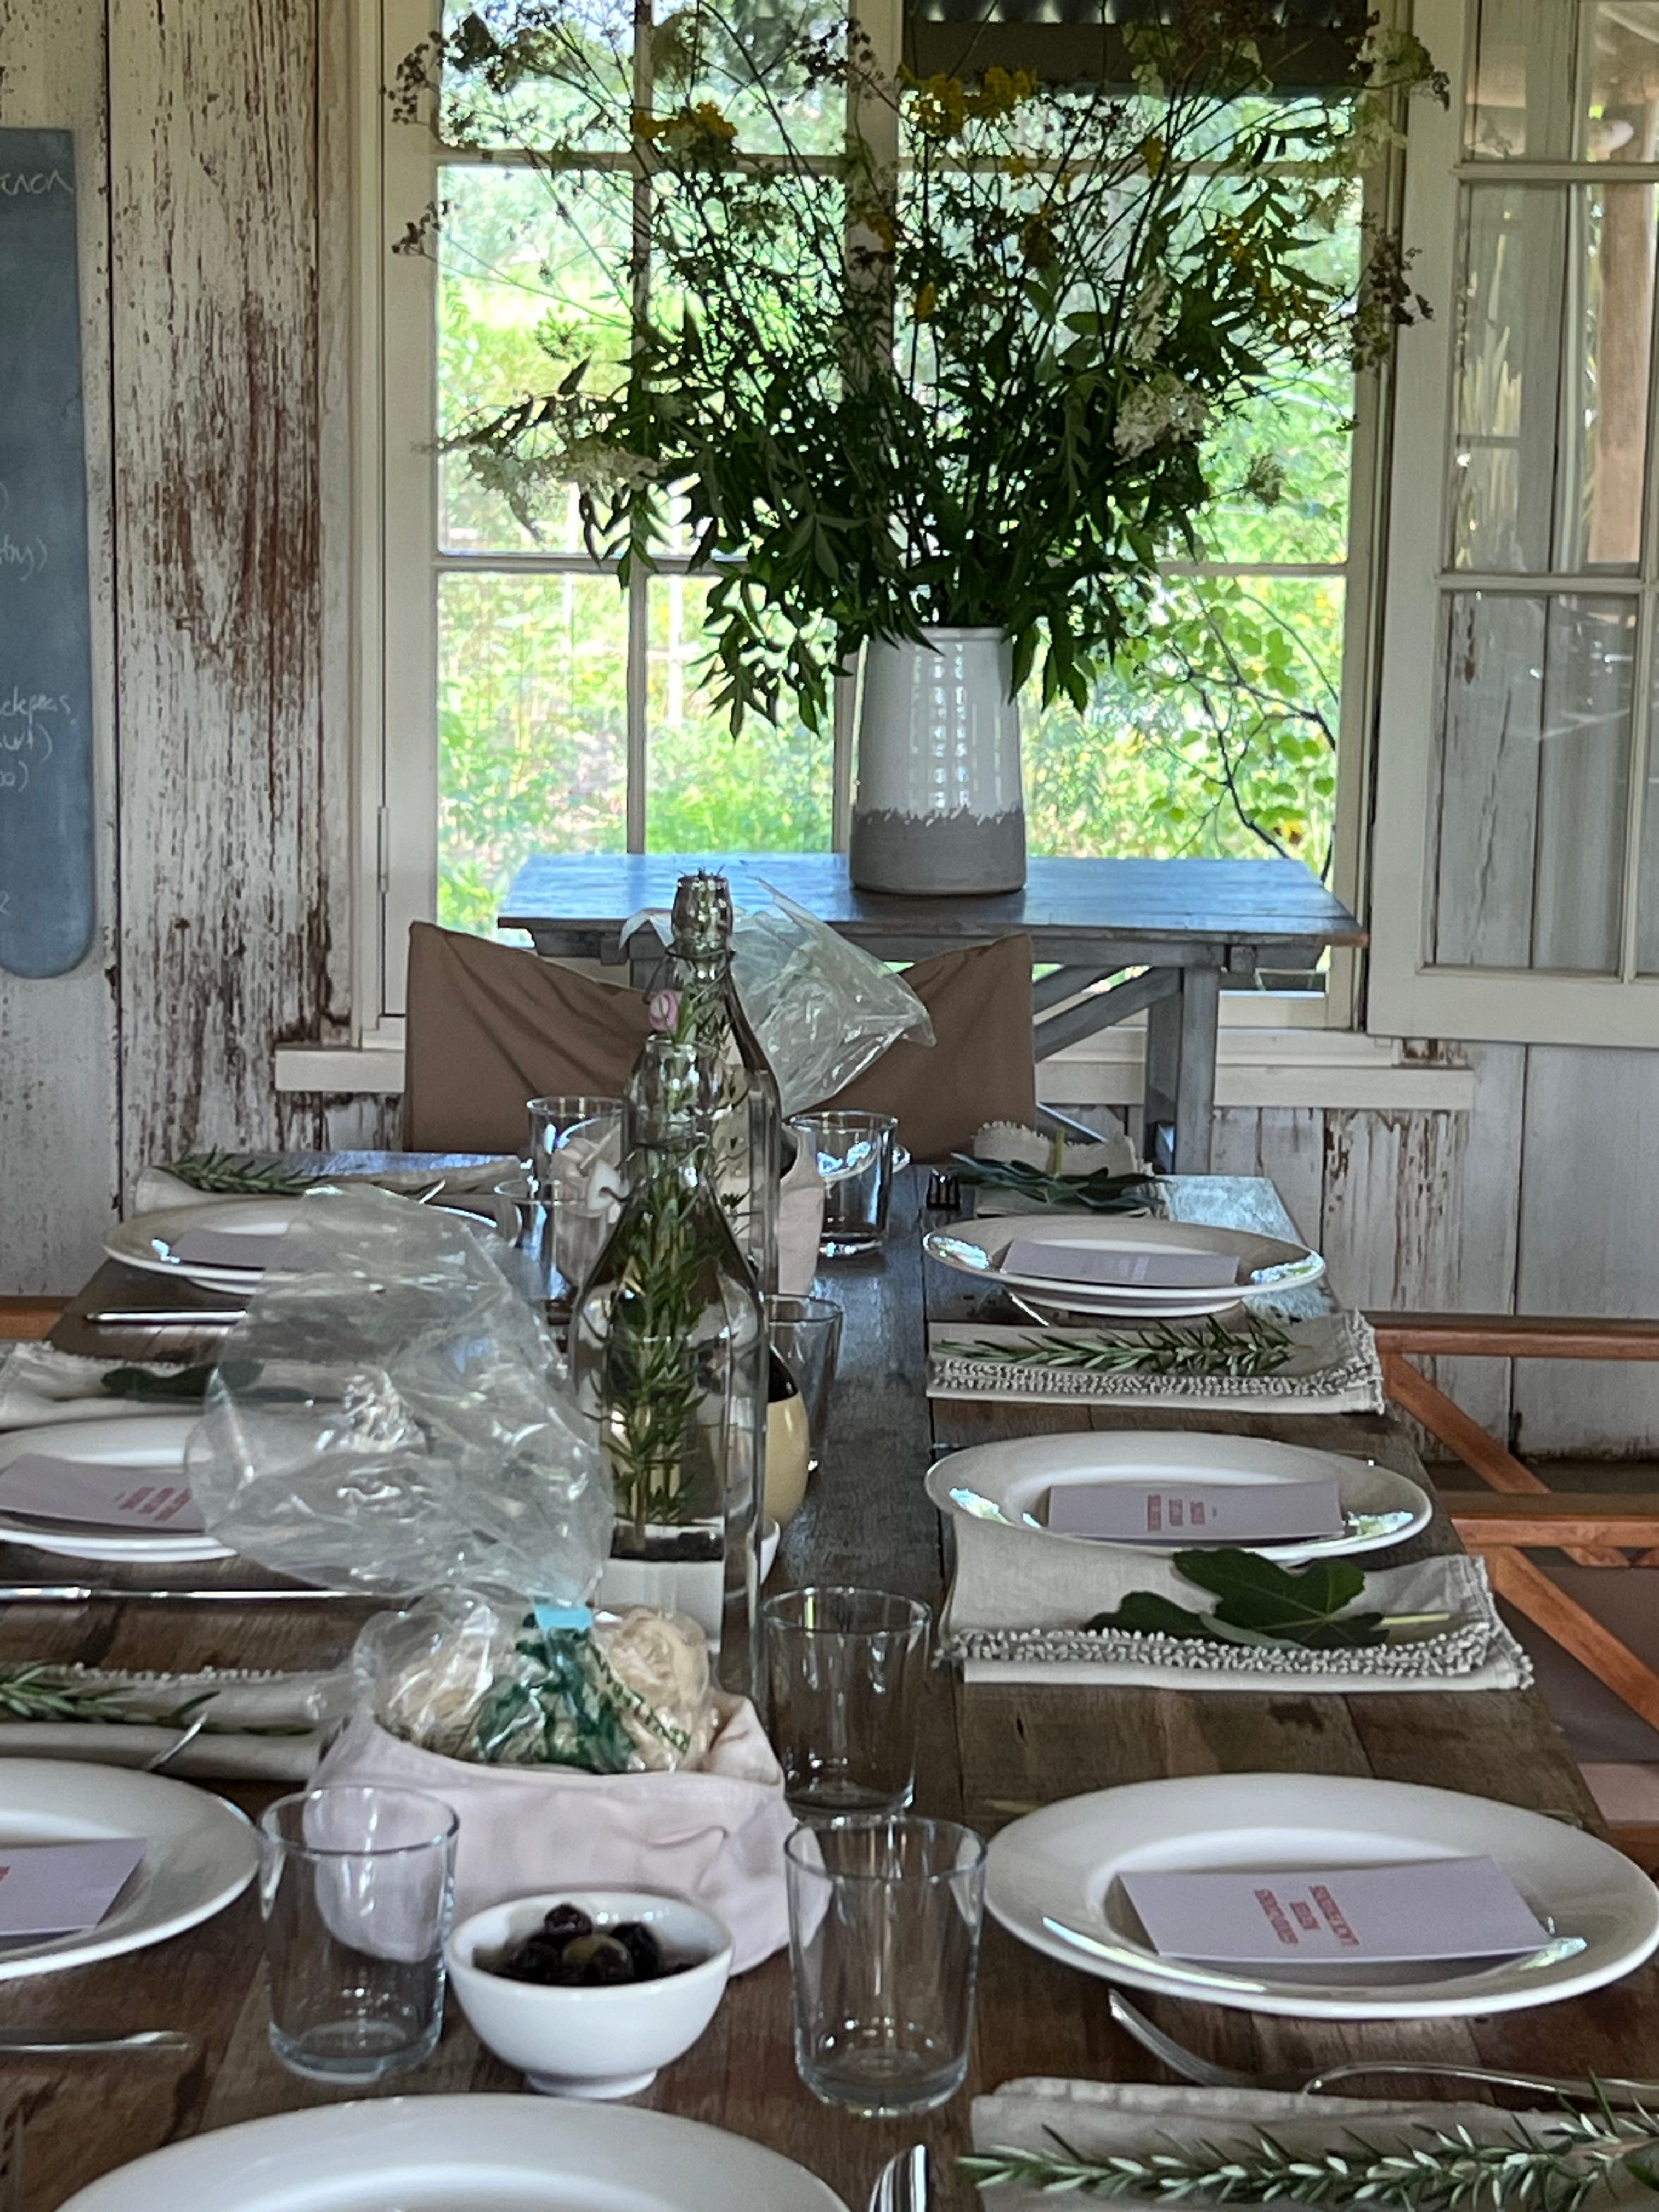
We kept the tables simple…because they ended up laden with food! And of course I was so swept up talking to everyone that…I forgot to take photos! Karima arranged for someone to do just that…so when I see them…it might even be a little video…I’ll share it/them with you here. (I did put up a short post on instagram…if you want to take a quick jaunt over there…it’s in the first row!)
For all the palava of setting up (which of course I love every aspect of) all that matters on the day…is people…our guests and the joy they derive from a visit. I love to see them immersed in the garden, asking questions, losing themselves…and last Sunday was a particularly bucolic kind of day…perfect temperature, blue sky, golden sun…everything was shimmering with life. There was a lot of love in the air…love of food, family, friends…there were stories, memories recounted…evoked or made anew. Our tastebuds had such a wonderful experience…our bellies and our hearts, were full. Karima and Sivine have a book coming out later this year and I’ll look forward to telling you more about them…our meeting last year…and some of the touchstones that led to last weekend’s event…and others to come.
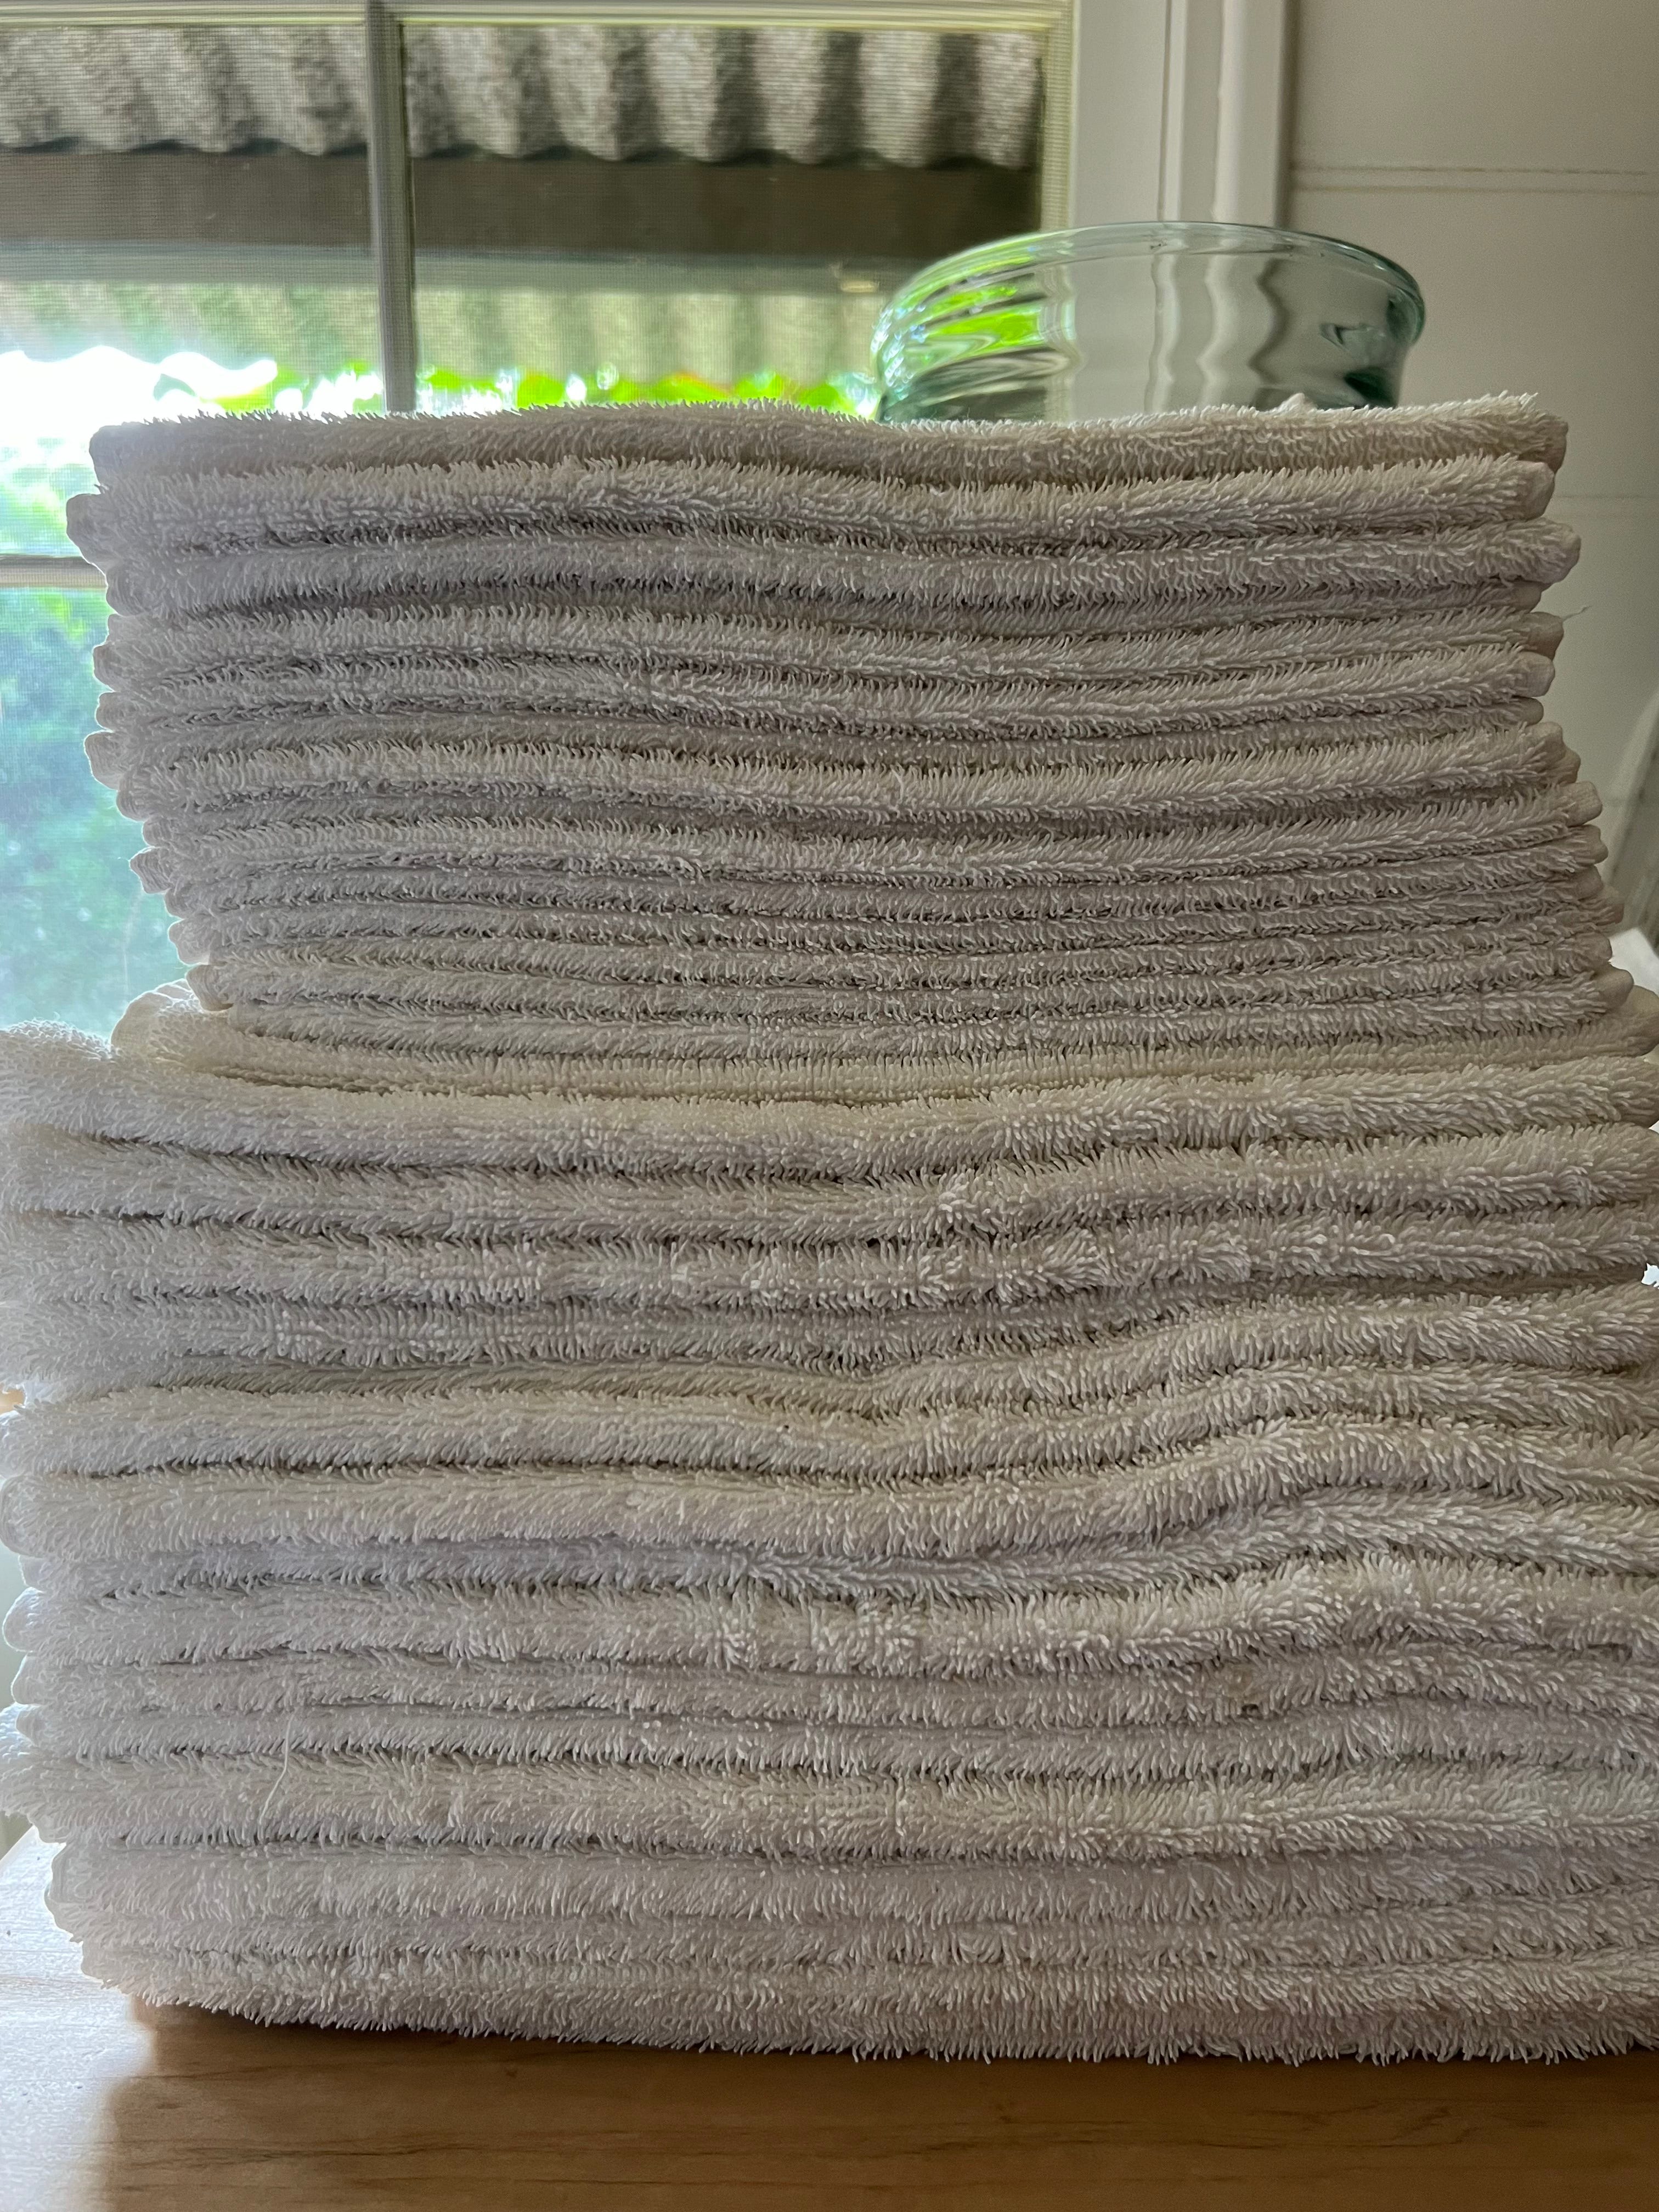
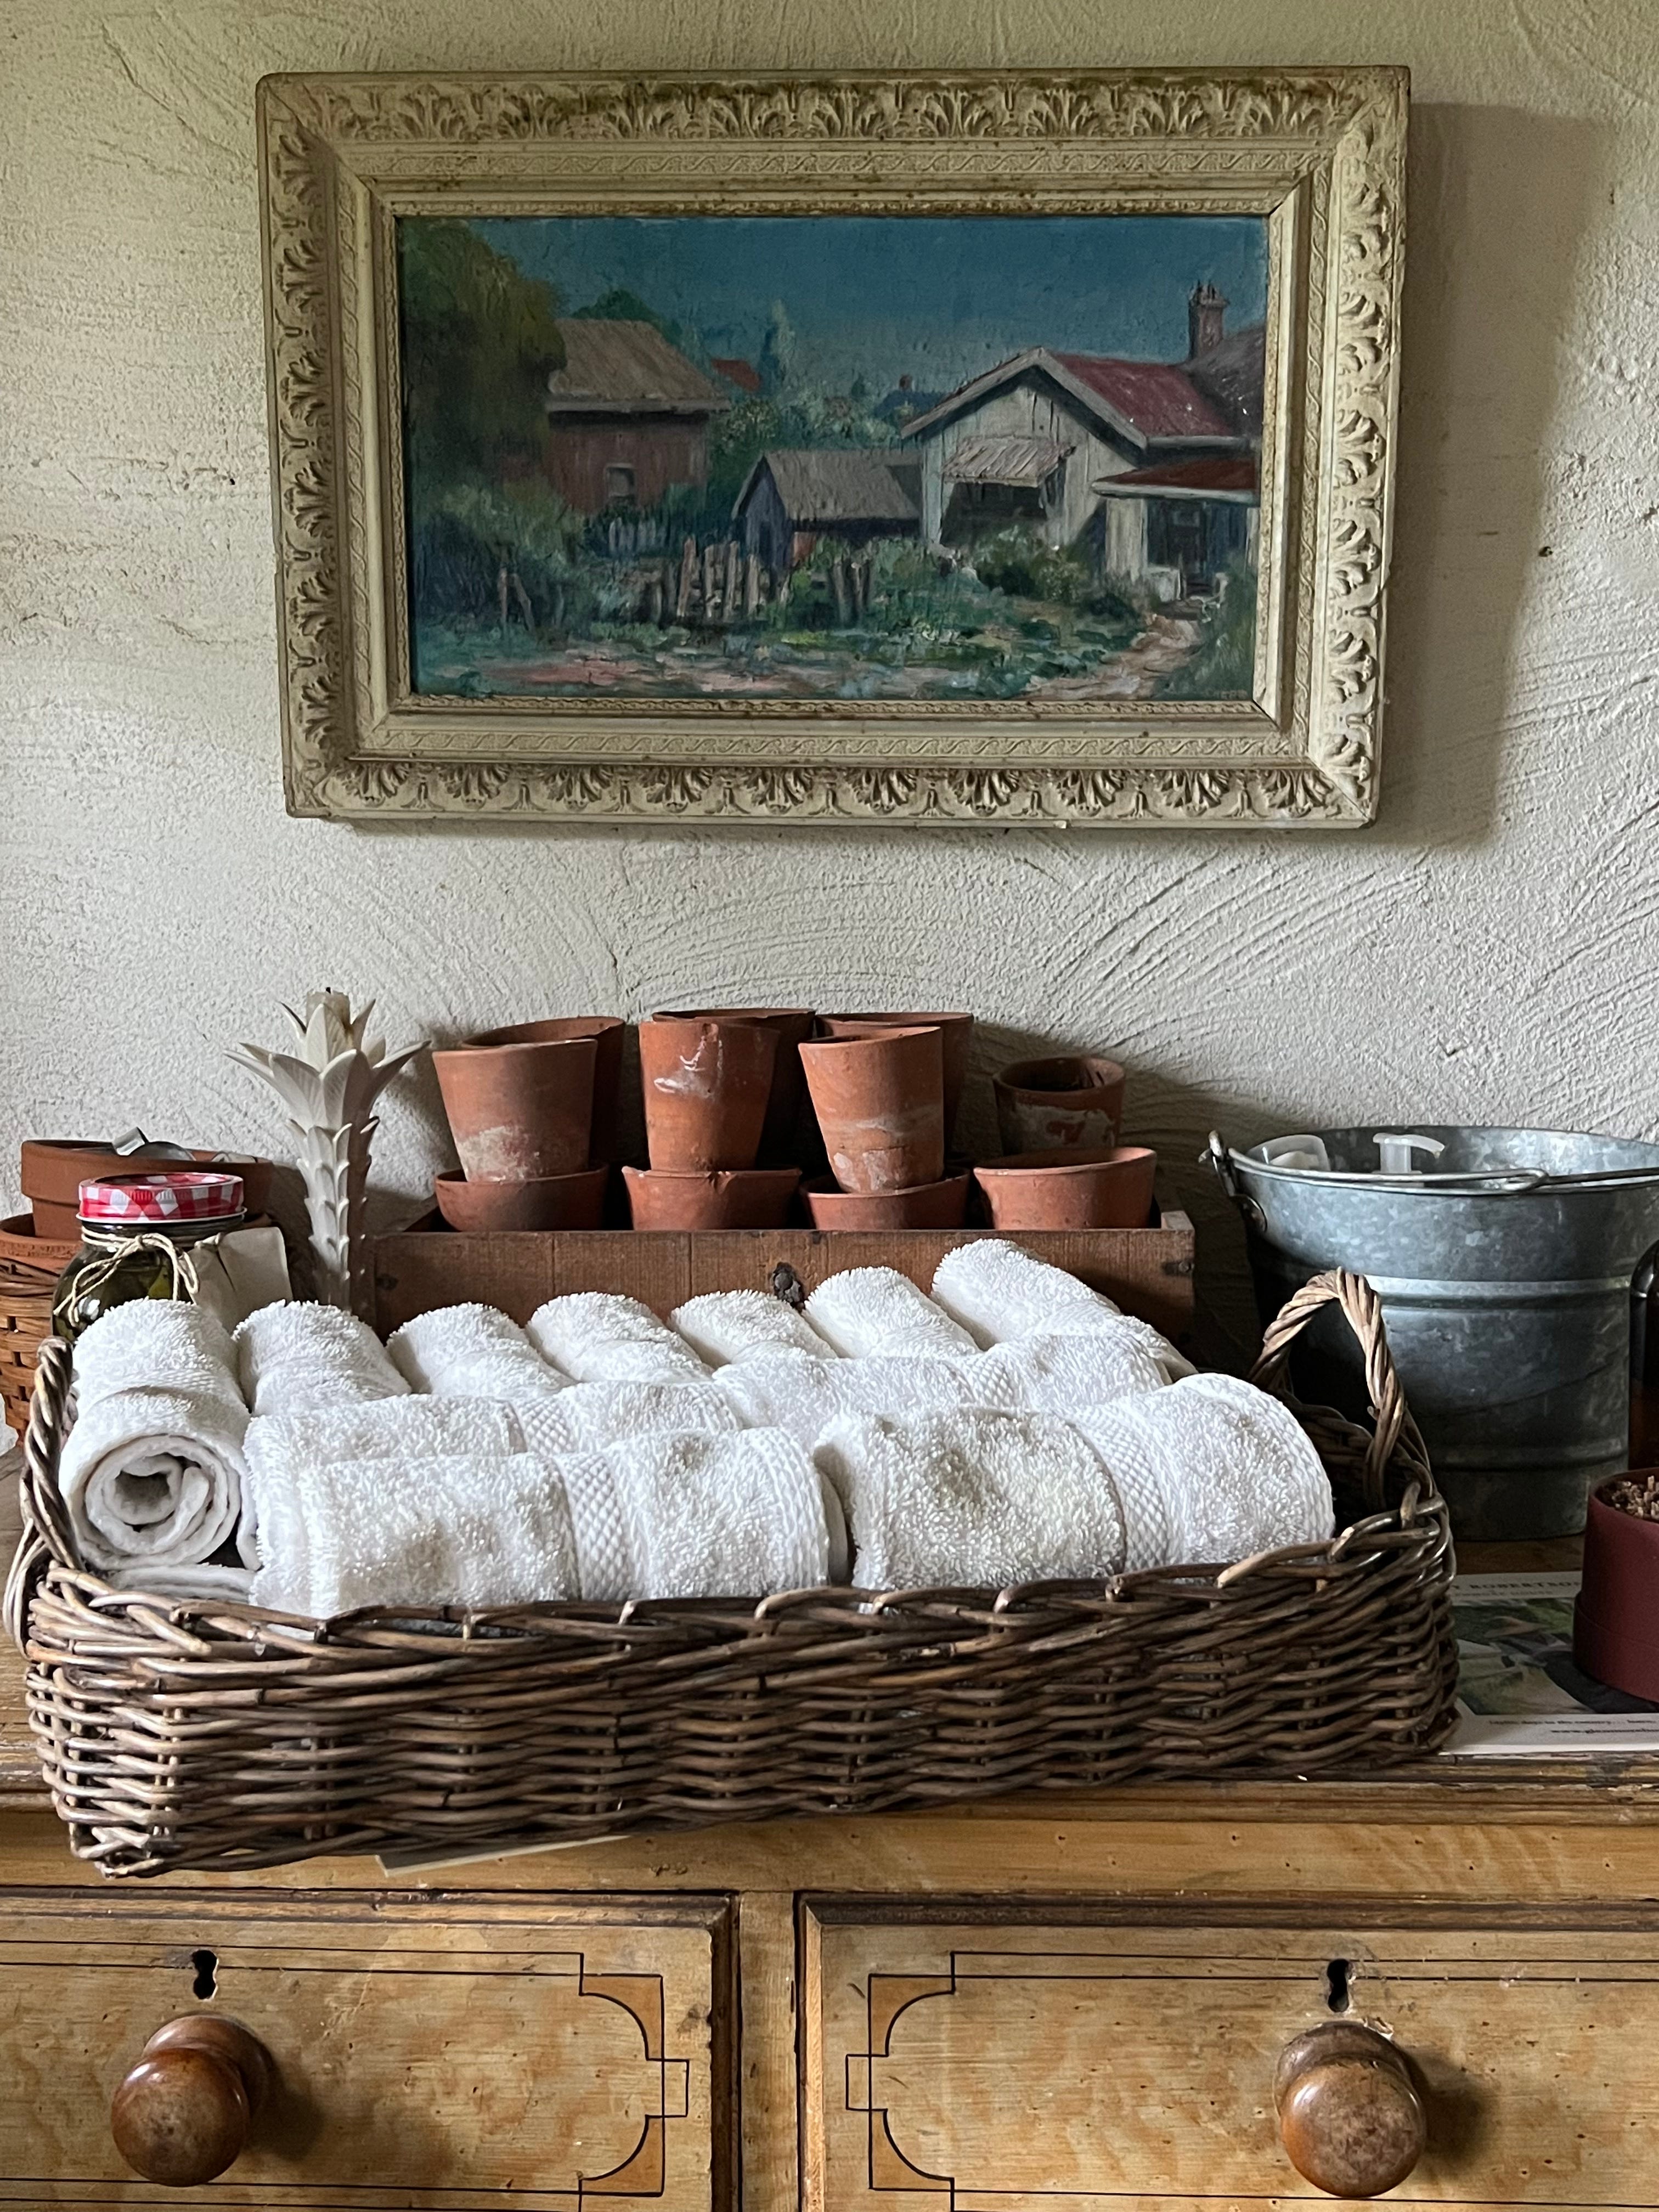
Then…there’s always the post-event laundry to be done! These are heading back to the drawer in the Dairy…I haven’t yet ironed the linen napkins!
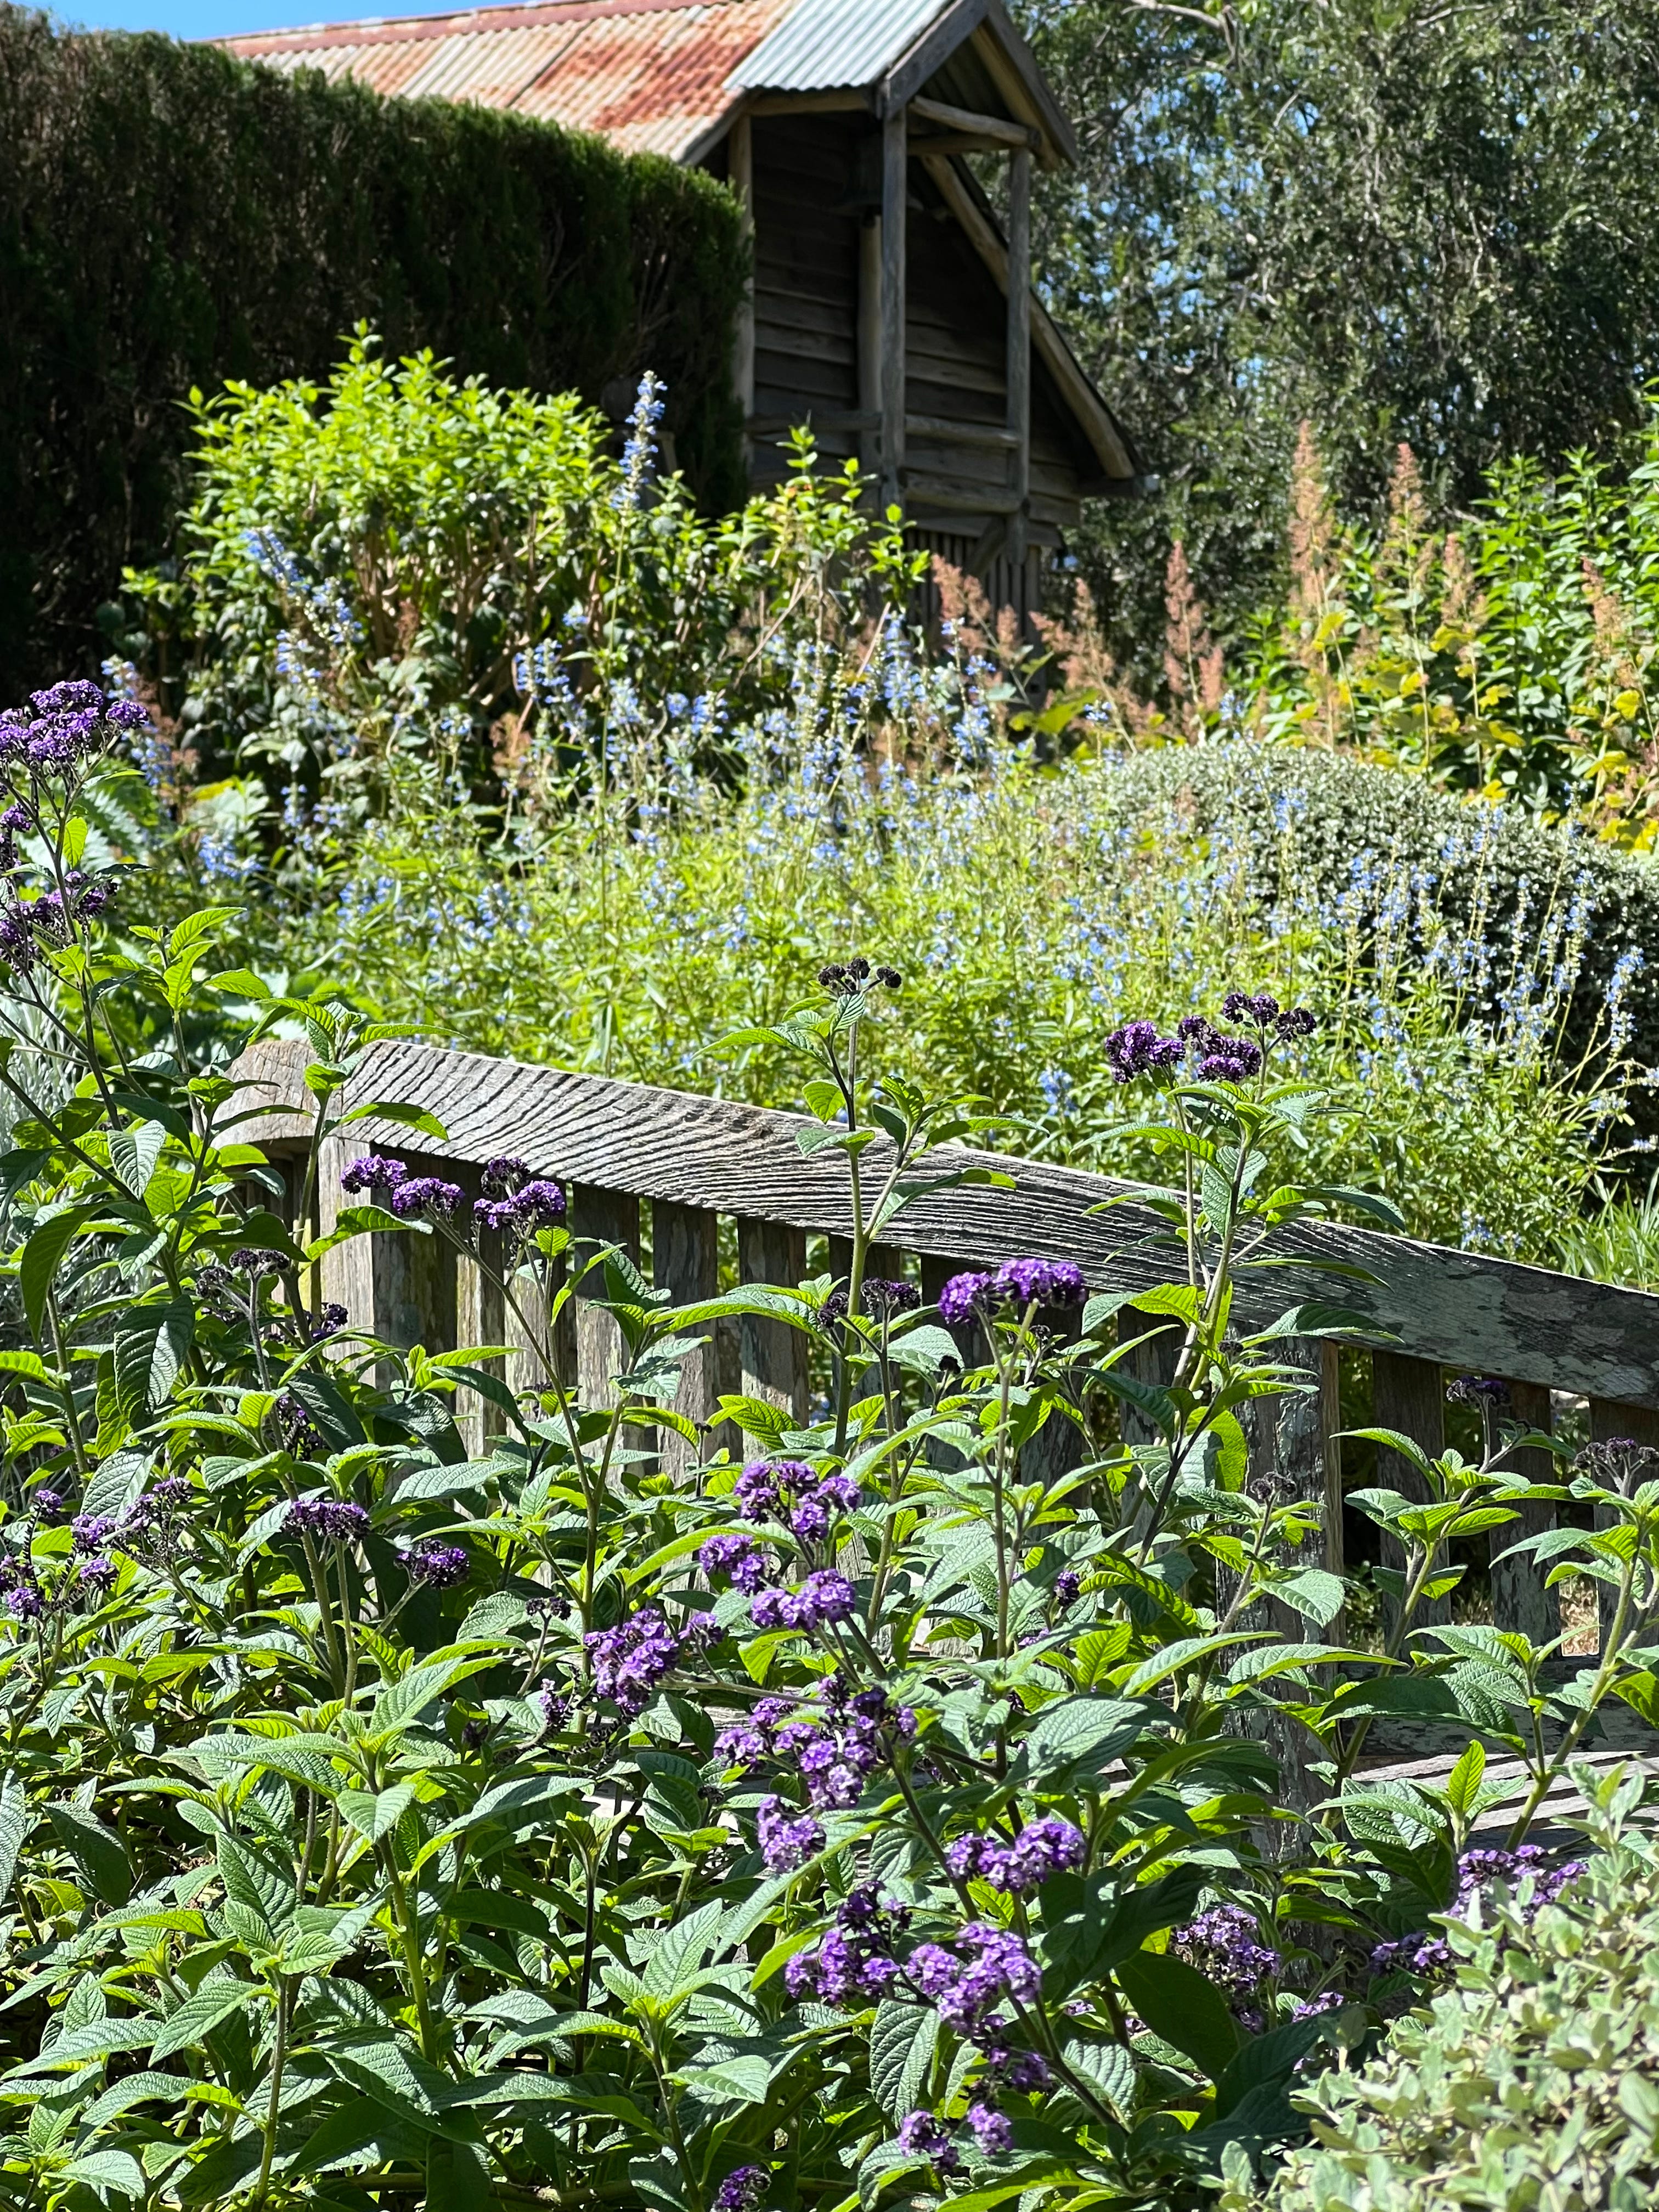
I love The Arc at this time of year. Facing (and supporting) the courtyard / western side of the house, it’s a bit out of control! From my desk, I can see this view in reverse, backed by a borrowed landscape that is Rowan’s Hill. I’ll show you an image of that one day…it’s very beautiful at the moment…especially in the evenings when the light glows apricot. The building you can see here is the Barn…my once interior design studio, but for many years now, a little shop…perhaps the most secret shop anywhere on earth…it opens, very briefly, on event days!
The purple flower in the foreground is on a shrub called Heliotrope (or Cherry Pie) and although it’s fragrance tends not to carry on the breeze, if you plunge your nose in, it’s exquisite. It’s very happy in this spot, atop the drystone wall, where its roots bake each afternoon in the westerly sun…not an easy ask. It’s next to a few clipped plants of Teucrium fruticans and I enjoy the way the clipped sits next to the loose…two diverse habits side by side. To its left, though out of view is a Curry plant Helichrysum italicaum that I want to replace as this one has got very old and woody. I will have a great deal to tell you about this particular plant as we go forward! Behind you can see the spires of Salvia azurea (bog sage). I think it’s changed its name to something else (I don’t know why these name changes must be made…but I do think that colloquial name is a bit out of sync, as I hesitated to plant this for years…knowing that we have nowhere remotely bog-like and yet in this spot, it thrives!). I should have cut it down in January, so as to promote another flush of growth, but it’s been so constant I haven’t been able to bring myself to do it. There’s another huge clipped Teucrium and then, behind…you can see the tall spires of the plume poppy Macleaya cordata. I want to talk about this one as a specimen at length…so I’ll leave that for another time...
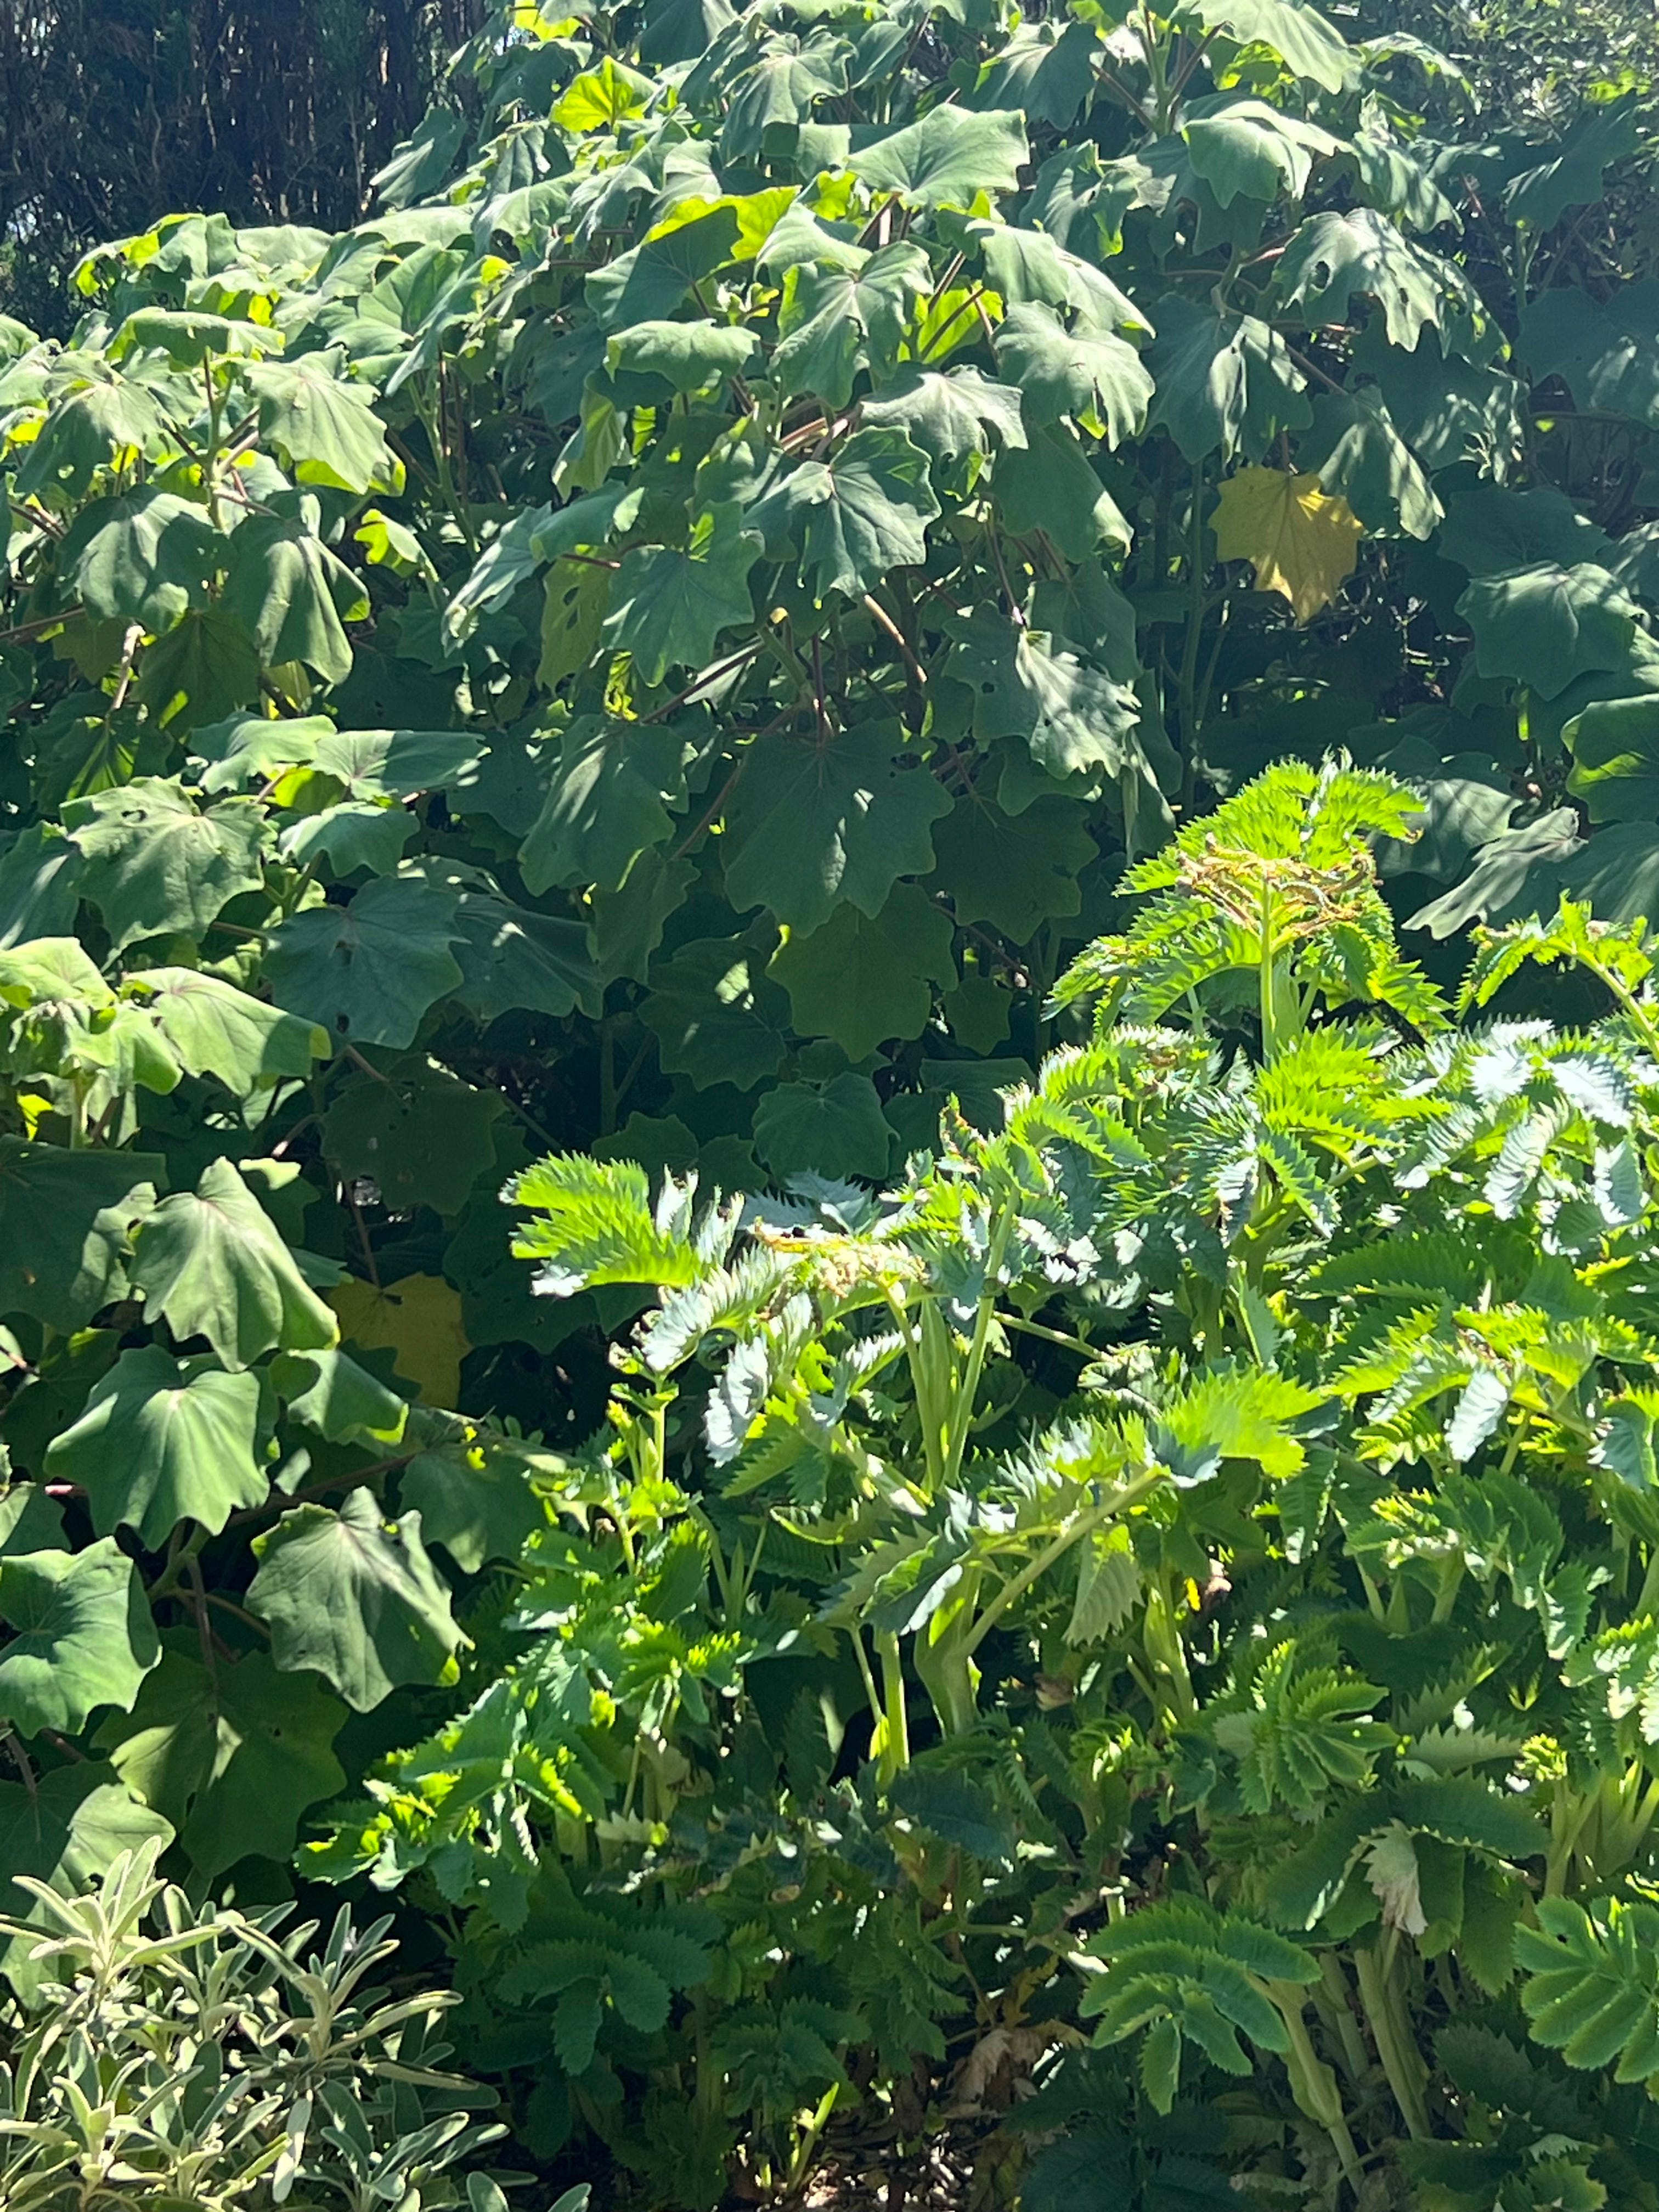
Because the reason I’m focussing on this part of the garden is to acknowledge that now is the time to remove overgrown branches of Roldana petasitis…a late winter flowering shrub with large, soft, velvety leaves that is smothering the Melianthus major in front of it. This weekend…I aim to take my secateurs to all the front growth to free up the young, heavily serrated leaves of the Melianthus (its tall flowering spikes were cut to the ground in January…if you don’t do it then, it gets horribly leggy and unattractive). Both these plants really do their thing in sprinter…that season betwixt winter and spring that in our climate, is a real thing. At that stage, the other plants you see in the previous image are quite dormant, so then…it’s these two whose moment it is to shine. But they won’t…if I don’t sort them out now! Next time you see them…they’ll be doing their thing!
By the way, the Roldana came from lovely Anna van der Gardner at Bronte House some years back. Bronte…is my absolute favourite garden in Sydney and has a couple of autumn open days coming up on 17 and 23 March 10 - 2pm.
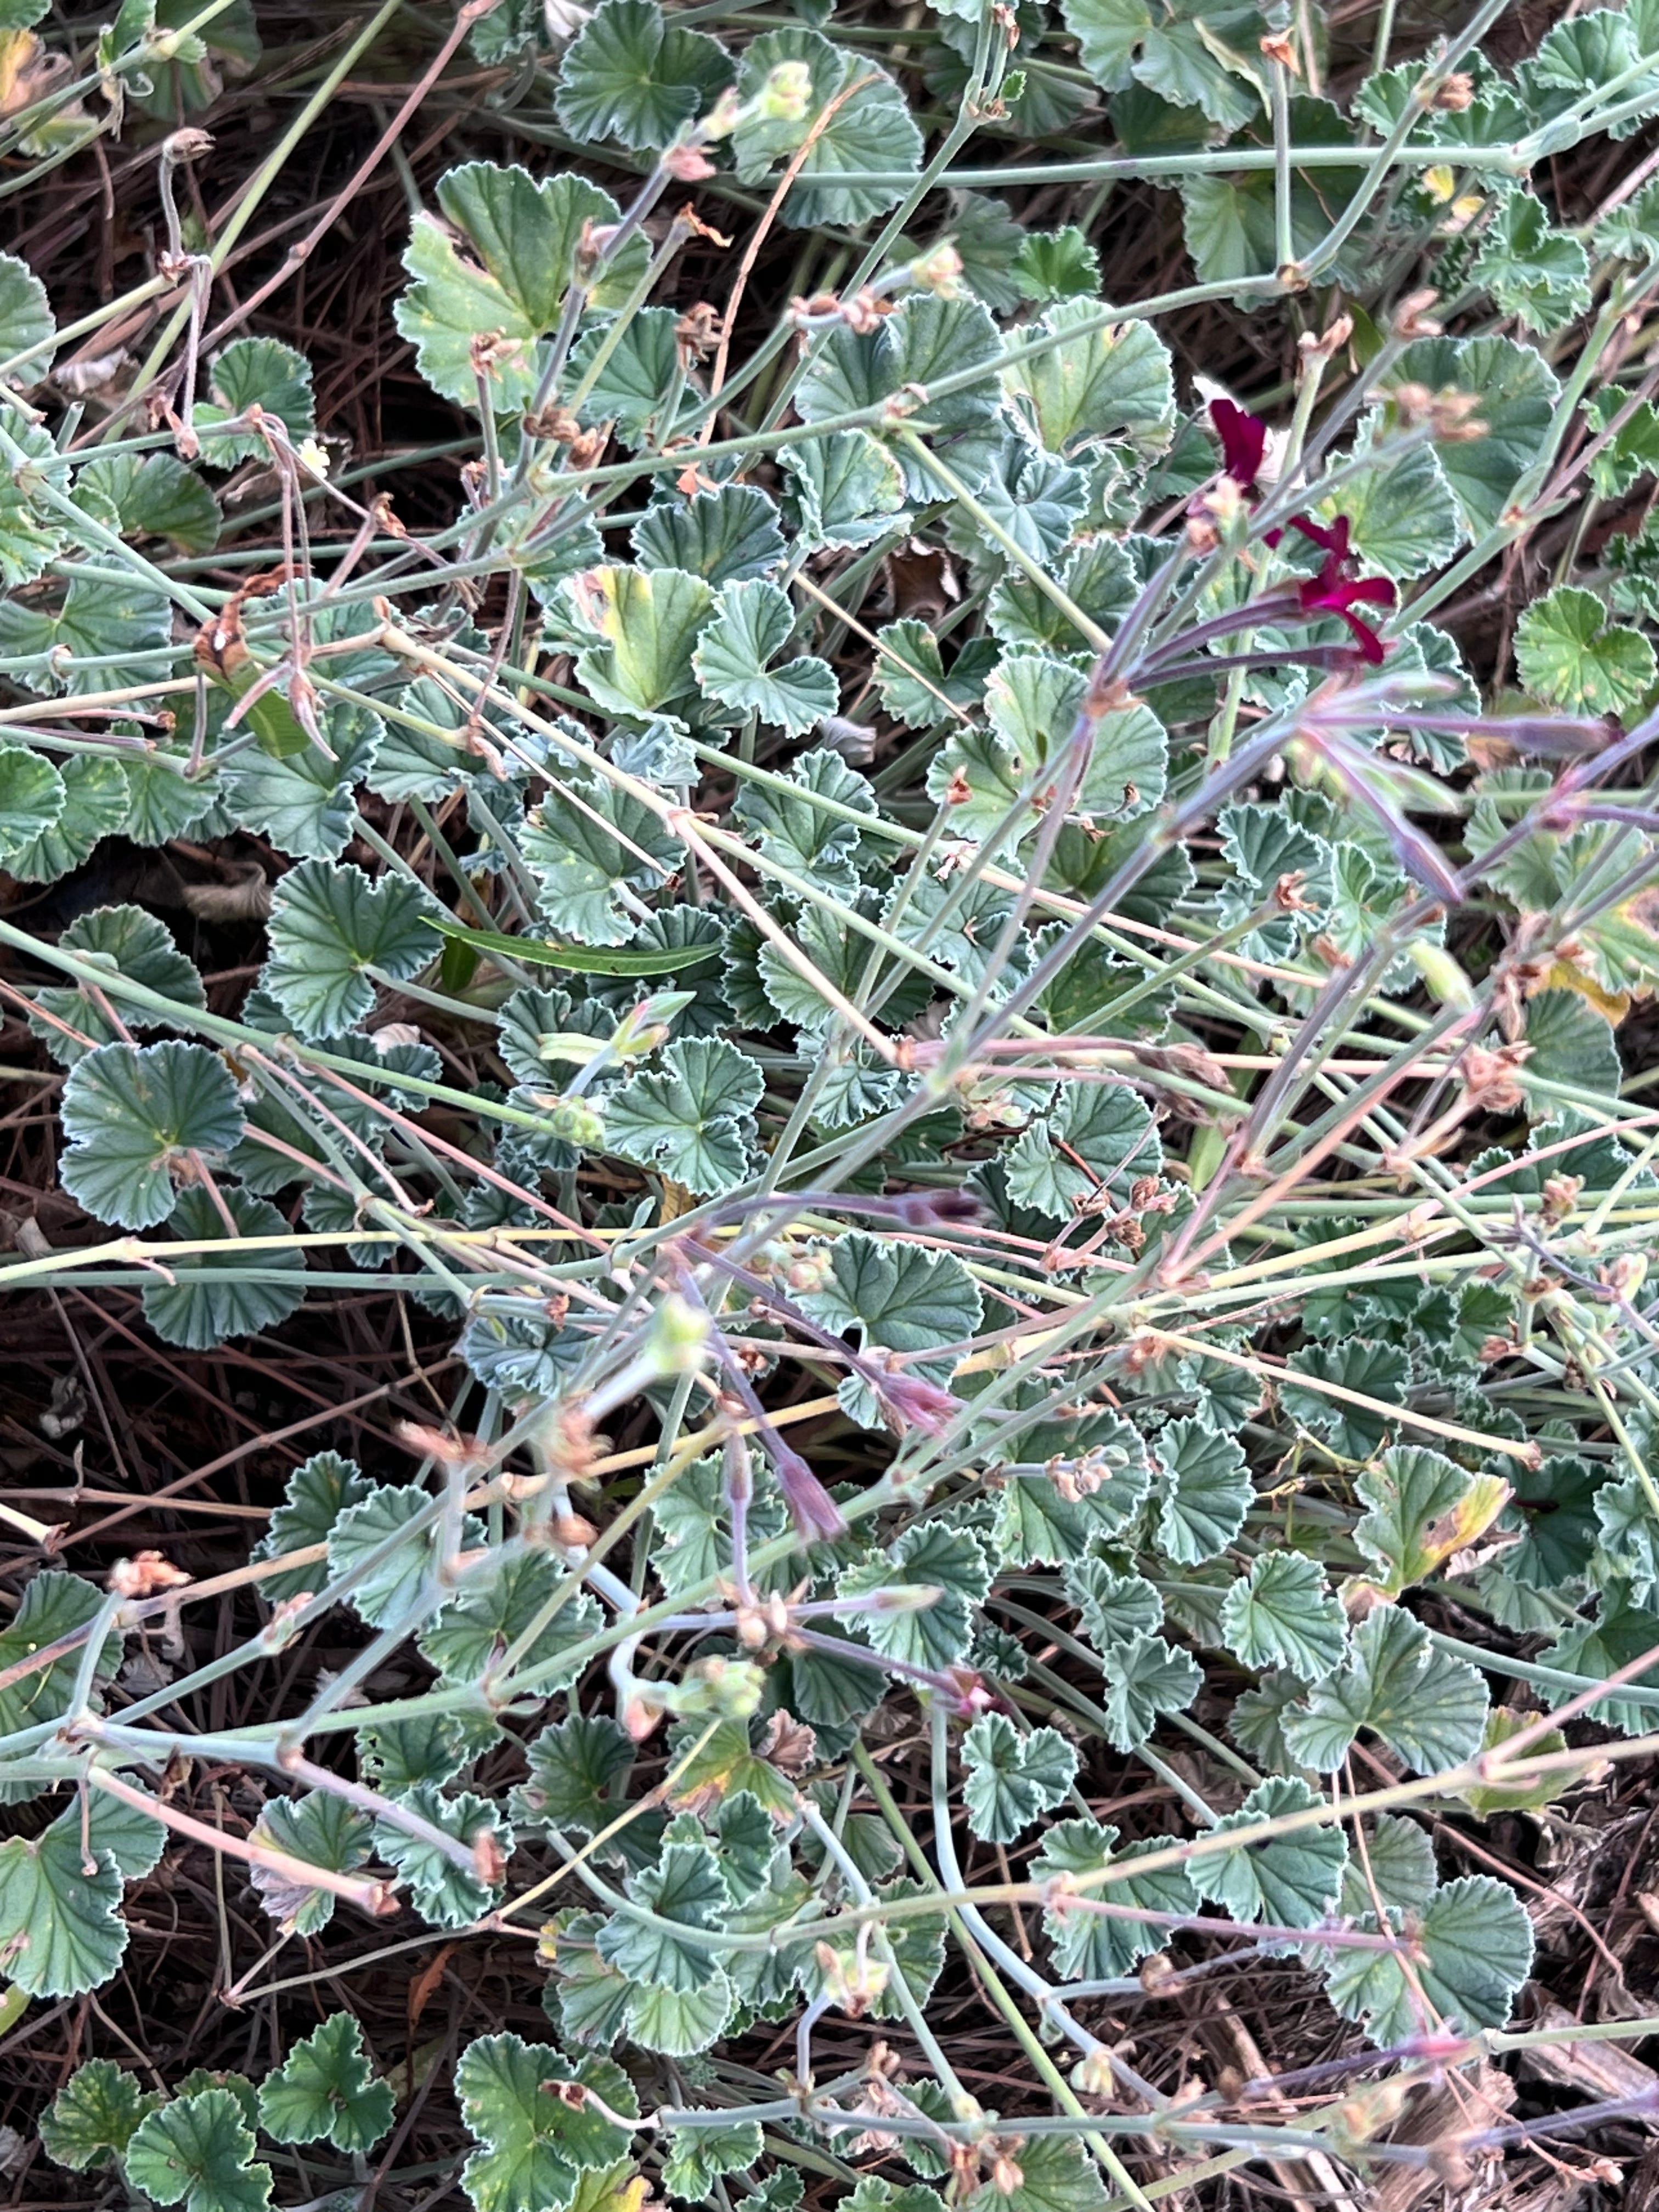
Similarly, Pelargonium sidoides has had a lovely flowering time (also sitting atop the drystone wall) and it’s time to cut each stem (I cut them individually) back to its base…removing all the detritus of spent stems and returning the plant to a neat mound of grey/green foliage.
I will continue to mention individual specimens in this vein as we go forward because…I know so many of you have plants from here in your own gardens (whether you’ve bought them at an open garden or I’ve given you a cutting…many, many cuttings leave here!). Or perhaps it’s the plant you meant to ask me about and forgot…or you have it and are not sure….
Now let’s go to the kitchen garden!
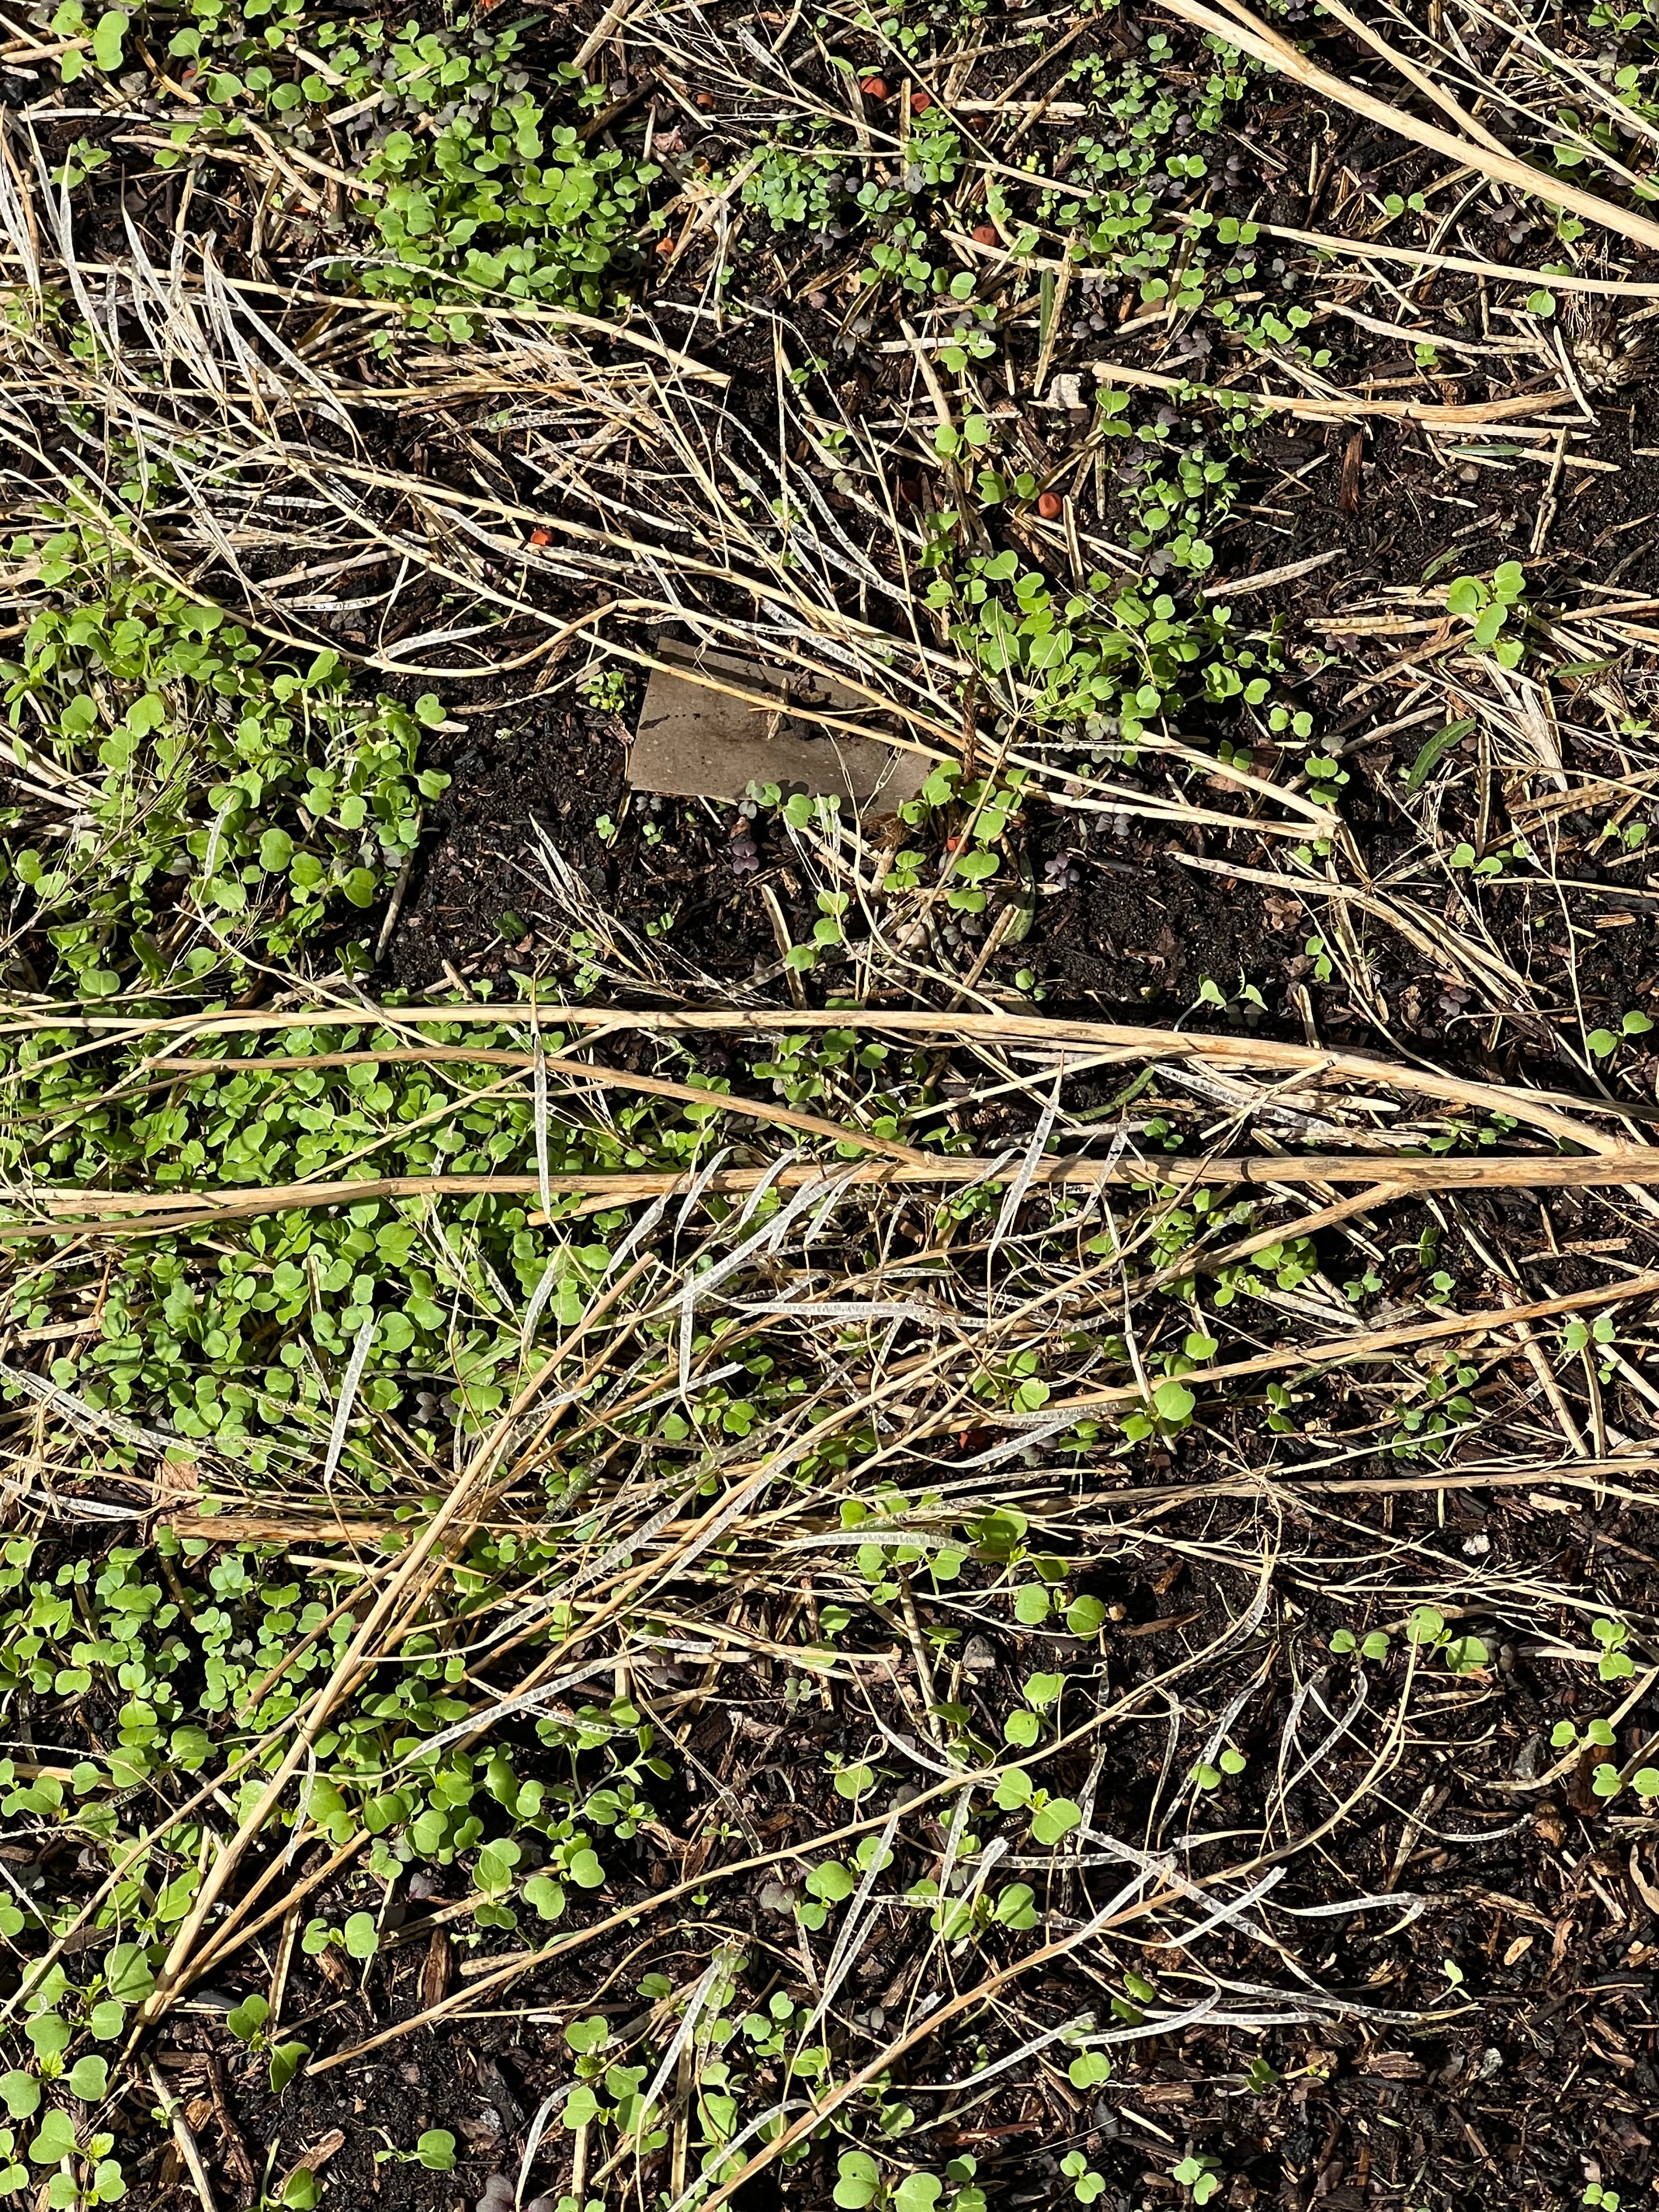
First up…what’s this? I hear you say? Well…this really is to show the results to those keen kitchen gardeners who joined me on the last summer Sunday…just 12 days ago! As a final activity, I took them back down to the bottom of the garden and with a flourish…tossed a great mix of out-of-date seed I’d been saving (confident that a new batch has germinated and will be likely to replace the old seed gathering dust) into an empty space (it was covered with hessian before I did this!). This is something I’ve been doing for many years…and it’s just so much fun! If you have children, I especially encourage you to give it a whirl, but honestly…every age gasps in wonder! The result from this wild seed-flinging-episode is like a treasure chest…and from it, we will eat like kings!
I keep a lot of my seed ‘on the stem’ and simply store it, quite haphazardly, in large brown paper carry bags (breaking every rule in the book!). I behave moderately better with peas, beans and various other seeds, but for things like rocket, mustard, brassicas…fennel, carrot, parsley (there’s another I’ll come back to!) this system works well (for me anyway).
How long before they germinate? Was the question on the day. Well…a fine carpet of newly germinated seed was visible the following Wednesday…and I began picking micro-greens last weekend…so one week ‘til something to eat…even if that something is very fine…it is very tasty! So far, it’s mostly baby Cima di Rappa (and I adore it when it’s tiny…equally when it’s flowered, though it’s powerfully strong at the time you’re meant to eat it!) and tiny Red Elk Mustard leaves. Both are beaut scattered into a leaf salad for a bit of punch…or over potatoes, pasta, an omelette….I’ll keep you in the loop with its progress…after all, you’ve now joined my keen kitchen gardeners!
Before I got so distracted with event prep last Saturday afternoon, I worked like a mad woman in the kitchen garden! First there was a lot of tying up to do (tomatoes…always a Saturday job throughout the summer and autumn months) and cutting back spent zucchini leaves, removing cucumber vines that are done and dusted…except for two…which are…dare I say…producing again!
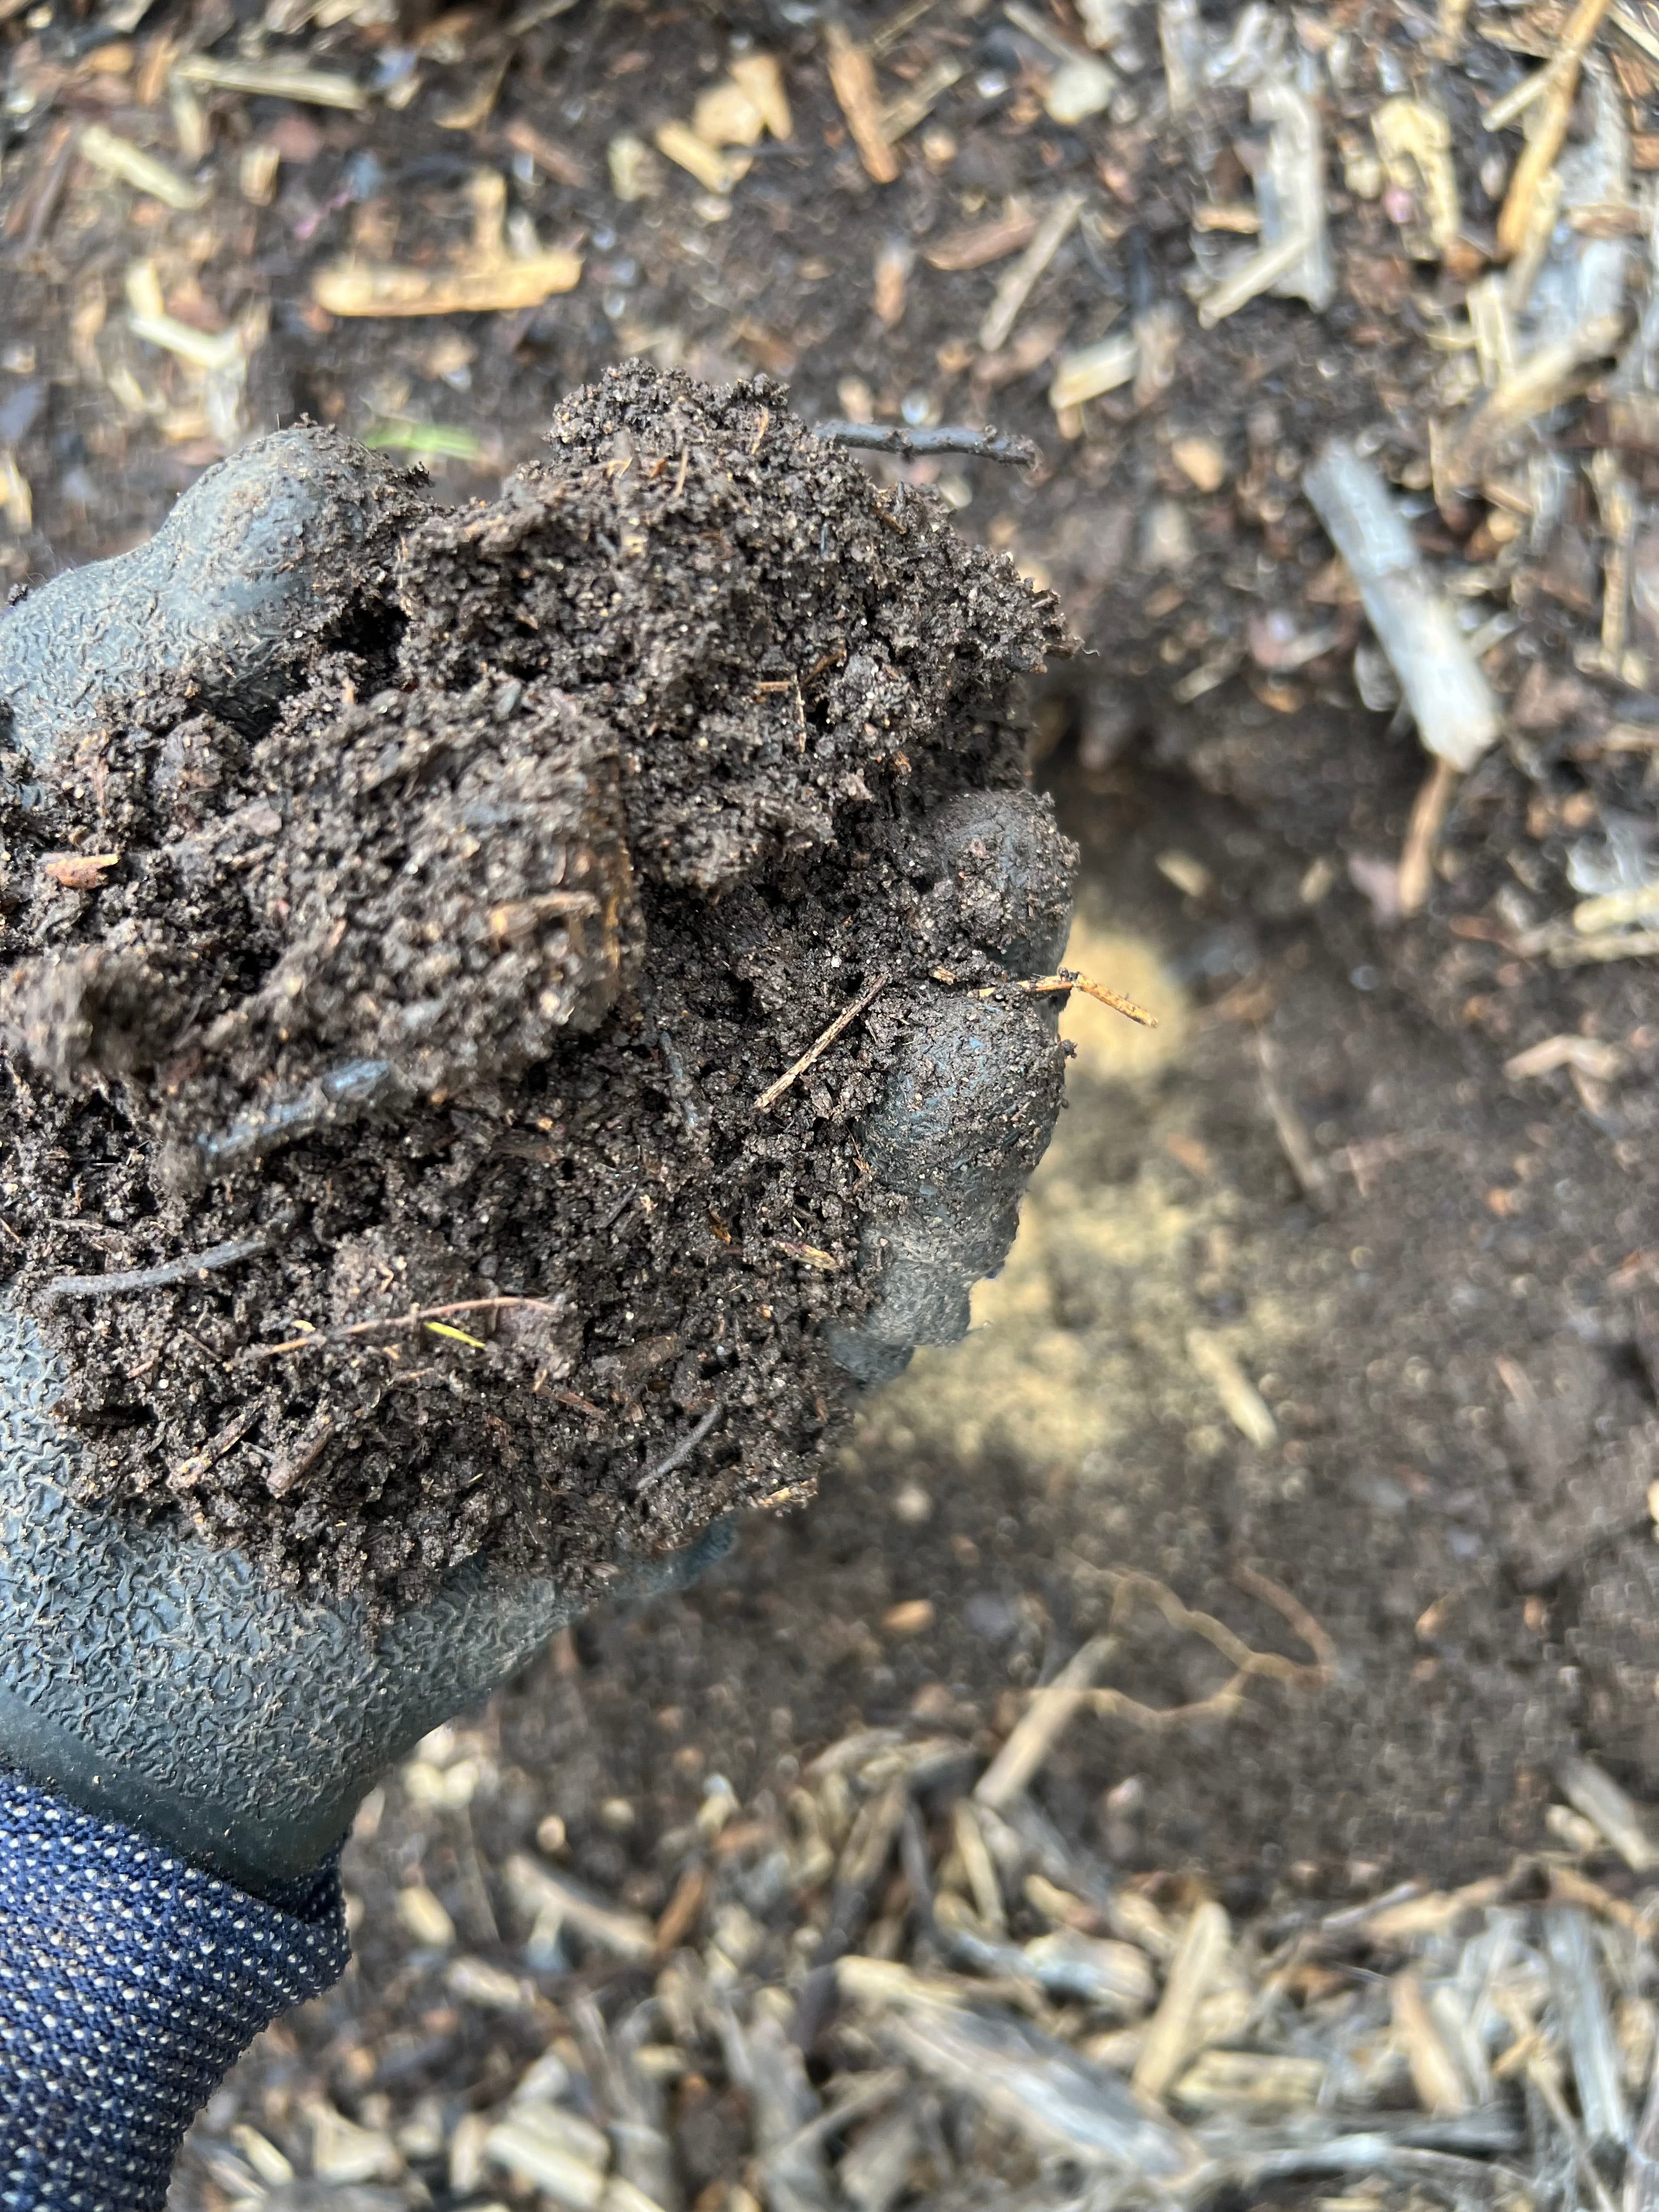
But I was keen as mustard to begin planting my brassicas. So…I did just as I suggested last week and took a good look at the soil where I wanted to plant. I elected not to fork/aerate in most of the bed and instead, gently dug each individual small hole, dropped a good dollop of blood and bone at the bottom, added a good handful of our own compost and then…dropped in each seedling. At each point of soil disturbance, I encountered all manner of little organisms on the move…including earthworms squirming away from my prodding. (I so hate when I chop one in half by mistake…I’m pleased to report there were no casualties last week!).
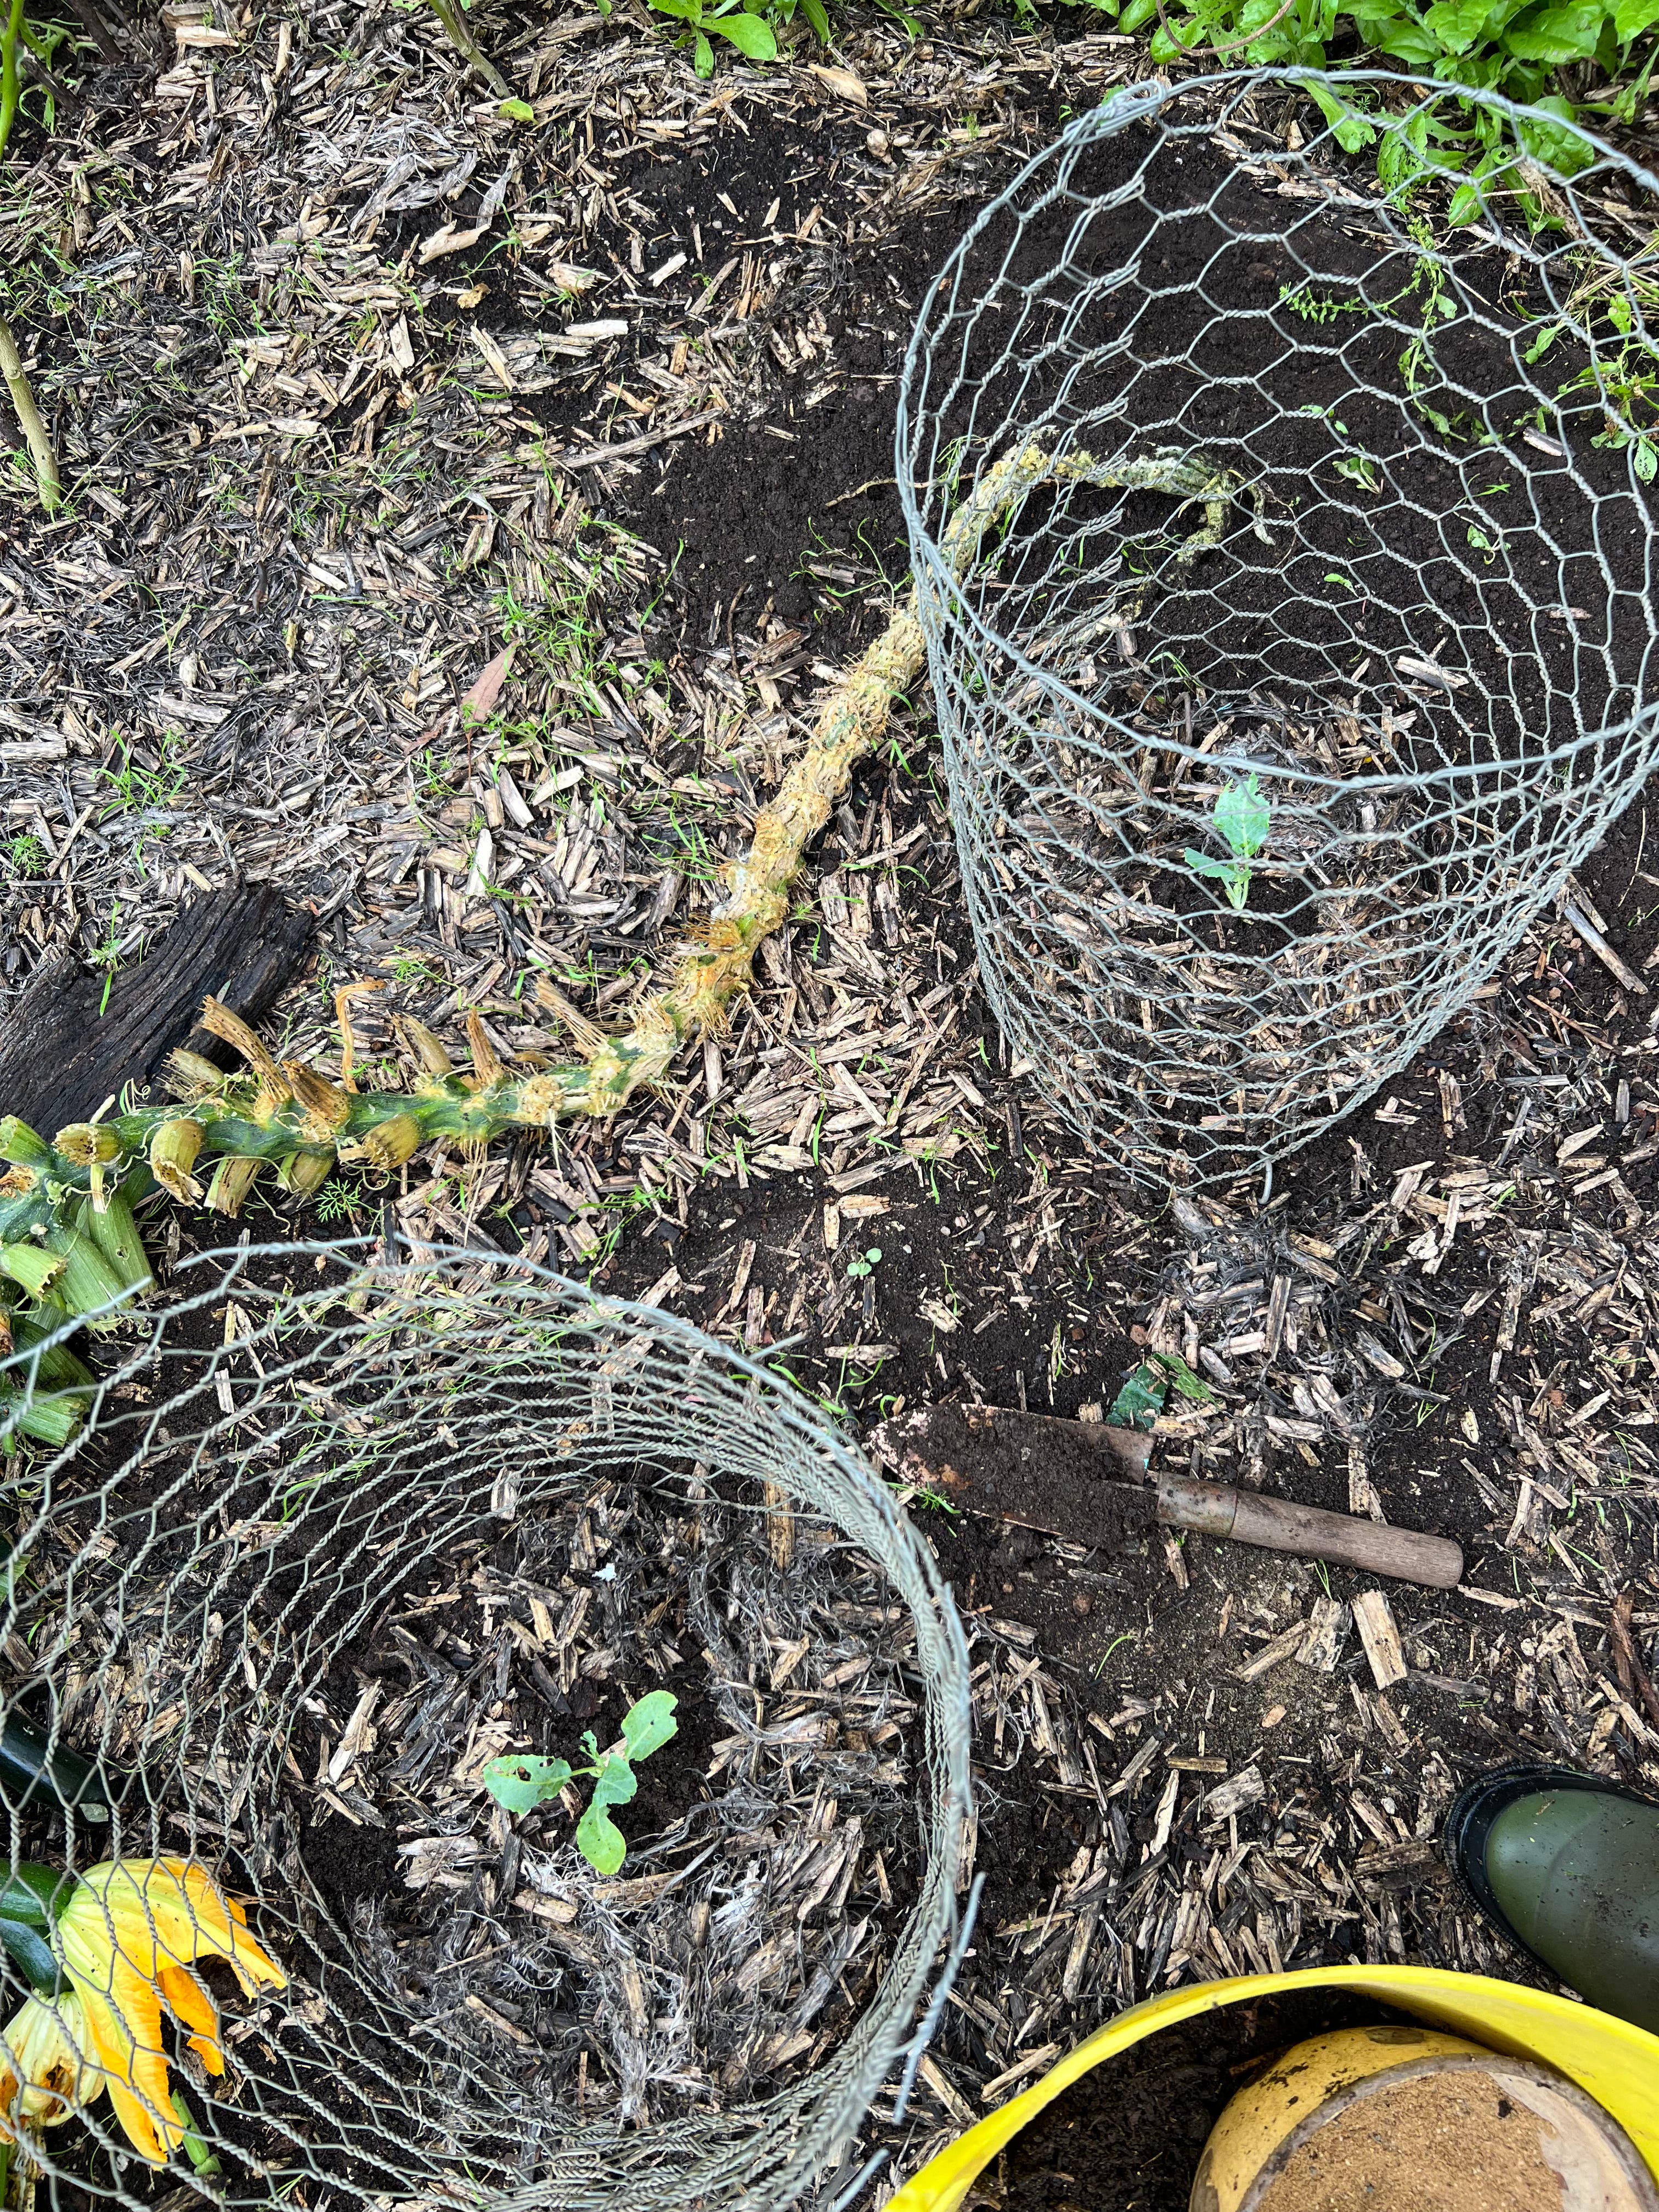
In keeping with my philosophy of planting from south…to north…I managed to squeeze two cauliflowers close to the sprawling old zucchini where you can clearly see I had planted it…at the south end of that bed at the beginning of last season and it has been creeping its way towards the sun ever since…thus ensuring its huge leaves are nowhere near my newly planted cauliflower seedlings. At the moment, sure, its roots are well established close by…but it doesn’t have much longer to live and when its spent…by which time my caulies will begin to better establish their own roots, I’ll cut off the zucchini at its roots which will wither, contributing to the makeup of the soil. In the meantime, its existing leaves prevent me from making the mistake of planting a whole row of caulies…ensuring I am successionally planting, so they won’t all be ready to eat at the same time. By the way, if you happen to reading this in the northern hemisphere as I know a few of you are…please reverse this concept and plant north to south!
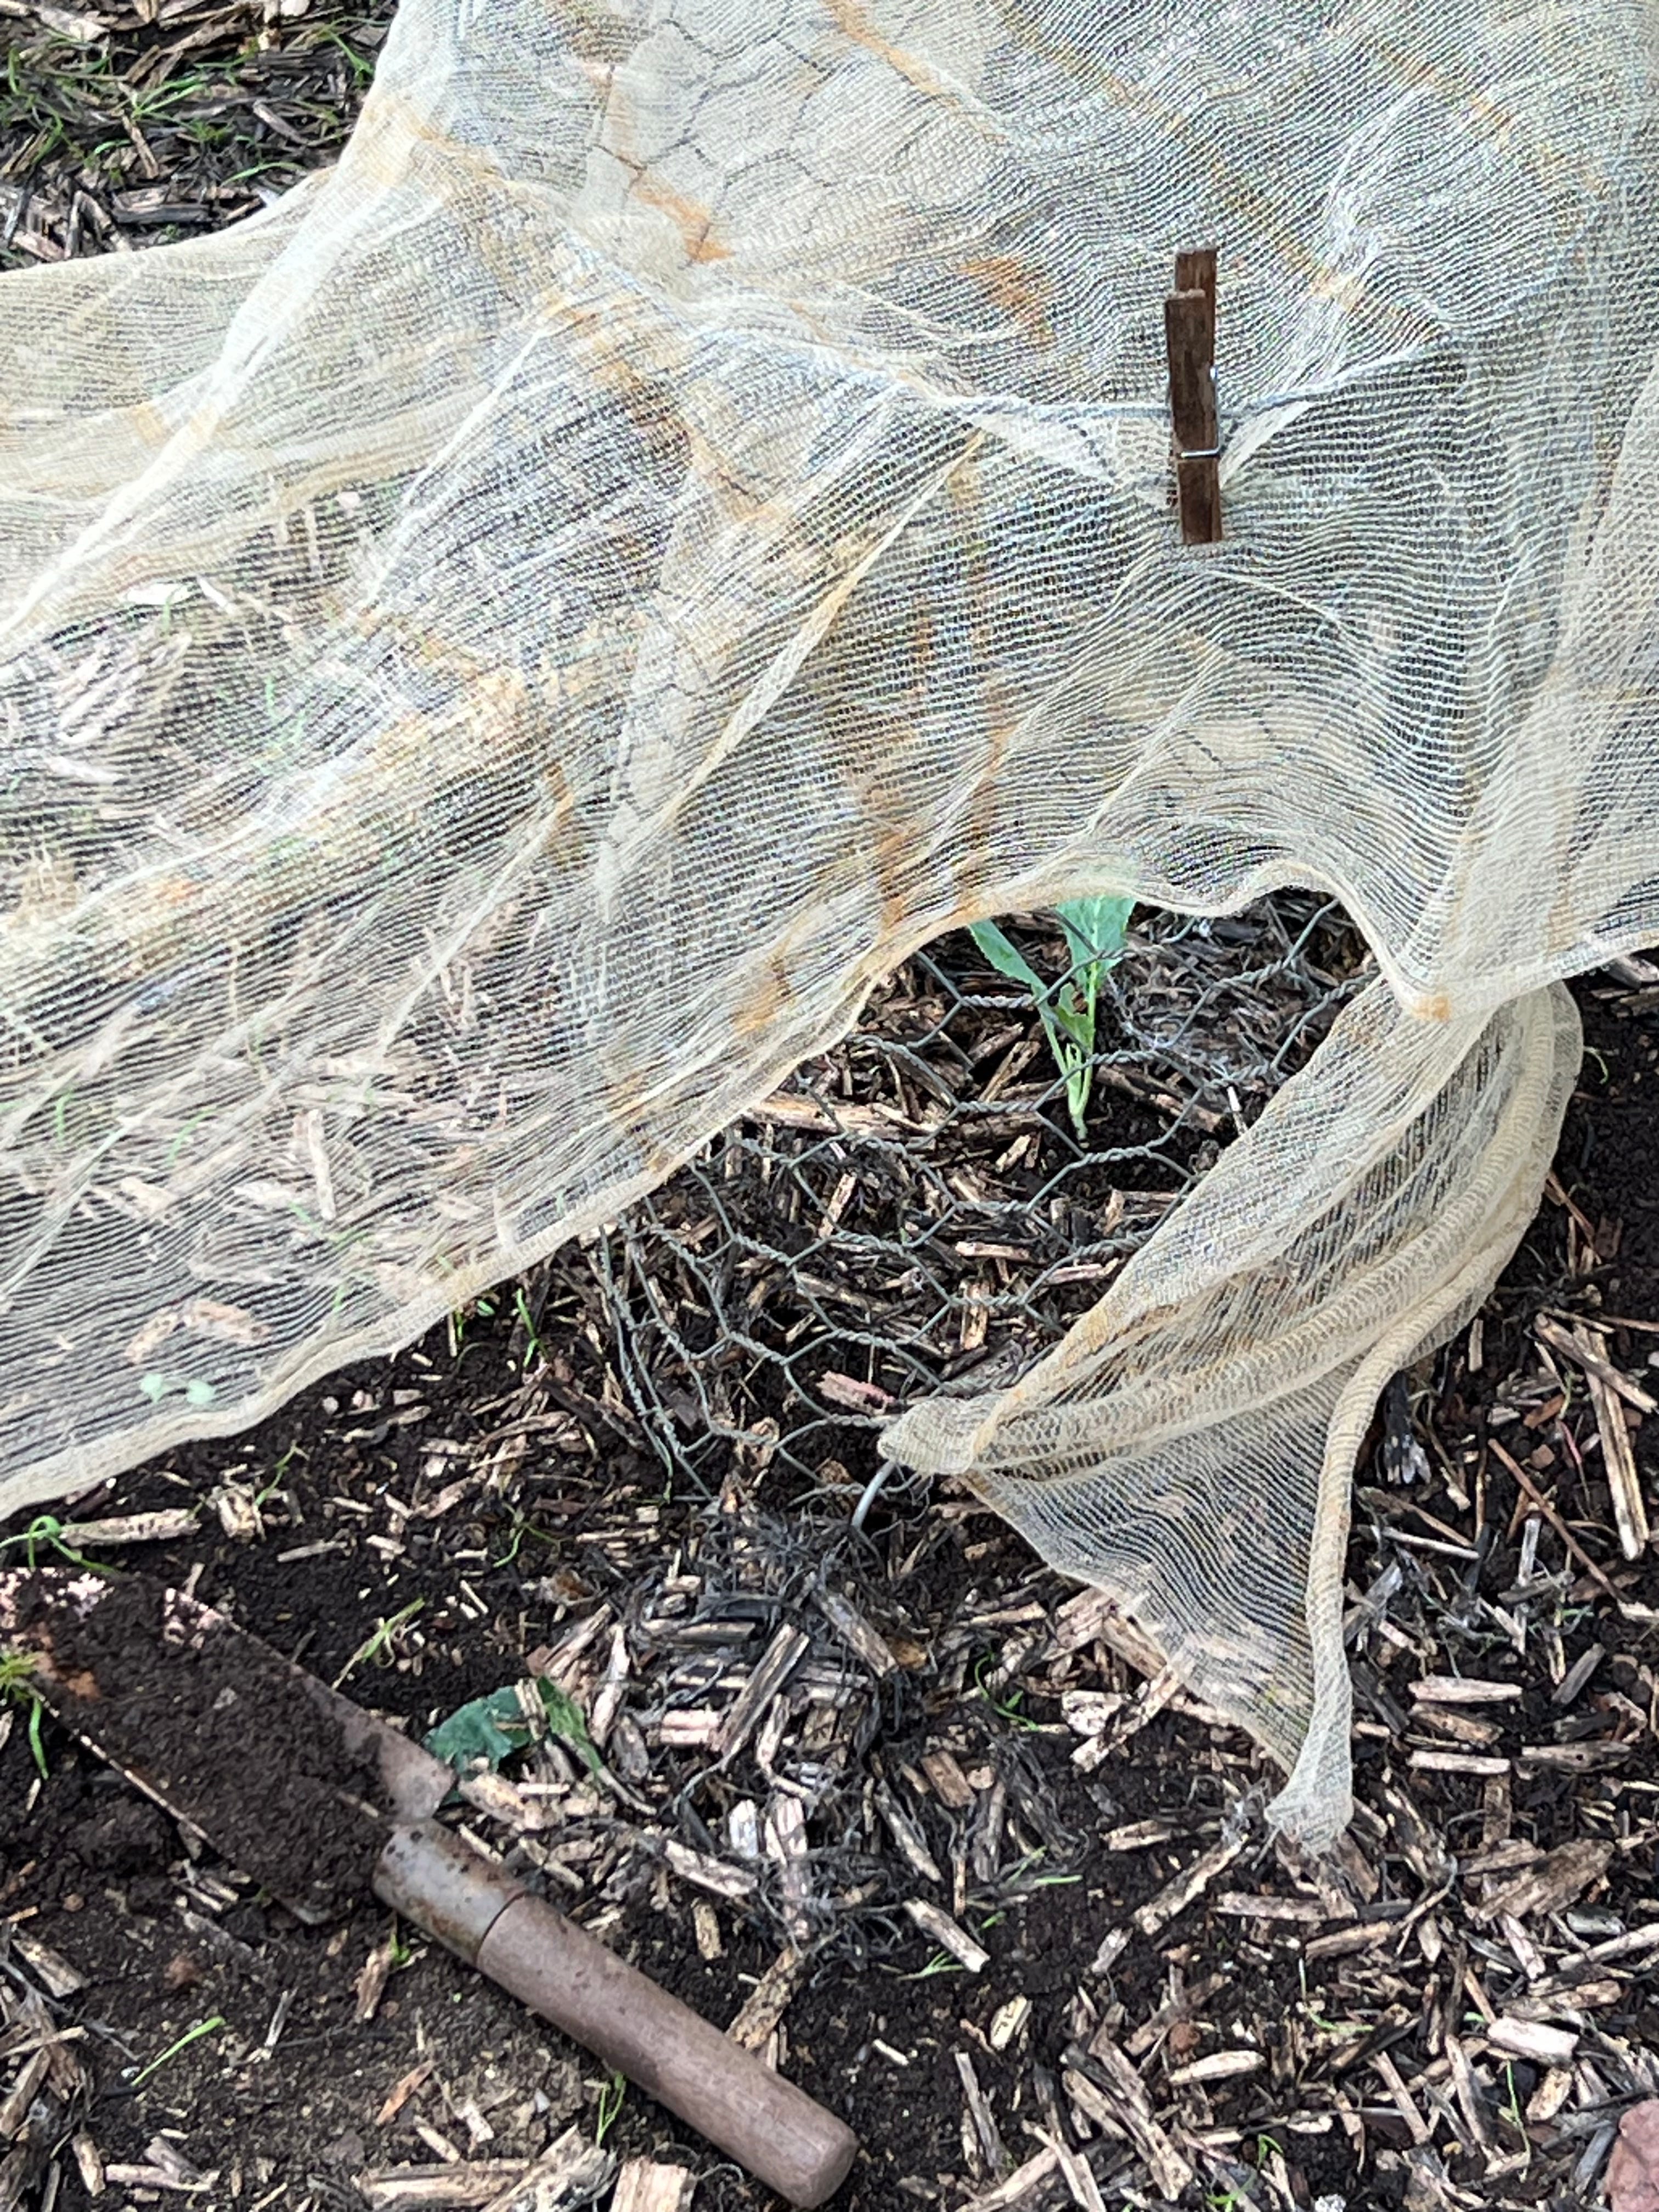
Then….because white cabbage moths are everywhere at the moment (and will be ‘til a frost knocks them all for six) I covered them with net. I find the wire cylinders useful to protect the seedlings from rabbits and bower birds, but also their height handy to peg to…keeping the net off the tiny seedlings. Before planting, I checked each seedling for the tiny yellow eggs that cabbage moths lay - mostly on the underside of leaves. You might think those moths wouldn’t get through the wire but I can assure you…that through even the smallest gauge wire…they can! Something about brassicas must drive those moths absolutely wild because they go to such extreme measures to gain access to those particular leaves!
As you can see…I didn’t do a particularly good job of netting…something I’ll remedy this weekend because…well….have a look at my insta stories this weekend - I’m inclined to upload as I go in the garden but did capture a little video a couple of days ago that I rather wish I hadn’t…you’ll see what I mean…and as a result, will have to check every leaf again for little yellow eggs! And when I find them…I’ll rub them off with my finger!
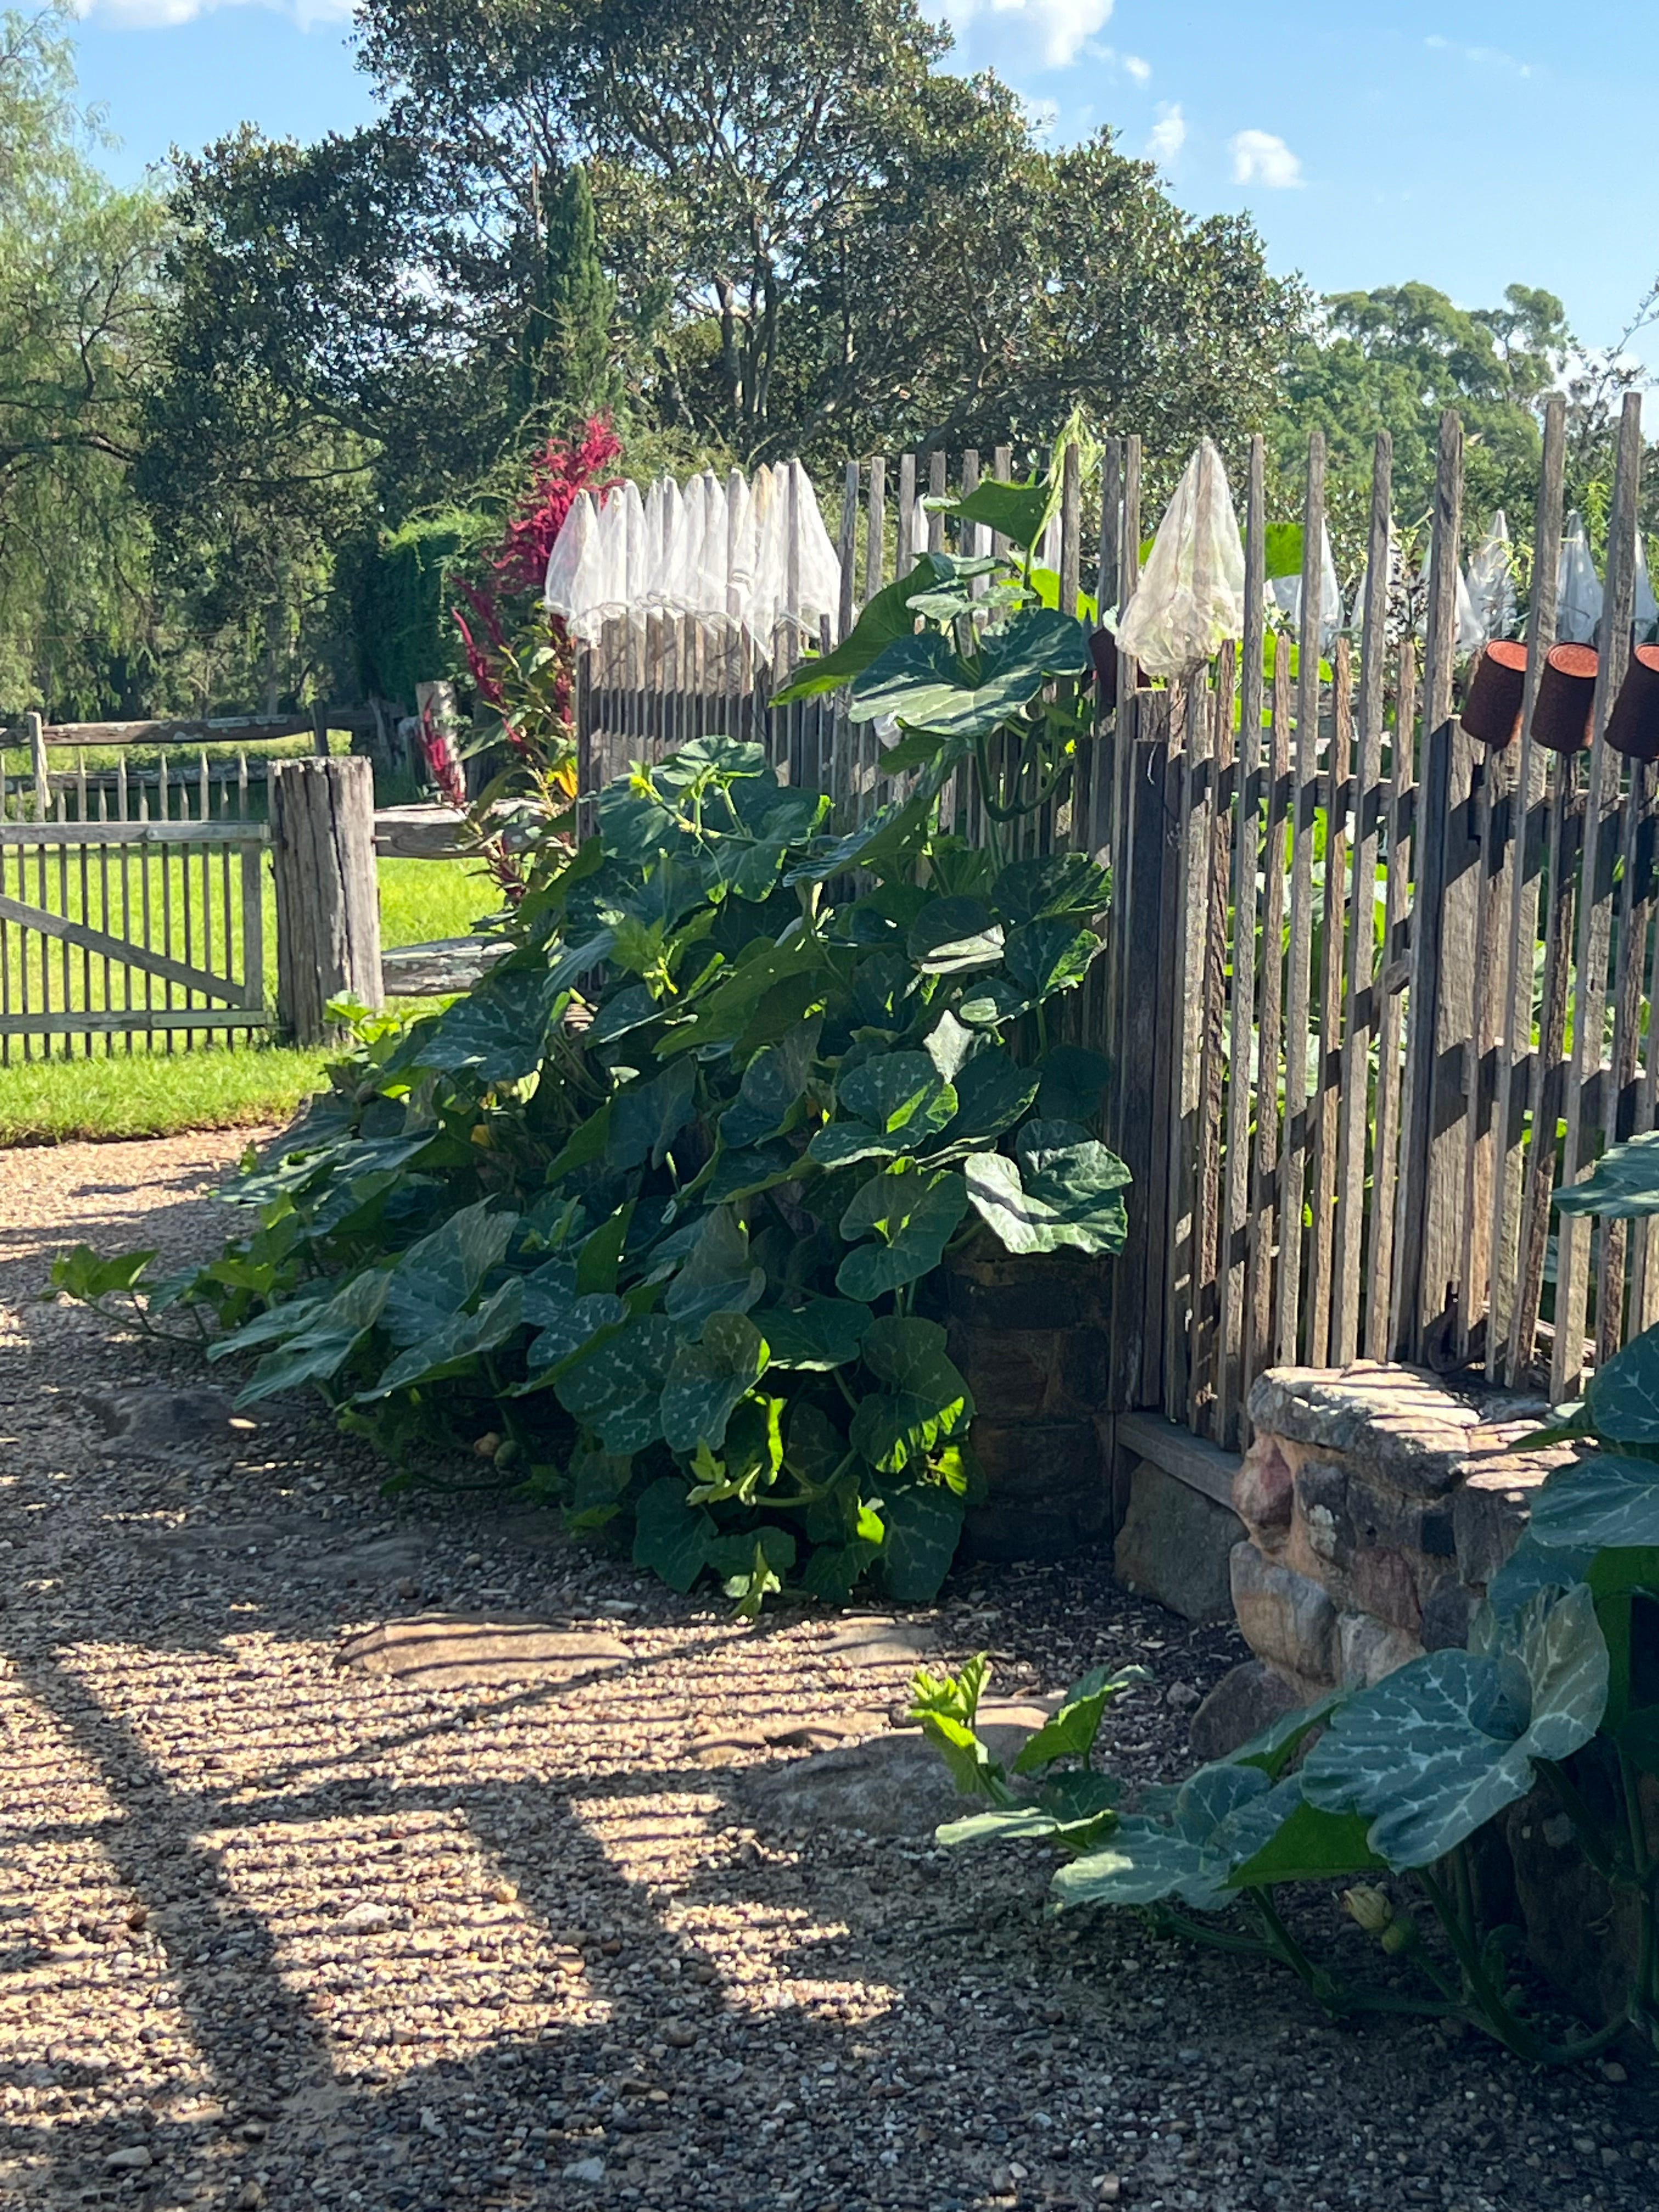
The pumpkins are romping away now and beginning to make a wonderful ruff of foliage around the citrus wall. But it’s to the net bags I want to draw your attention! Between doing duty on various fruit trees, I hang the nets on the fence spikes at the citrus enclosure, where they’re inclined to get washed in the rain, and well dried in the sun…and it means I always know where to find one when I need to! In the last months, they’ve protected apricots, peaches, apples…and I’m now fast taking them off the quinces. There are hardly any left on the fence now…as I’m re-purposing them to…
The tomatoes! For us, tomato season comes late (and this year in particular it’s later than ever…which goes back to last year when I had so many spring events, I failed to pot-on in time and then to plant in time, despite sowing my seed with a good germination rate on time!). I’ve been playing catch-up ever since….but…their time is almost here!
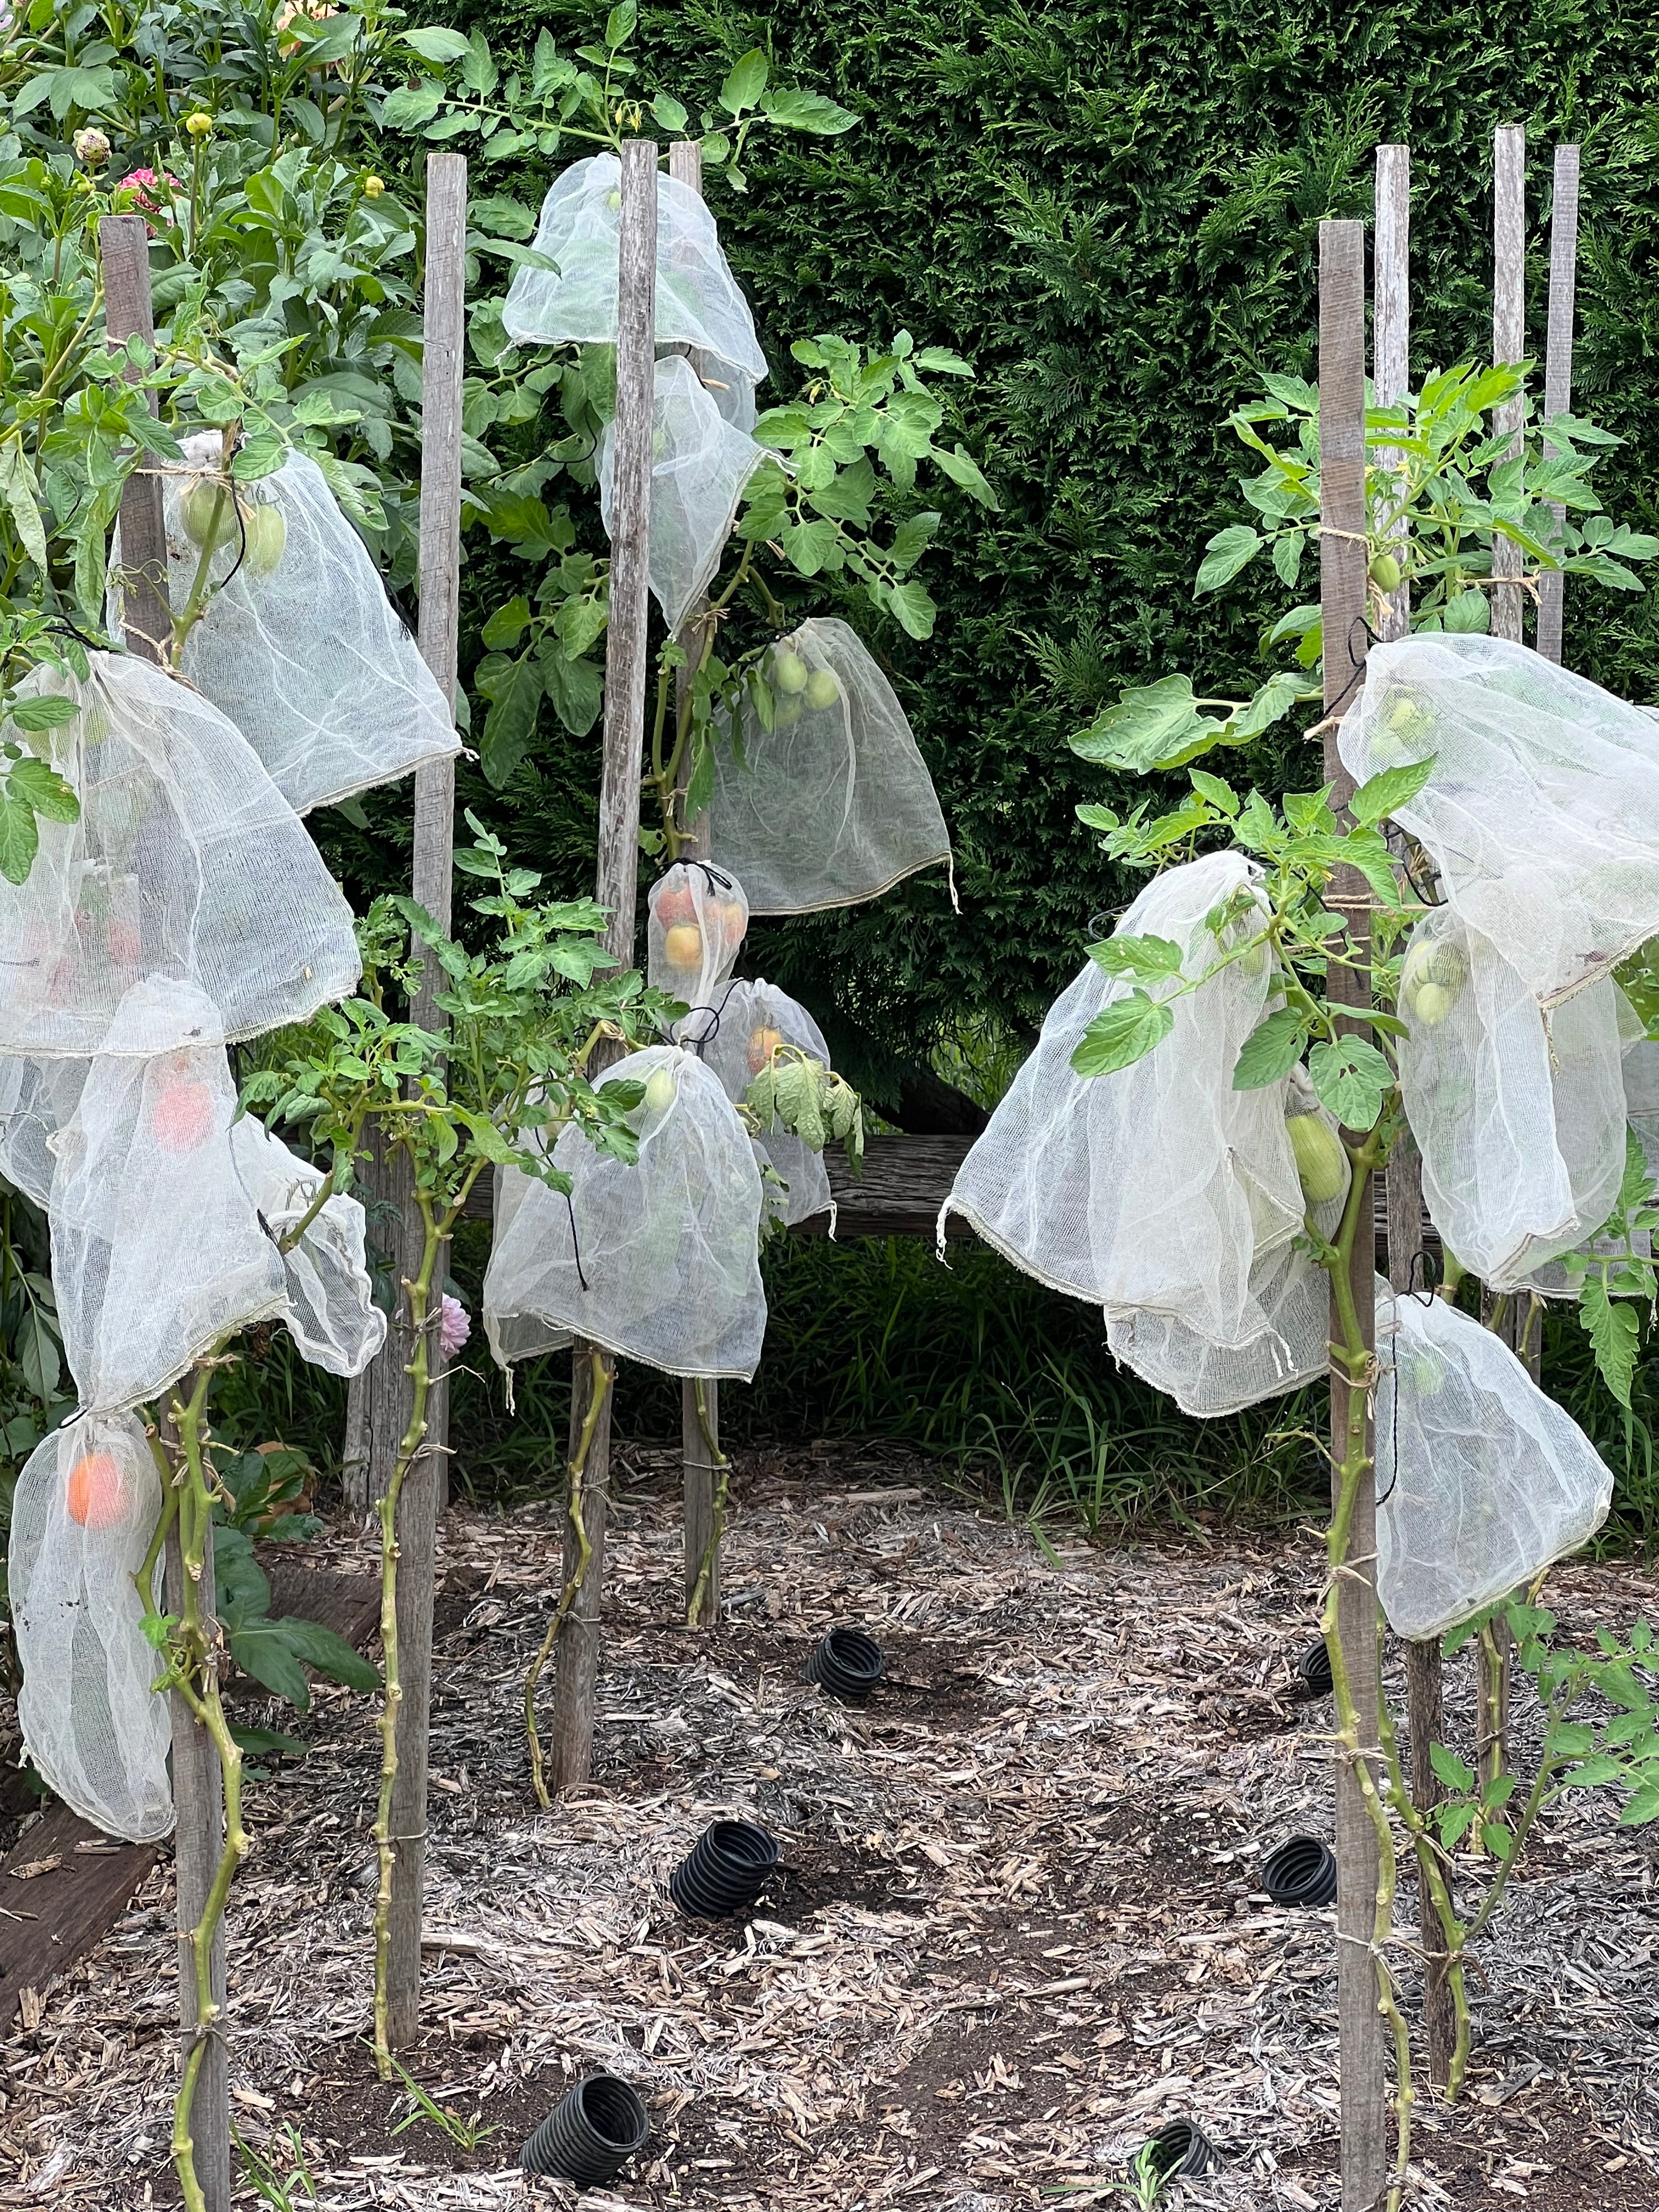
Each tomato, or cluster, depending on the variety, has its own bag. This helps to protect them from fruit fly and also pesky birds. It’s a nuisance, to say the least, but without them, we’d have no tomatoes. When I began doing this years ago I first thought how ugly the bags were…then, one day, when they caught the light just so…I decided they reminded me of the chorus line-up in Swan Lake! So there we have it!
Whilst looking at this particular image though…it makes sense to tell you something of the watering method I use here. Can you see that each plant has a corresponding section of ag-pipe dug into the ground at its base? I bury the ag-pipes (just about 10cm below ground) at the same time as planting the seedlings, and each day I water down the pipe. This ensures the tomatoes receive the same amount of water each day and also, that their foliage doesn’t get wet…cutting down on likely fungal disease that is the result of leaf watering. (I also only ever water in the morning…never the evening). Ensuring the tomatoes receive a similar amount of water each day prevents blossom end rot…that ugly thing that happens when you get a bruise at the tip of the tomato that continues towards the stem at a rate of knots. Ever since using this method (thanks to Linda Ross who taught our early kitchen gardening days here, whose idea it was) I’ve never experienced that problem again.
These toms (above) are the ones I call my main crop…they’re planted in one of the beds down the back, where I also rotate each season. It’s an ‘overflow’ area and I’ll tell you more about it as we go on…but…for now…enough to say these are all Roma tomatoes and the ones I use to cook, rather than eat fresh. Those ones we eat fresh are growing in the main part of the garden.
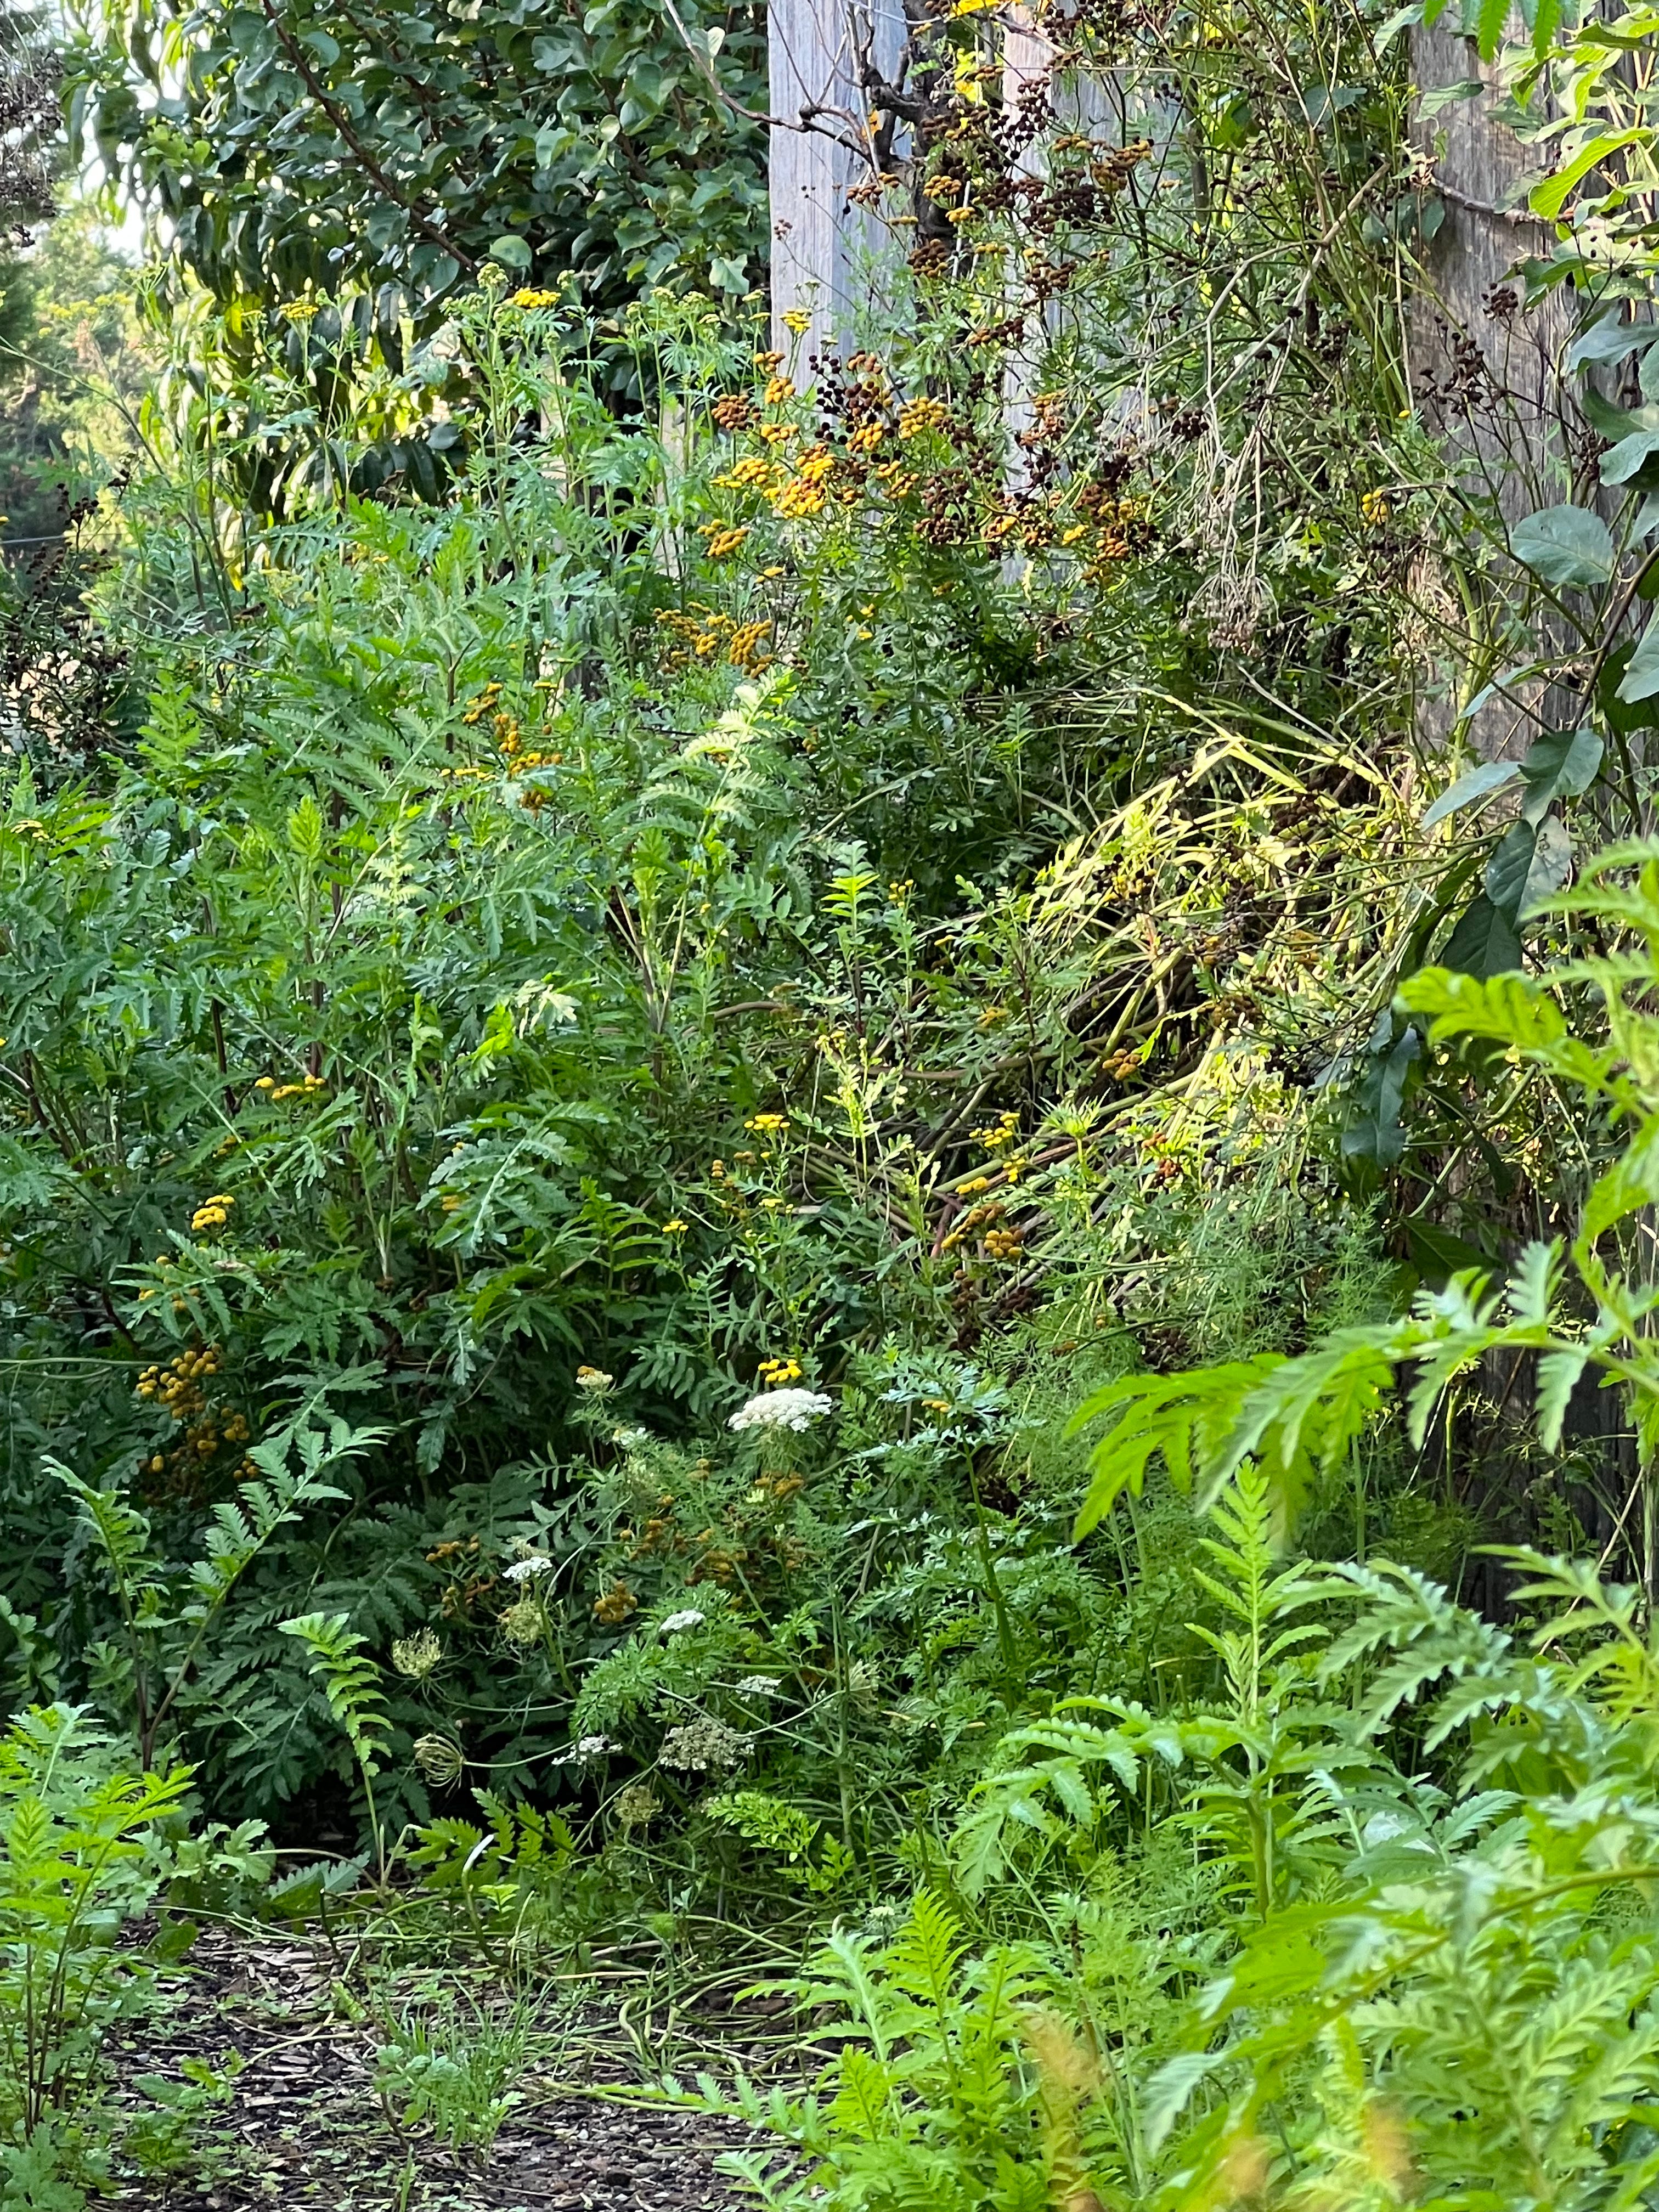
The Tansy has been running rampant around the garden paths (despite my first cut back that I told you about last week) and so this week was time for yet another chop. Oh but how I hate to lose this sense of (well…you might call it mess!) but to me it’s…divine abandon! I love it lolloping all over the place! It’s this very sense of weight that creates the late summer/early autumn atmosphere. But…if I cut it back now, there’s a good chance I’ll get a repeat flush. It won’t be quite so tall next time around, but we do need to get rid of mangey foliage which will be doing a disservice now…possibly harbouring pests.
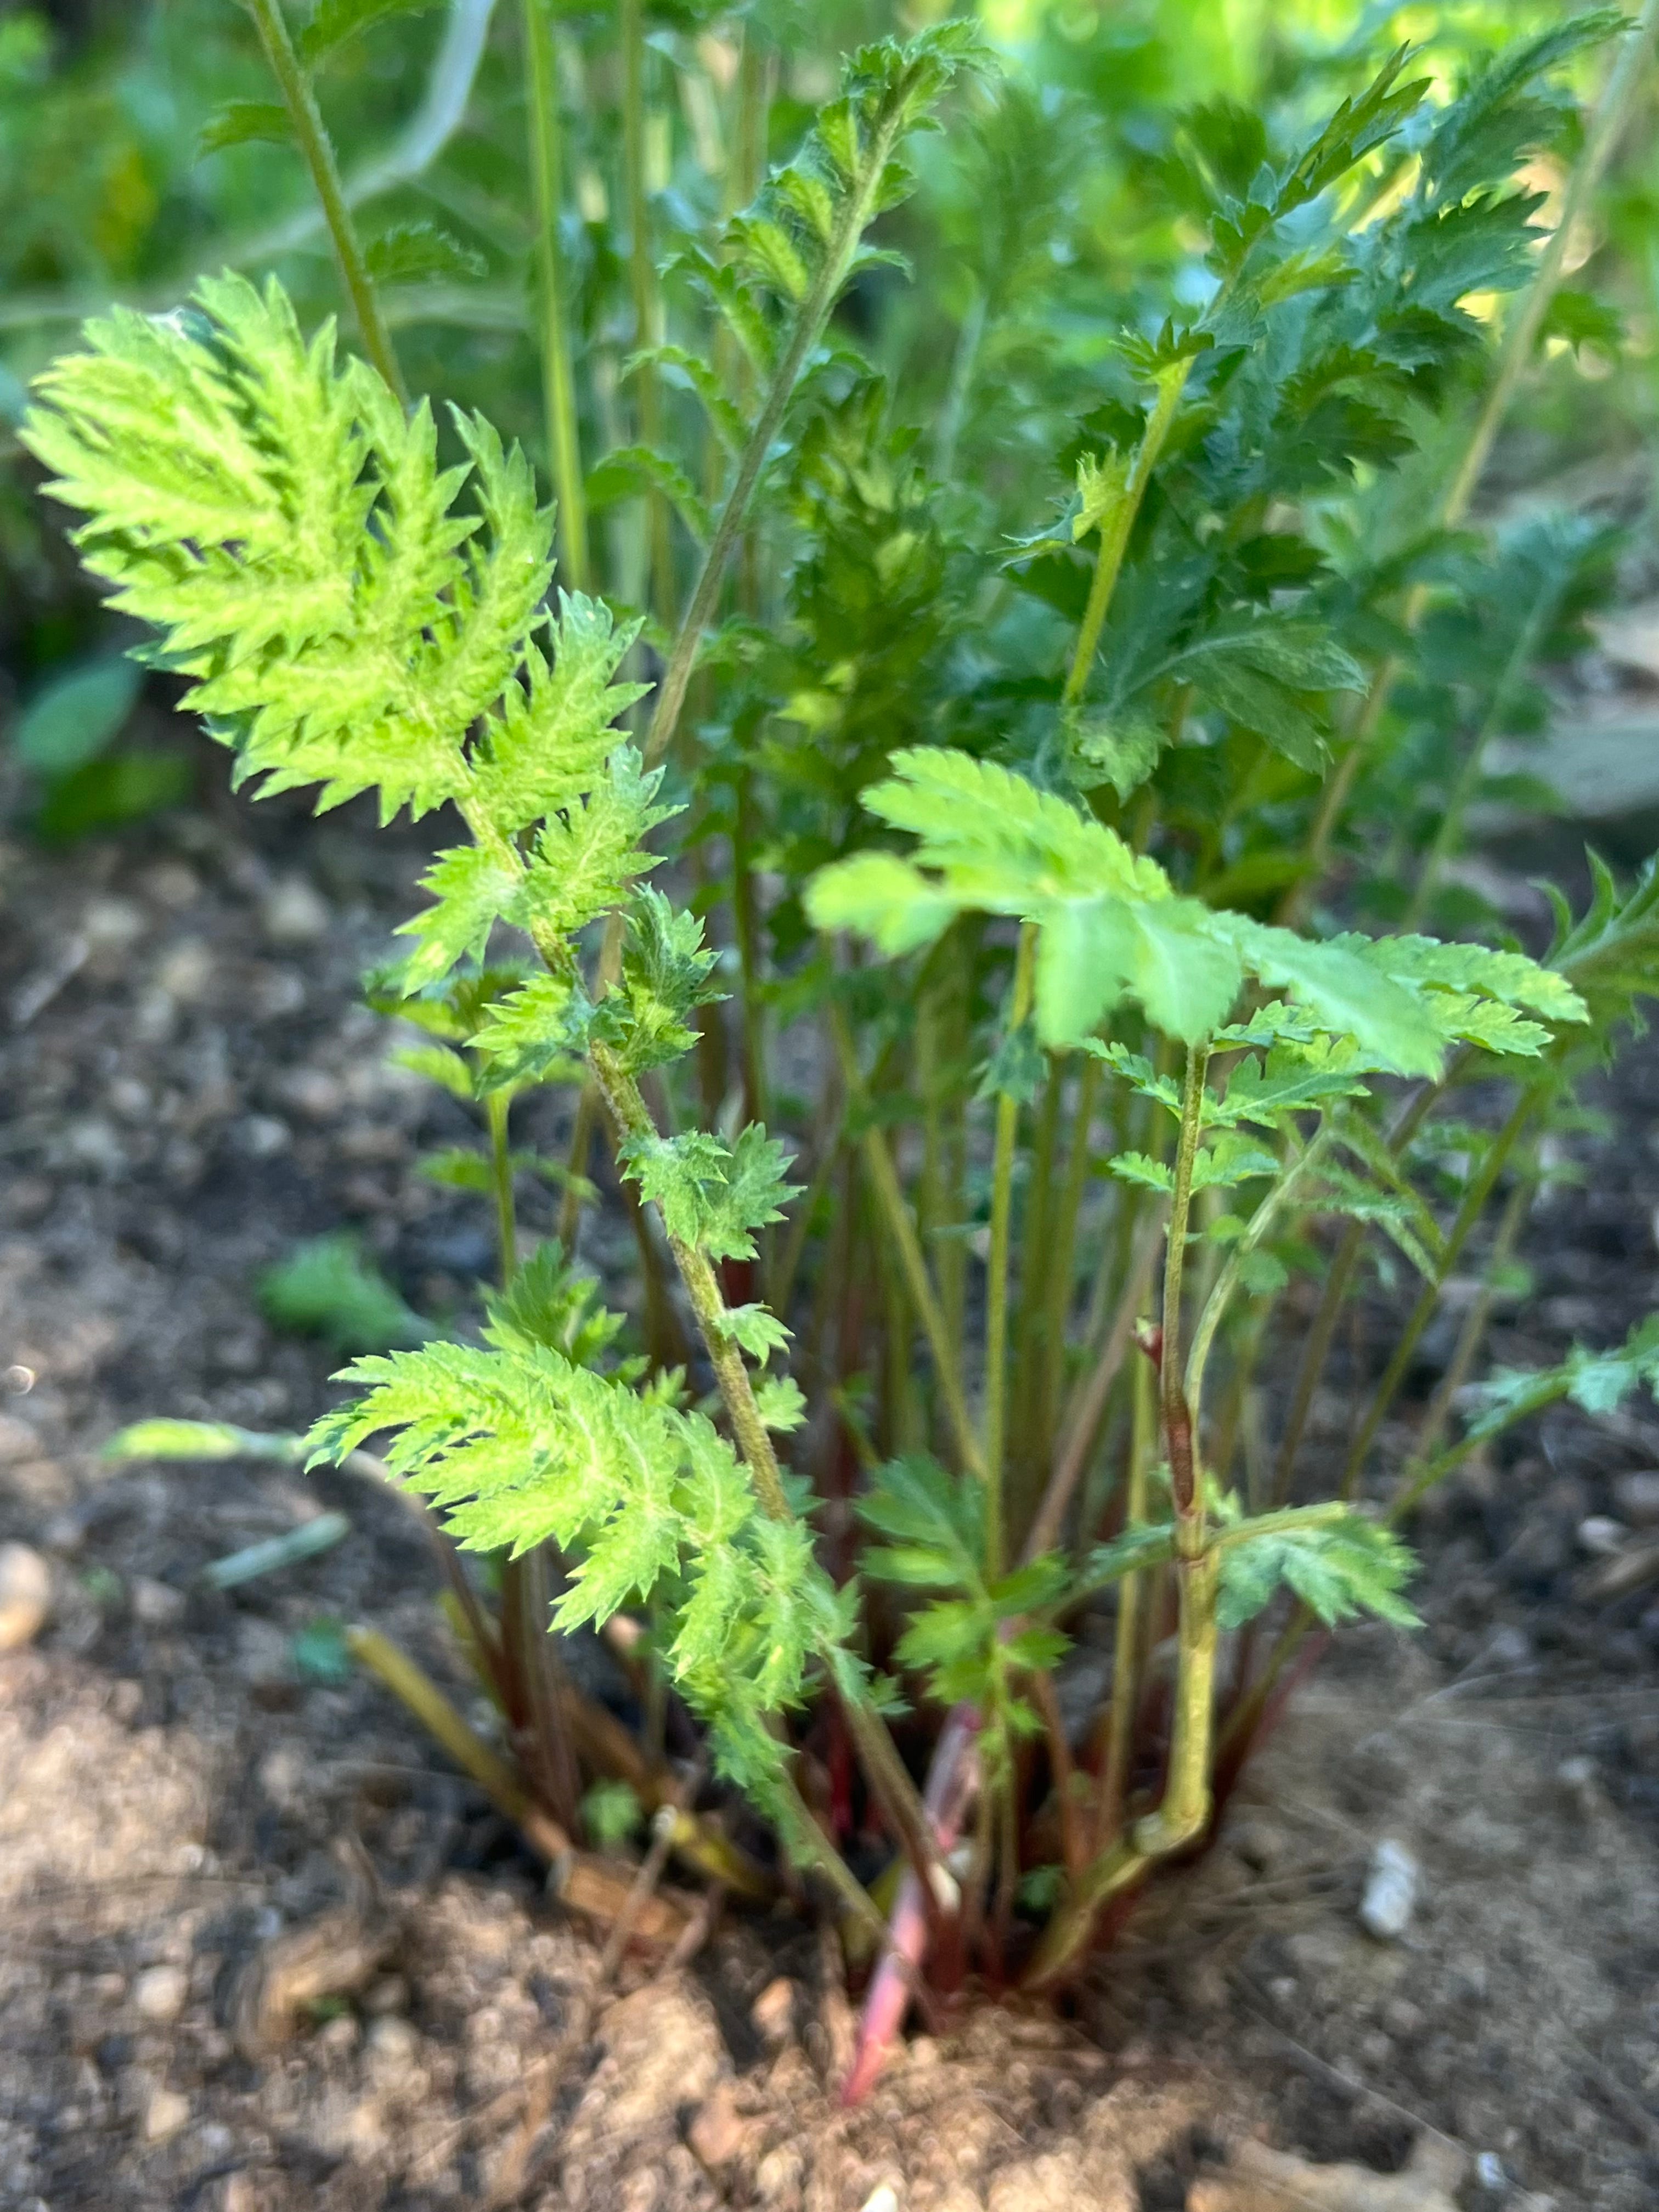
With each spent stem cut right to the base of each plant…there are now fresh plants all around. This week…I put this task on Thalia’s list and she’s really cleared the decks. I can’t tell you how often are the jobs I ask her to do that I wish was me doing it! Especially this one!
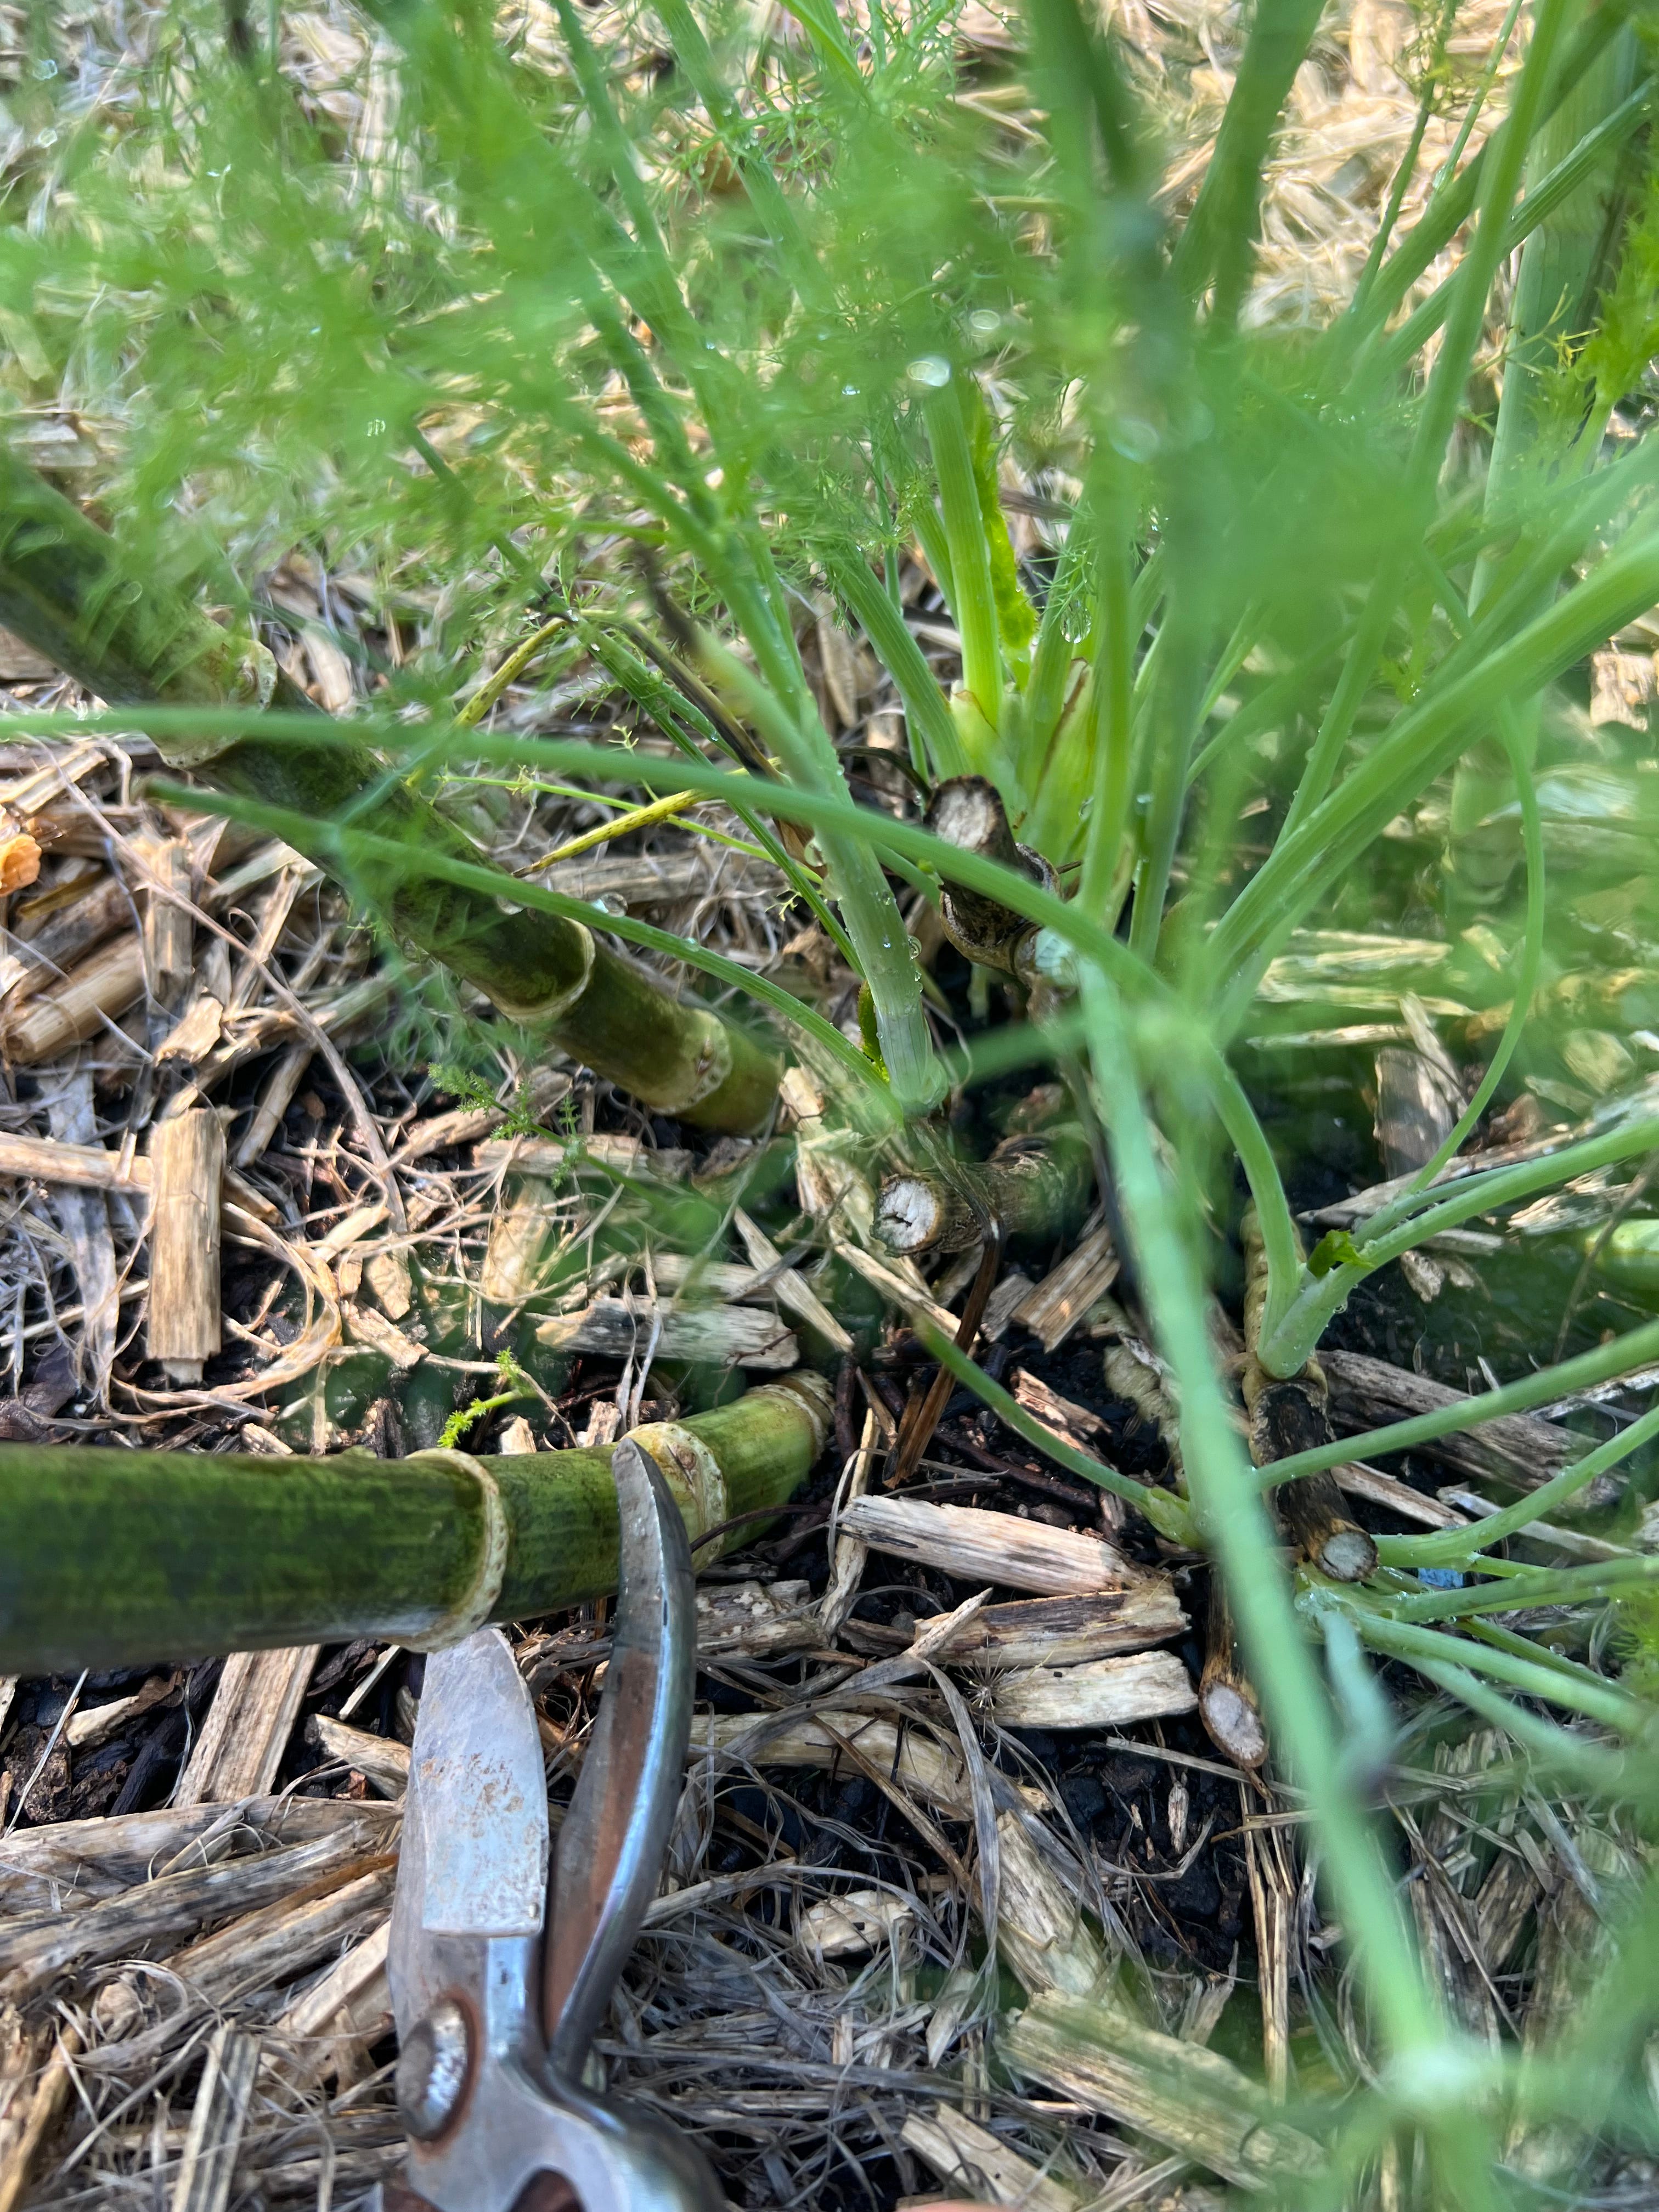
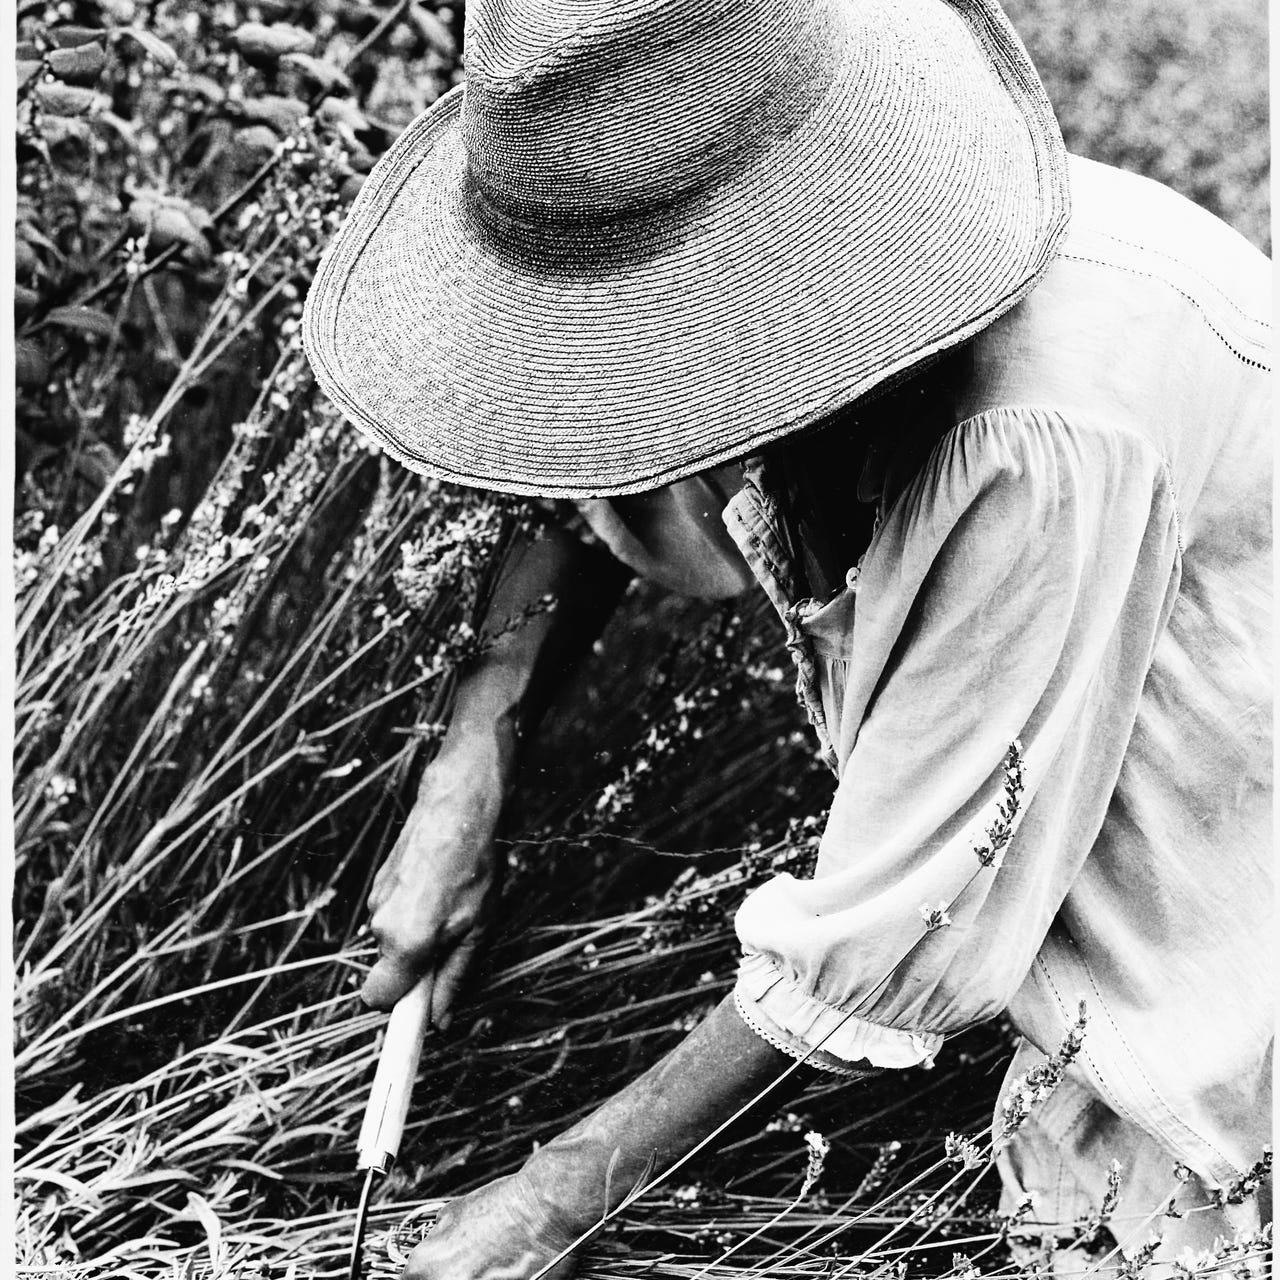
In a similar vein…here I am going in to cut out a spent flowering stem of fennel. It’s time to encourage a froth of new foliage on these old fennel plants too…to ensure that’s where the energy of the plant is directed…as I want to get fennel frond pistou into our autumn dishes! The fennel I use as companion planting has been growing around the edge of the kitchen garden for years. I keep it going by doing exactly this. The odd plant may die back completely if it’s very old, but there’s plenty of seed falling to replace any one that leaves this earth! The next challenge, is to stop the rabbits from eating the new stems that emerge…they love it! I’ll hazard a guess that if I could catch those rabbits that live in the kitchen garden and we were to eat them…their flesh would be fennel scented through and through!
I have so much more to tell you but…I’m guessing some of it will keep ‘til next week (and that message about the post being too long started flashing at me a good six images back!).
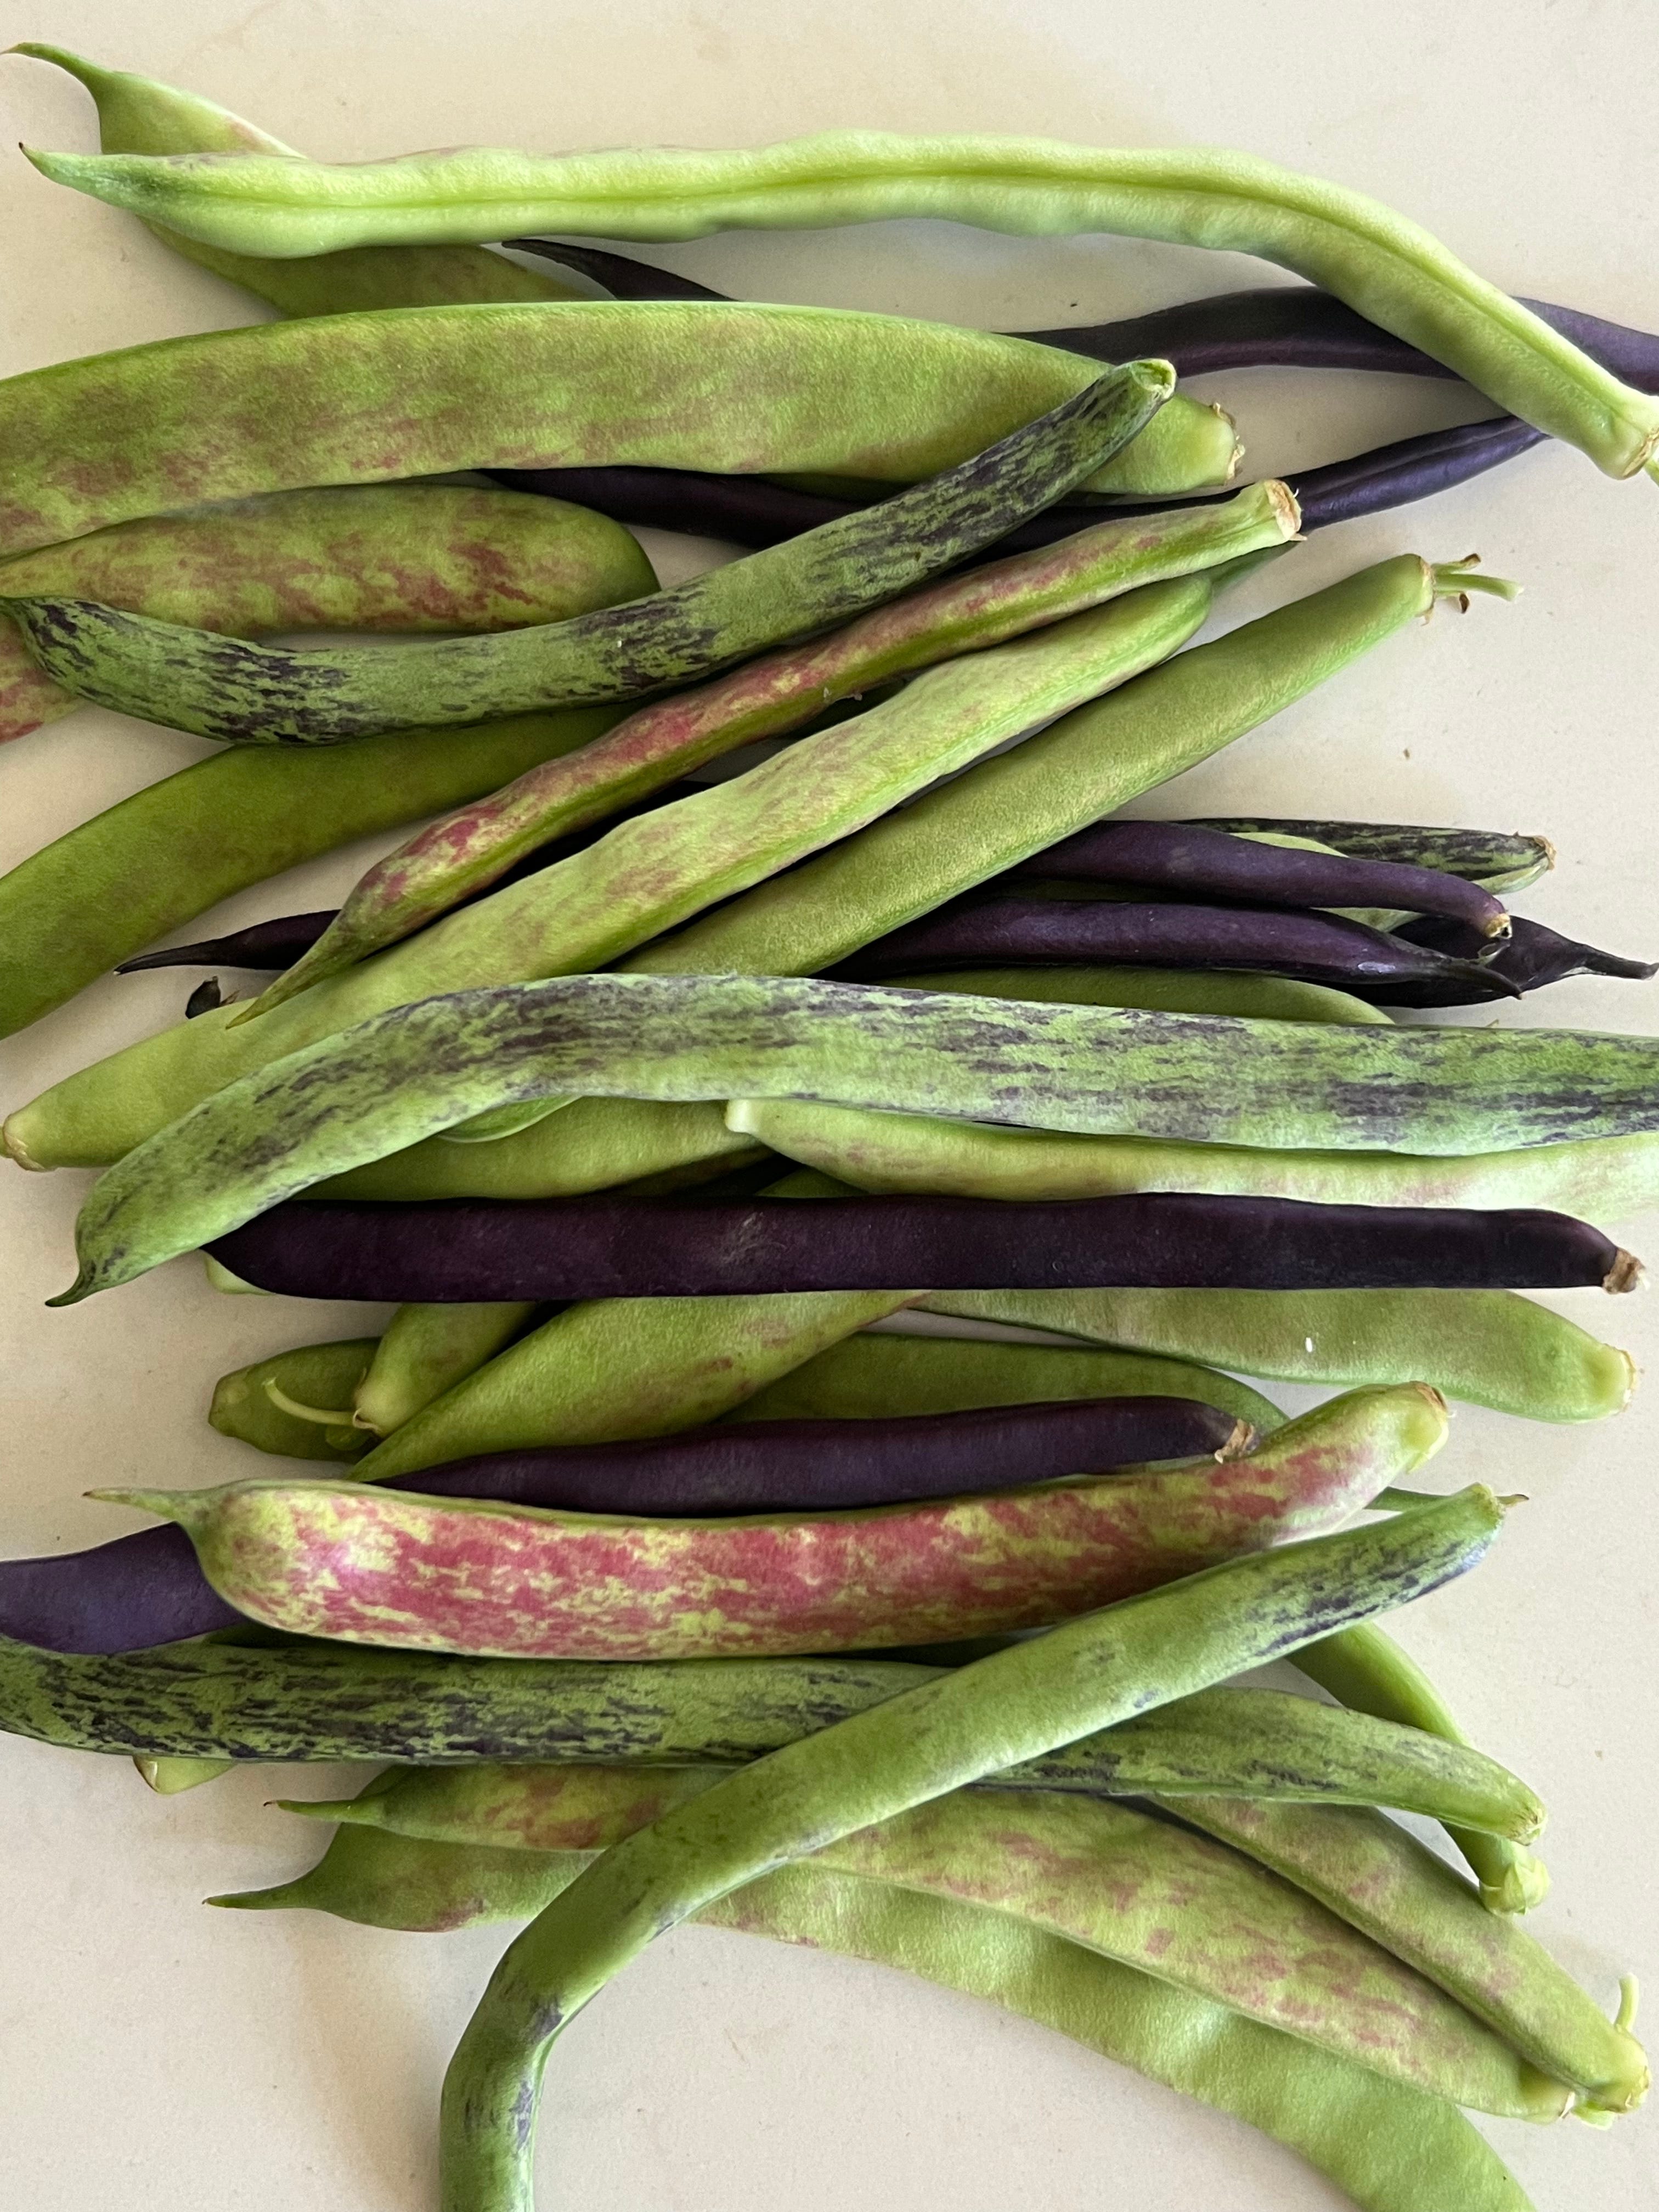
I love how colours cross-pollinate across the garden, from pocket to pocket…a true representation of this moment in time.

And on that note, I’ll leave you. I hope your world too, is abundant…don’t cut it back too quickly…it’s like going barefoot on the grass for as long as possible!
Thank you for following along this path so far. There’s much swirling around in my head that is not gardening…but whilst the garden is rampant and rotation is on, it’s in the garden my main focus must be.
Have a wonderful week!
Mickeyx
Sunday Kitchen @sundaykitchenau Bronte House @the_gardenersgarden The House and Garden at Glenmore e-book
I hear you re your dry and dusty garden India...'tis where we thought we'd be too 'til that storm...and then another...and the whole season flipped. We're counting our lucky stars...this time around. I've found you a night scented Jessamine...try Mudbrick Herb Cottage! They're in SE Qld and are a good source for mail order (although I know SA is strict with what's allowed to come in). But...how I would love for you to have her as a memento of New Orleans...what a heady combination that must have been!
Oh my goodness this quince recipe looks divine. Am going to definitely bookmark that one xo